I came across a scenario in Sitecore Forms where I needed to build a hidden field. The form is intended for employees, and when they access it, it should automatically recognize them and capture their name and email address upon submission.
Let’s get started.
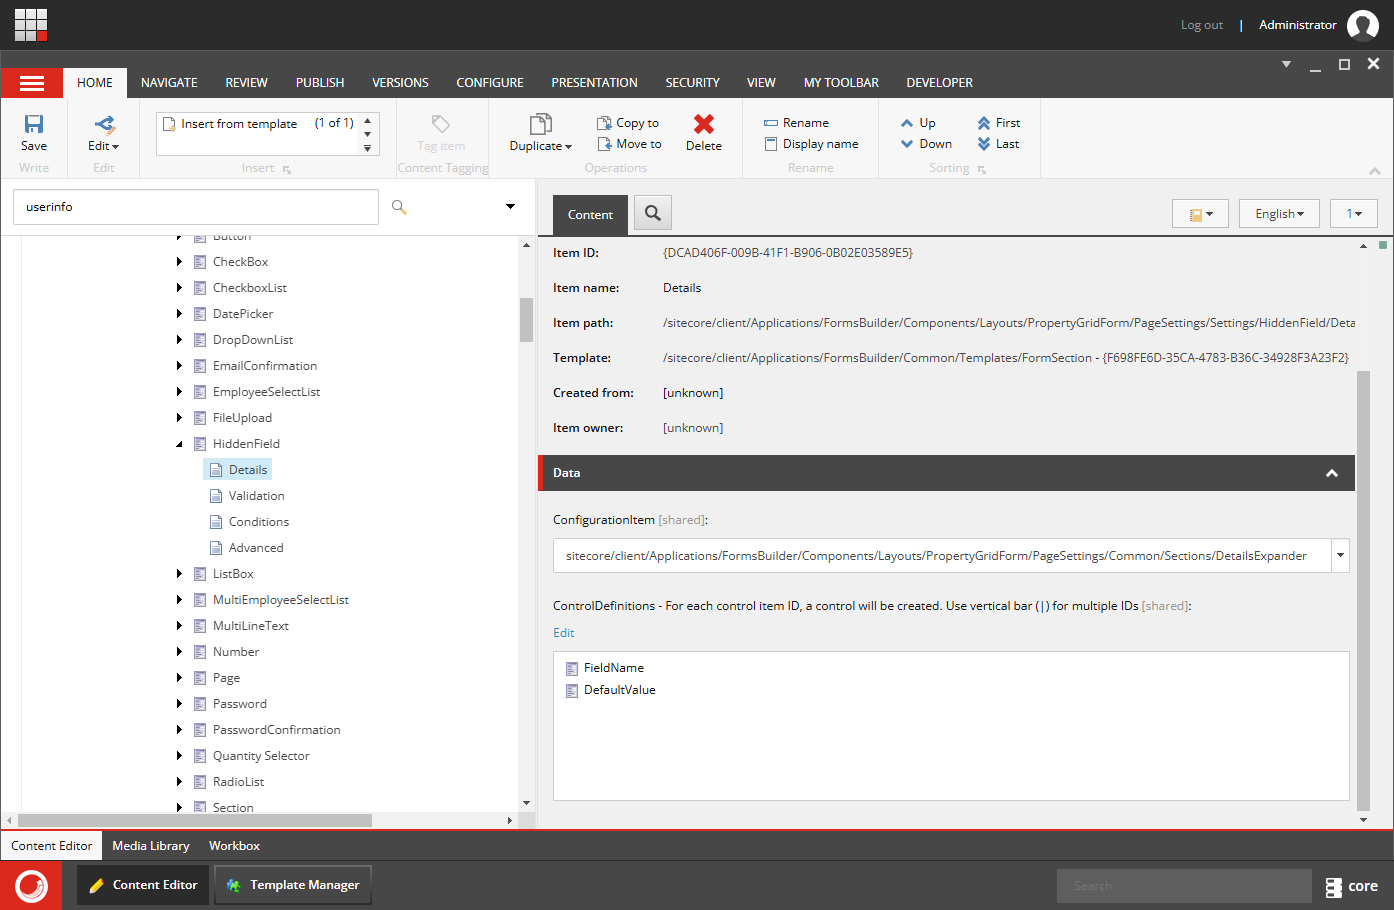
Create the Hidden Field in Core DB
Navigate to /sitecore/client/Applications/FormsBuilder/Components/Layouts/PropertyGridForm/PageSettings/Settings
Create the HiddenField based on /sitecore/client/Business Component Library/version 2/Layouts/Renderings/Forms/Form/Form Parameters
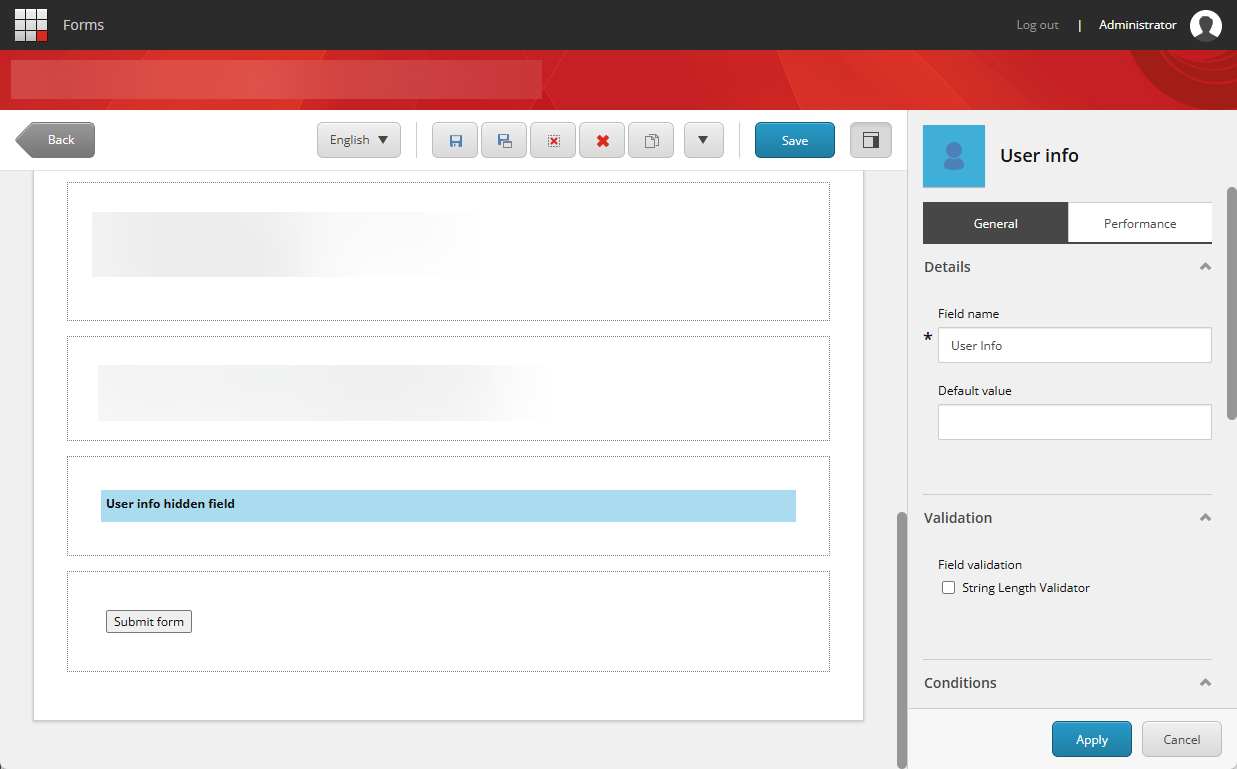
Fill out the following fields –
Details
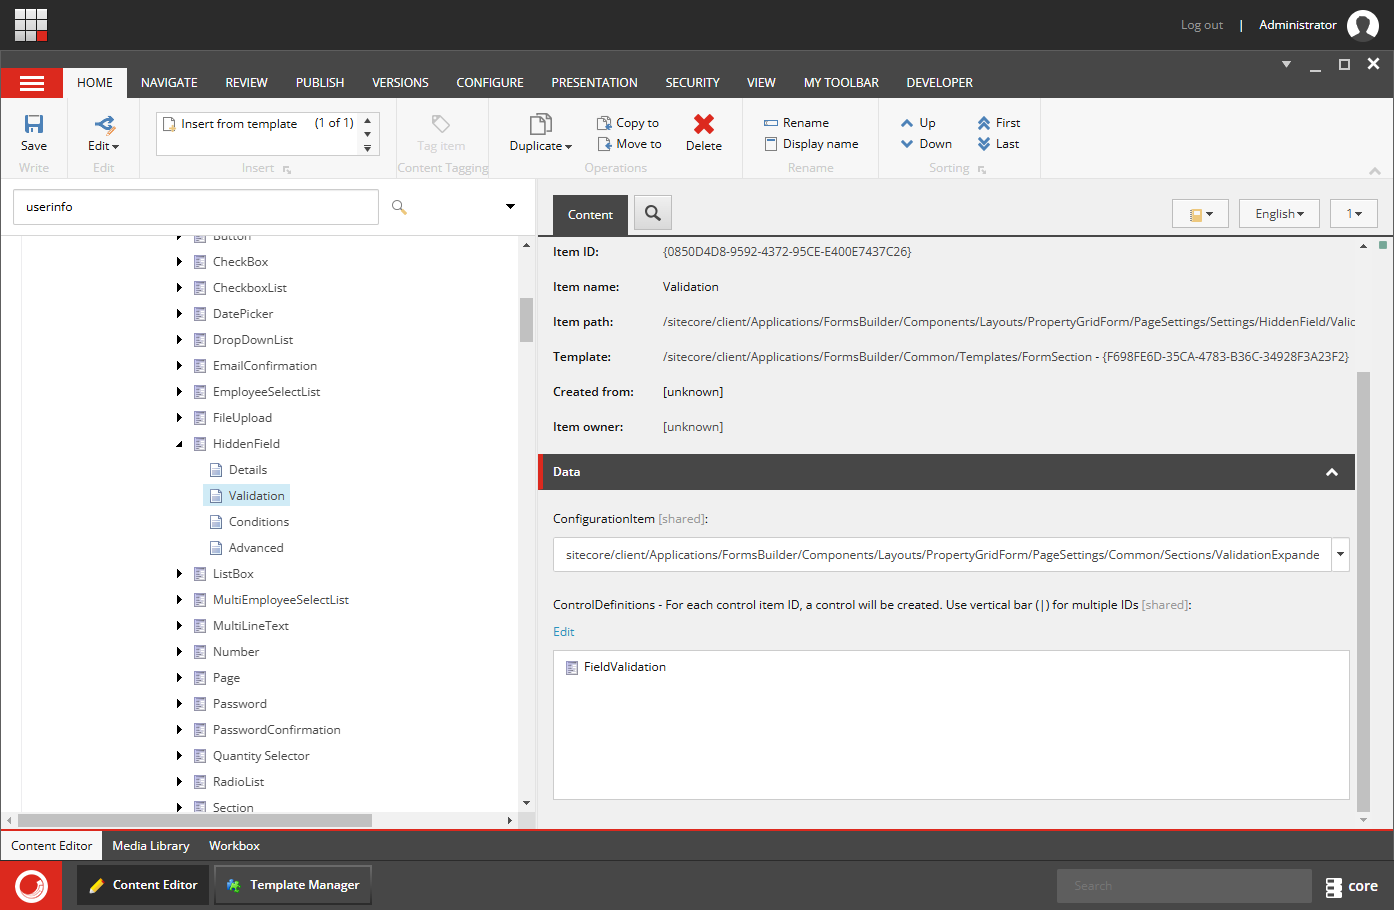
Validation
Conditions
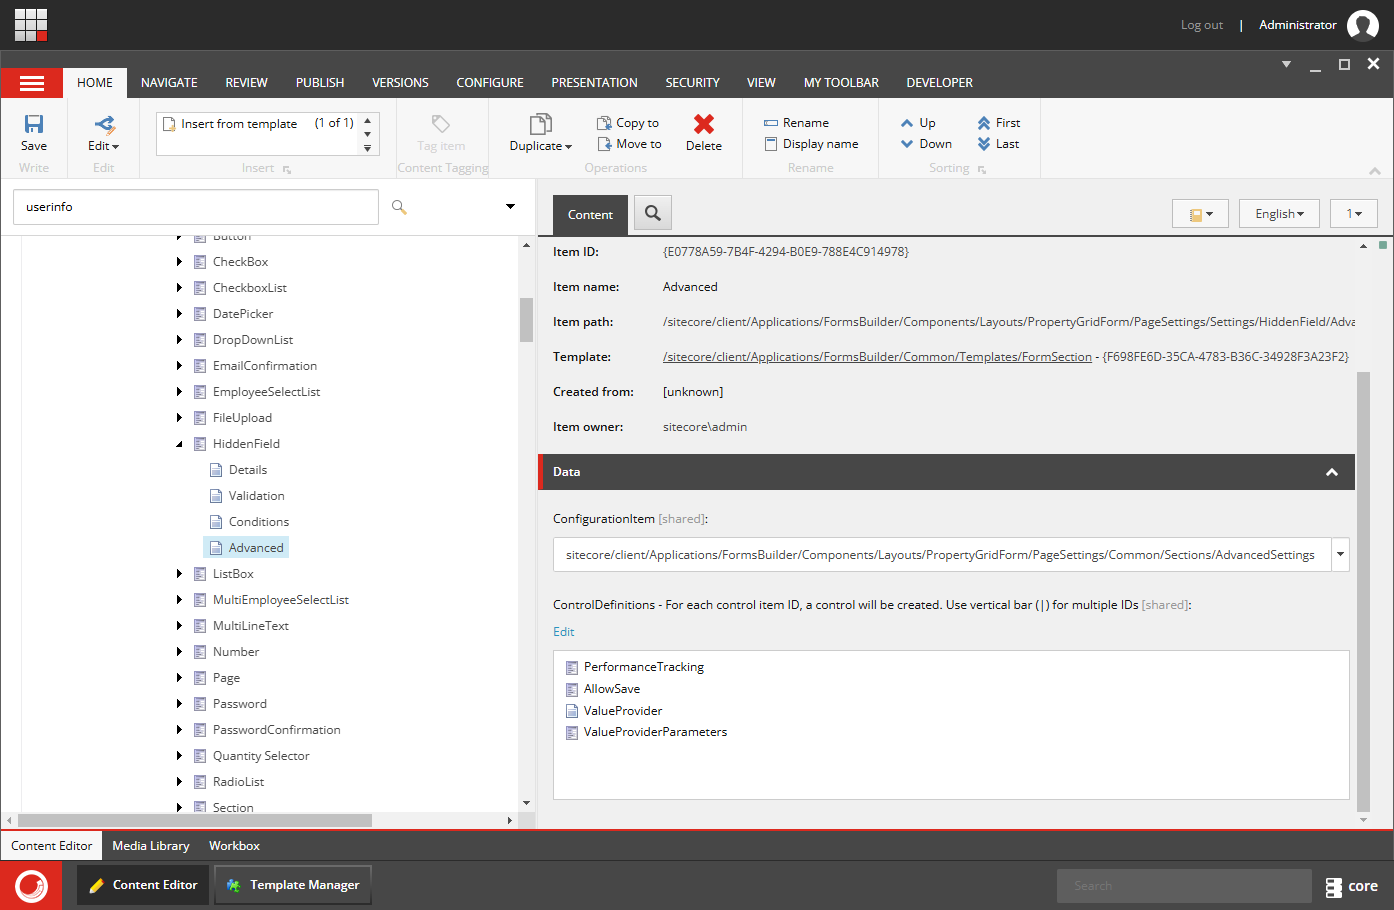
Advanced
Create a Custom Field Type
Inherit from the StringInputViewModel class to create a new view model for your hidden field.
Create the View for the Field
Define the HTML and JavaScript needed to render the hidden field and set its value.
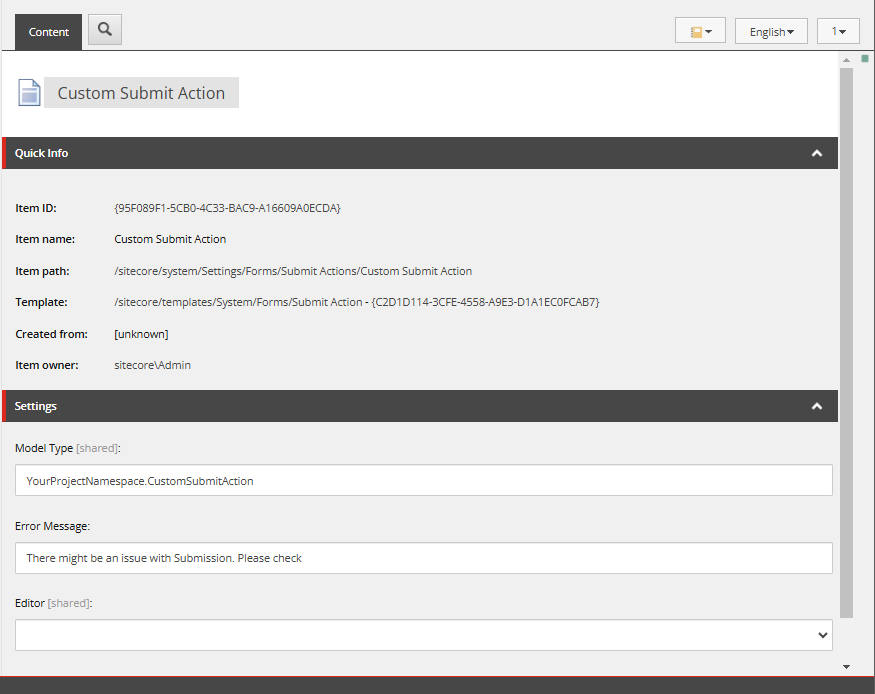
Custom Submit Action
Let’s create a custom submit action and read the properties from formSubmitContext.
Let’s bind it to the Form’s Submit Action.
Now I’m able to drag and drop the hidden field into the Form.
Make sure to publish the Form and its related items.
The year 2025 has been great, featuring presentations at various Sitecore User Groups around the world and meaningful interactions with numerous members of the Sitecore community.
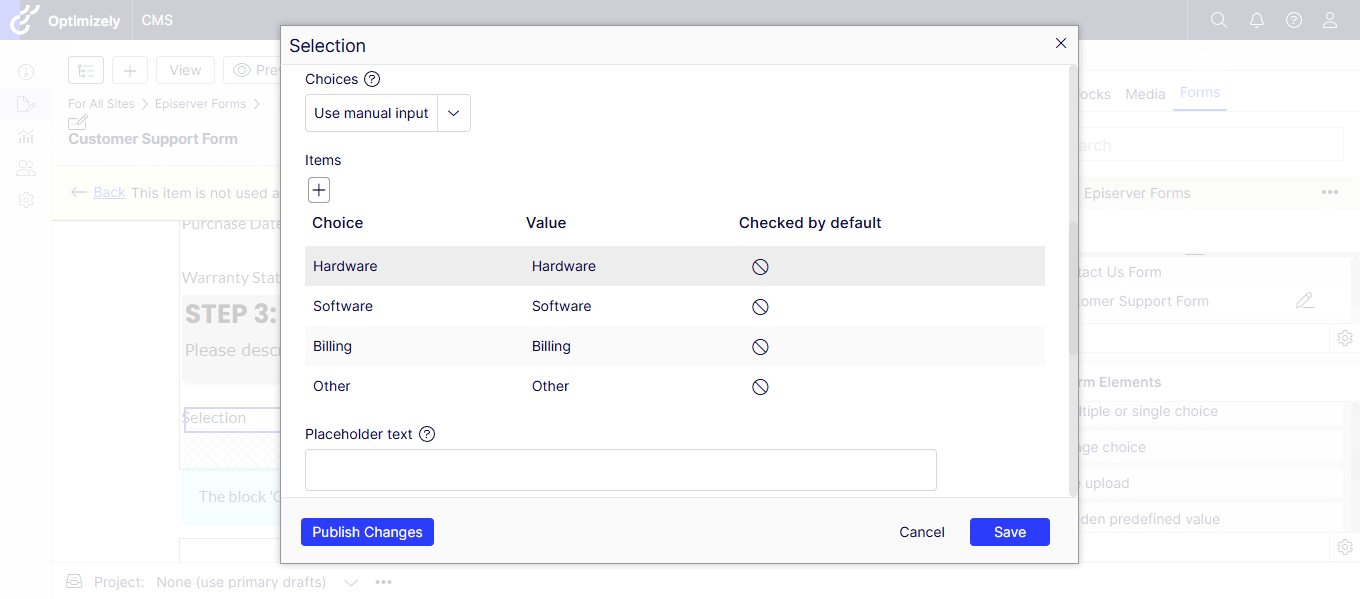
I came across a scenario where I needed to exclude the default value for dropdowns in Sitecore Forms. By default, dropdown fields in Sitecore Forms often preselect the first option, which might be a placeholder like “Select an option.”
If users submit the form without changing this value, it can lead to unreliable data. Custom validation helps enforce user interaction, ensuring the selection is meaningful.
Steps to Implement Custom Validation in Sitecore Forms
Step 1: Create a Custom Validator
Navigate to your Sitecore solution and open the project where Sitecore Forms is configured.
Create a new class that extends FormConditionalValidatorand override the validation logic.
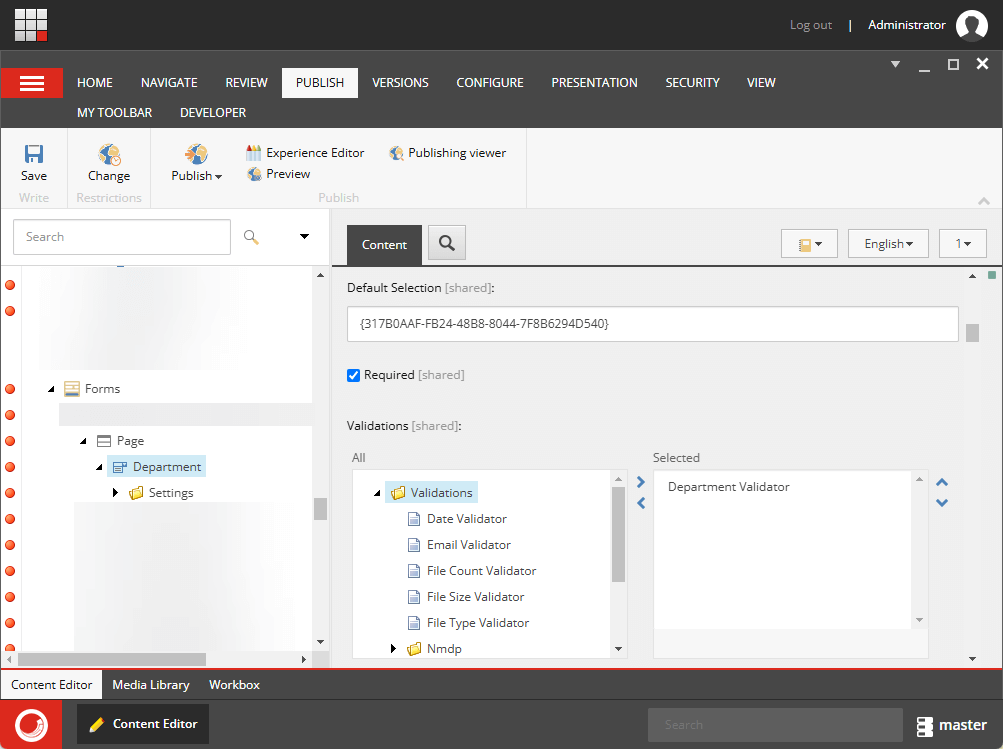
Step 2: Register the Validator in Sitecore
Open Sitecore Content Editor and navigate to: /sitecore/system/Settings/Forms/Validation
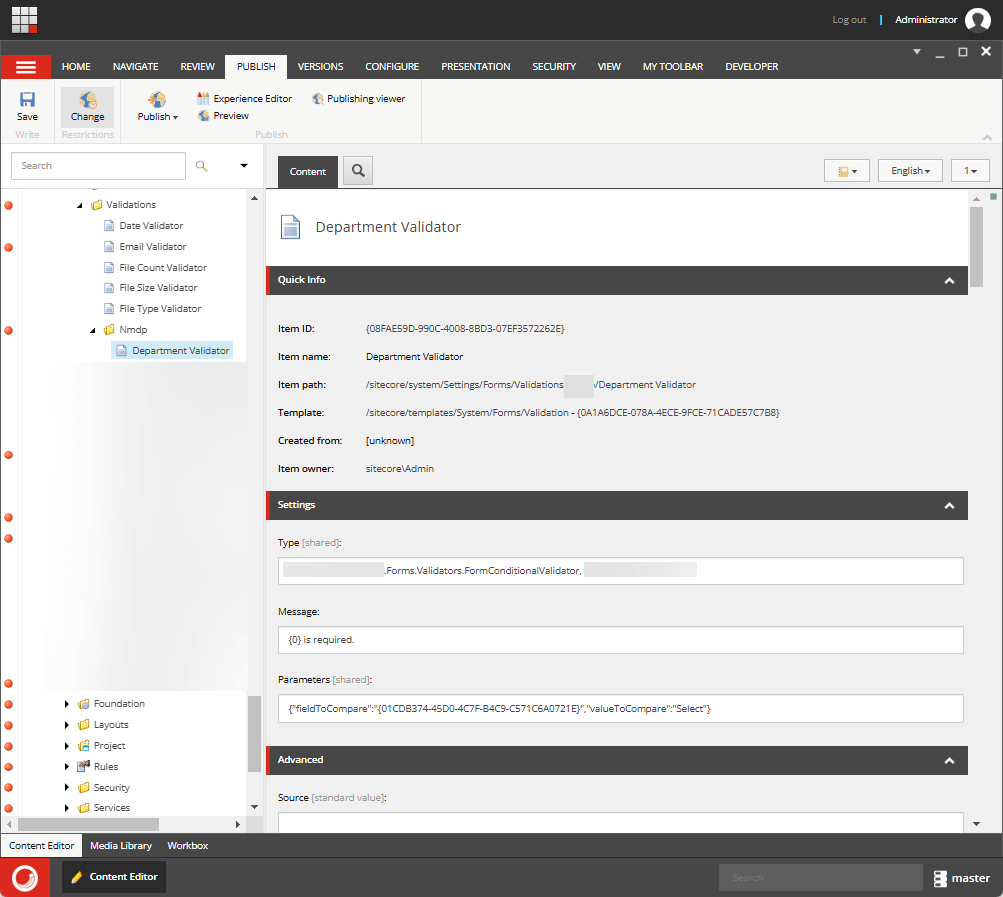
Create a new validation item:
Name: Department Validator (Change it according to Project needs)
Type: Reference the class you created, e.g., Custom.Validators.DropdownDefaultValueValidator, CustomAssembly
I have exploring Optimizely Forms recently – Installed NuGet package to enable Optimizely Forms, created a Contact Us Form and placed in a landing page. Sharing my learning from installation to submission.
Let’s get started.
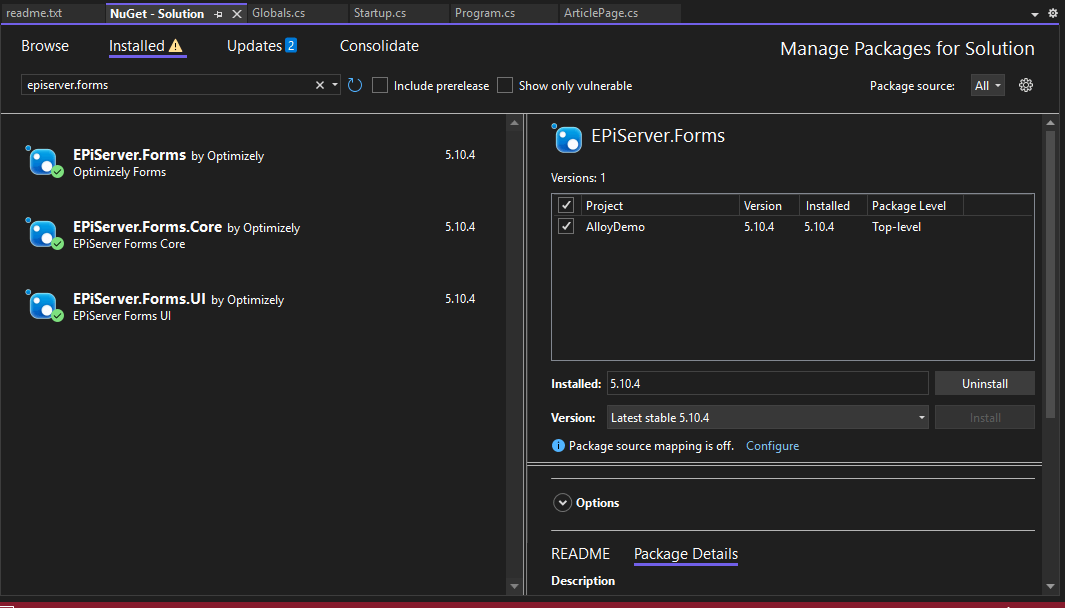
To enable Optimizely Forms, we need to install NuGet package for Forms – It can be installed via NuGet Console or Manager. I prefer GUI since it’s more visual.
EpiServer.Forms
EpiServer.Forms.Core
EpiServer.Forms.UI
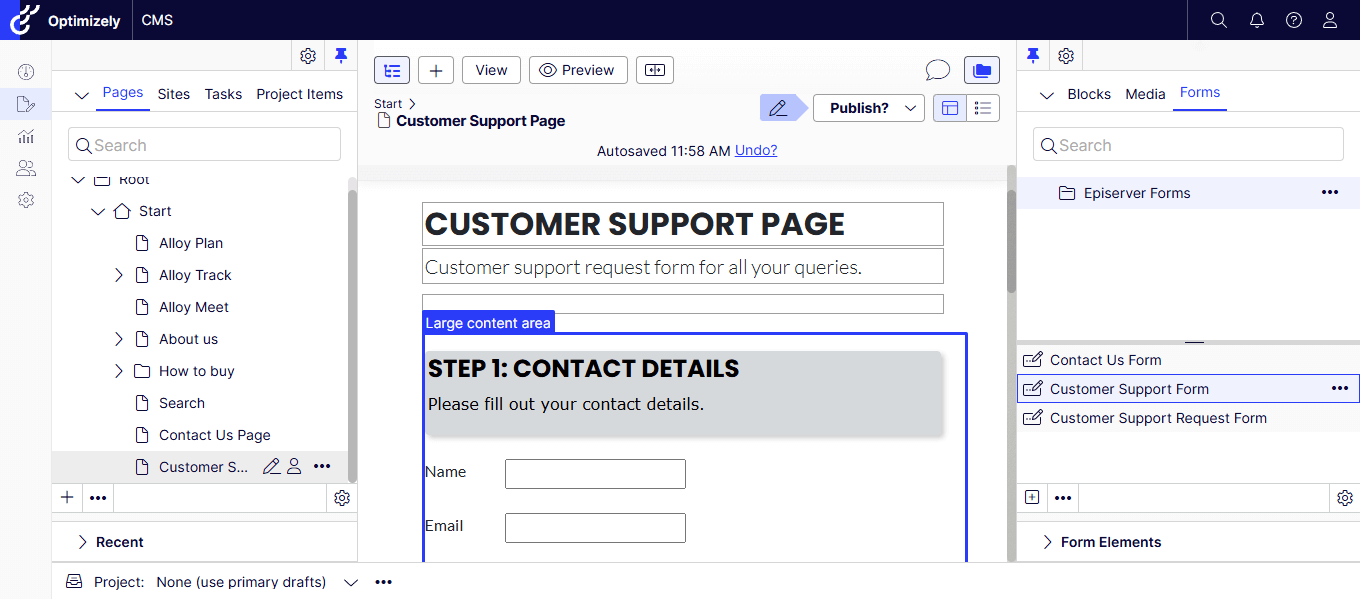
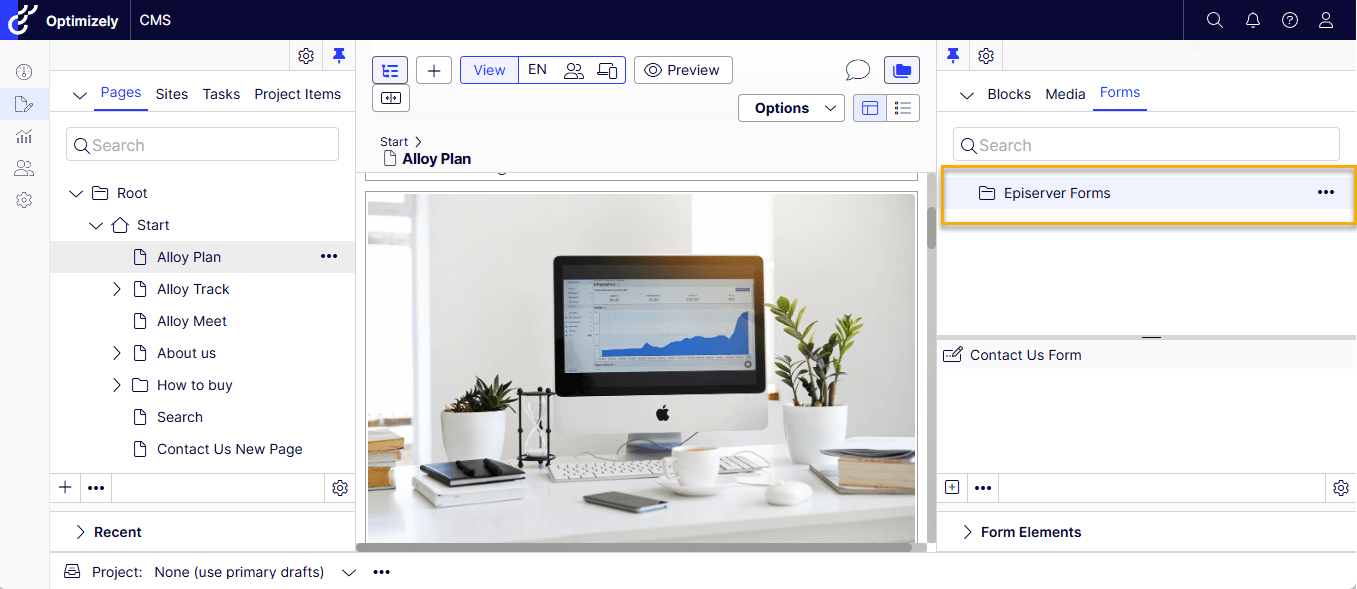
Let’s run the project – localhost:5000 now will have a new tab Forms besides Blocks and Media.
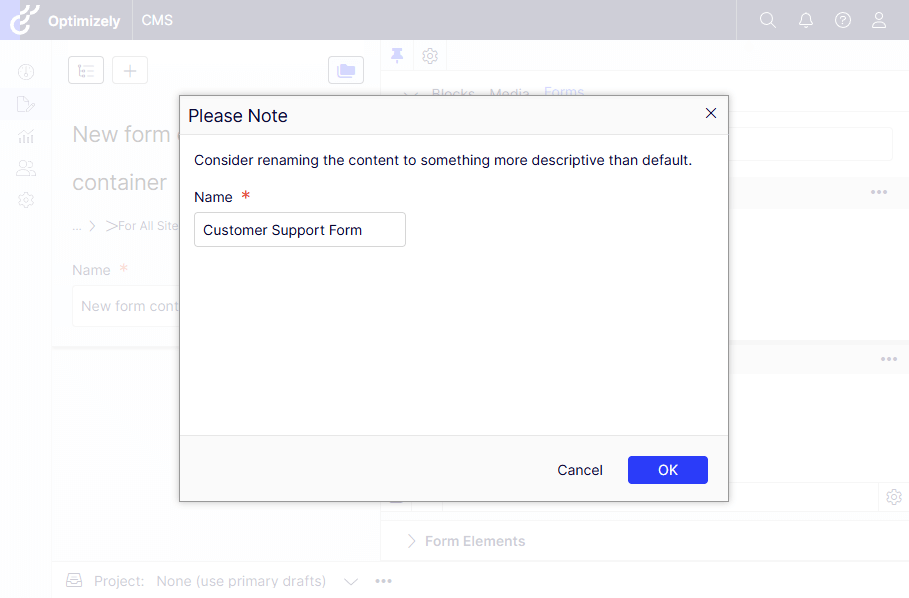
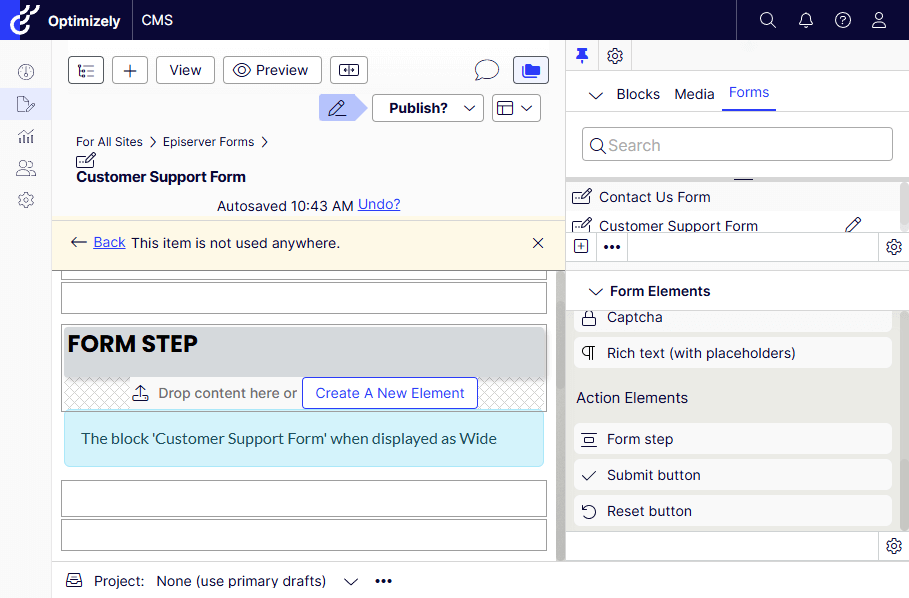
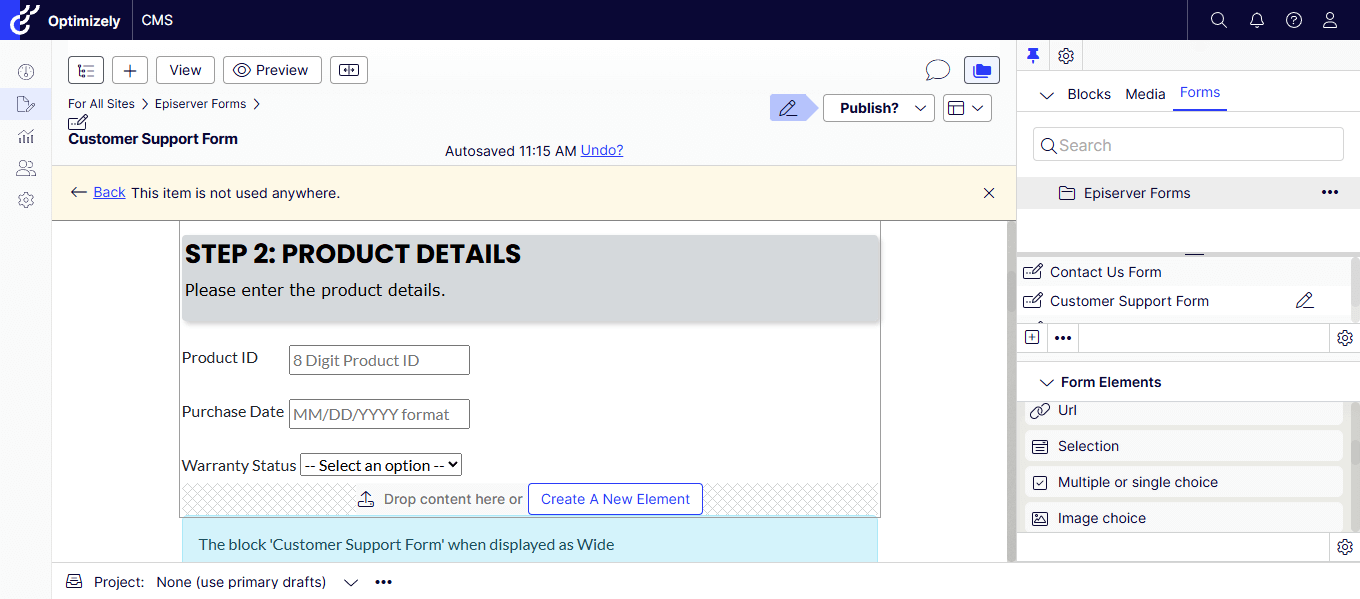
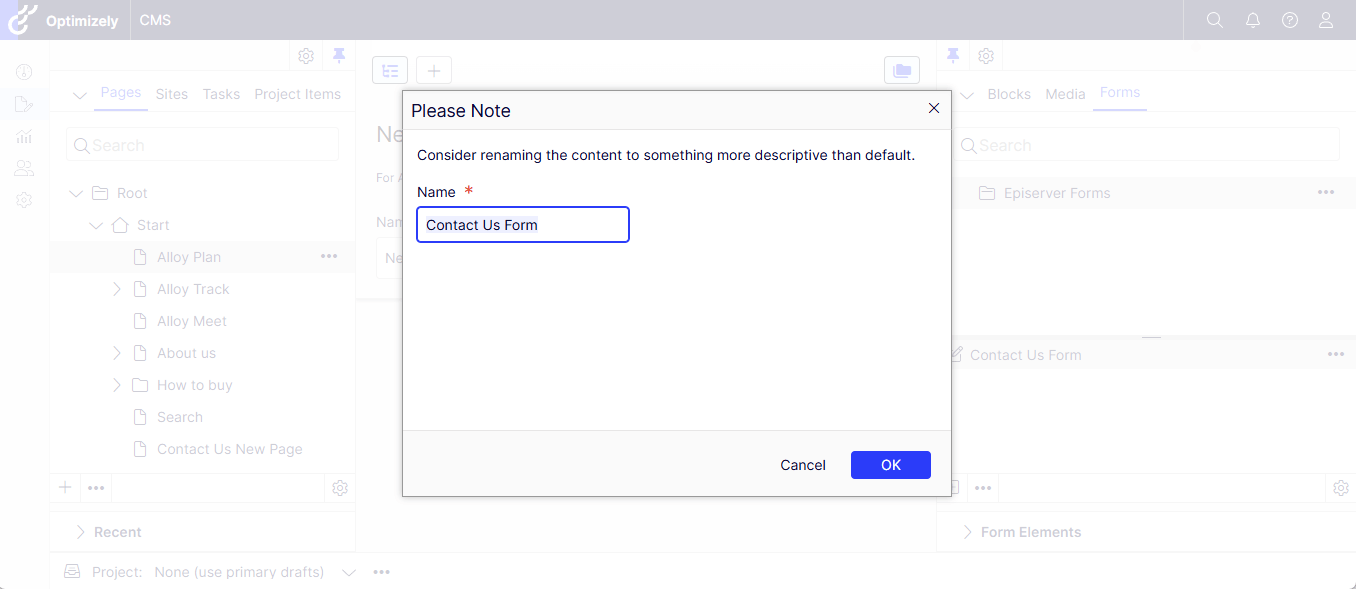
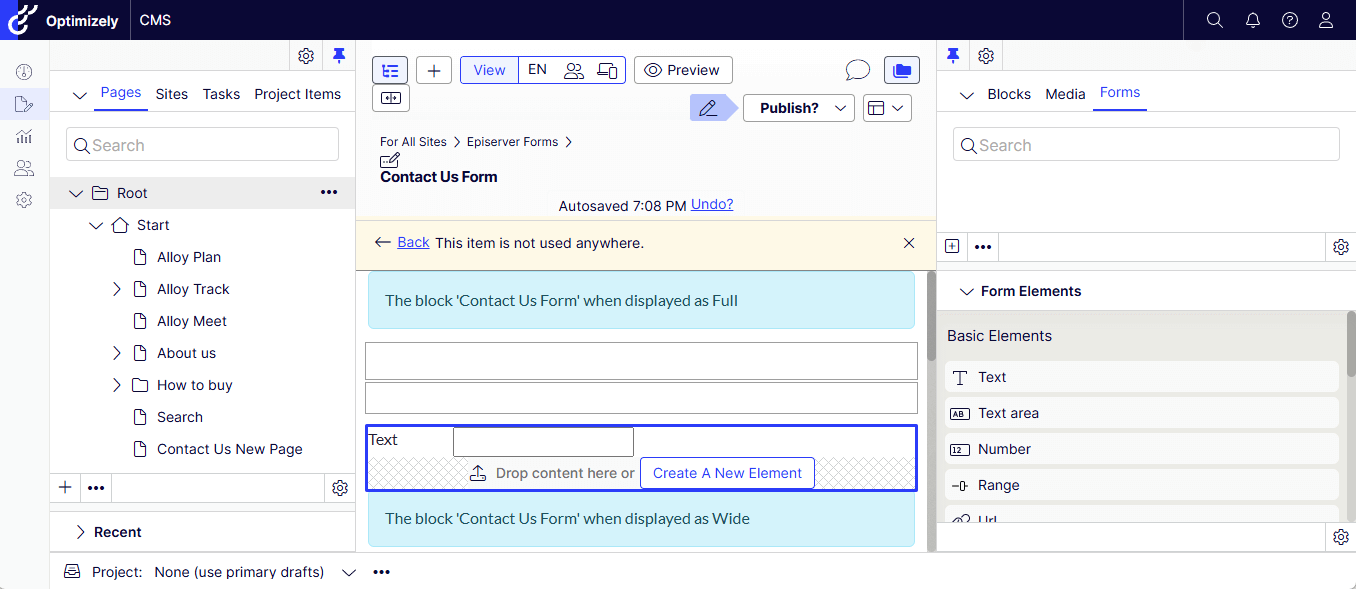
Create a New Form by right clicking on EpiServer Forms – named it as Contact Us Form.
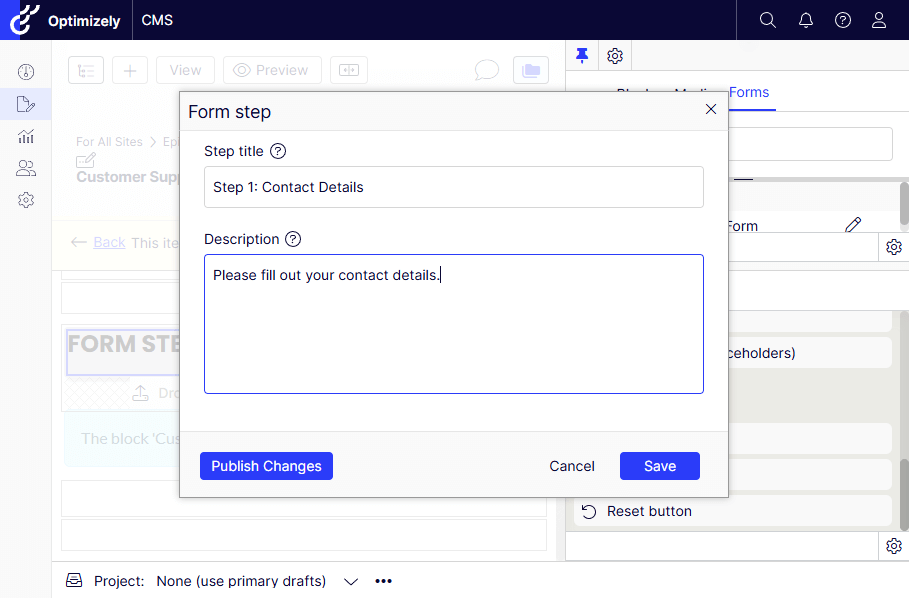
Let’s add the fields by drag and dropping into the Content Area.
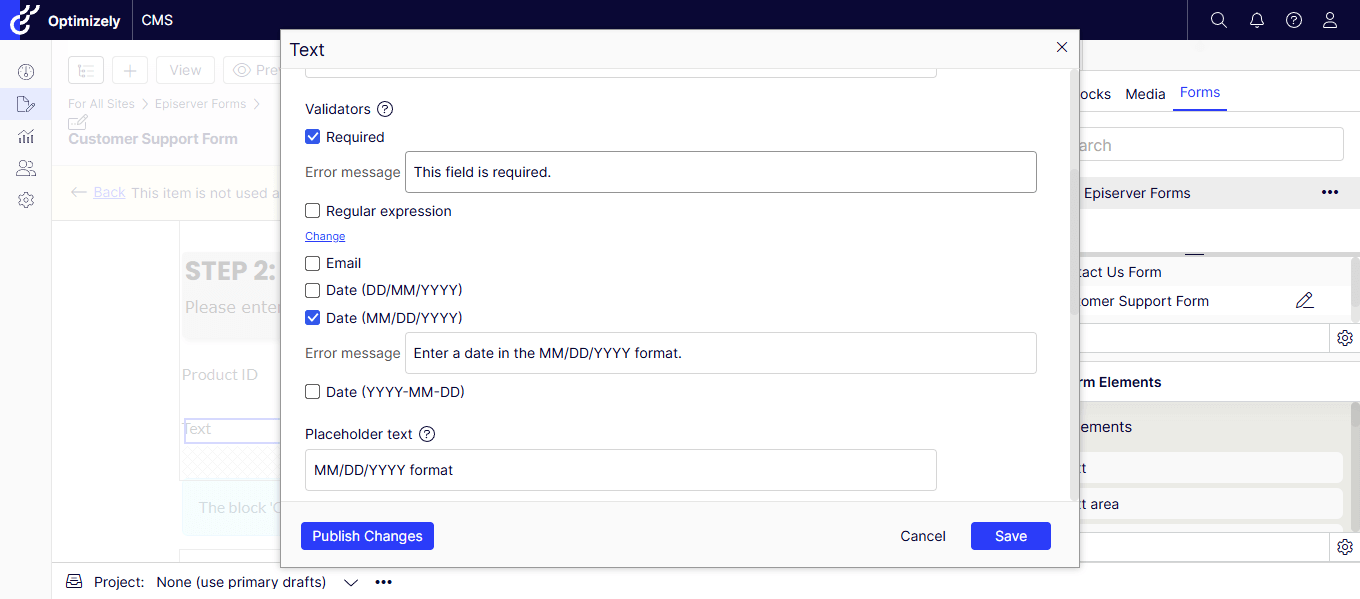
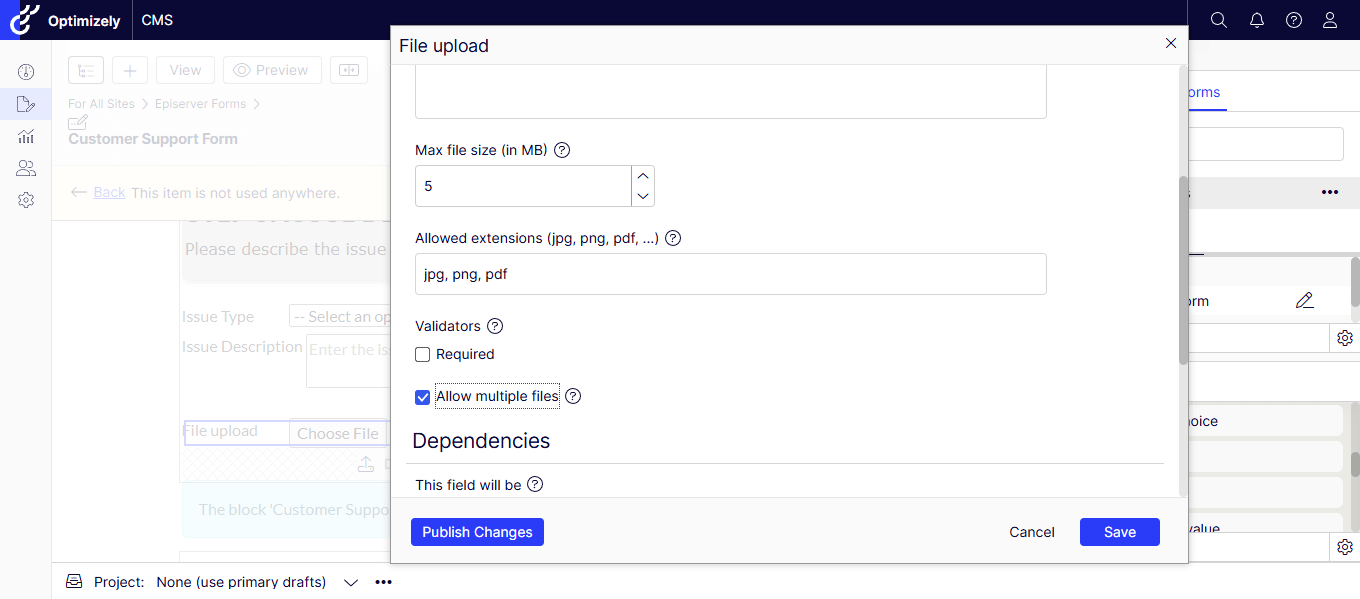
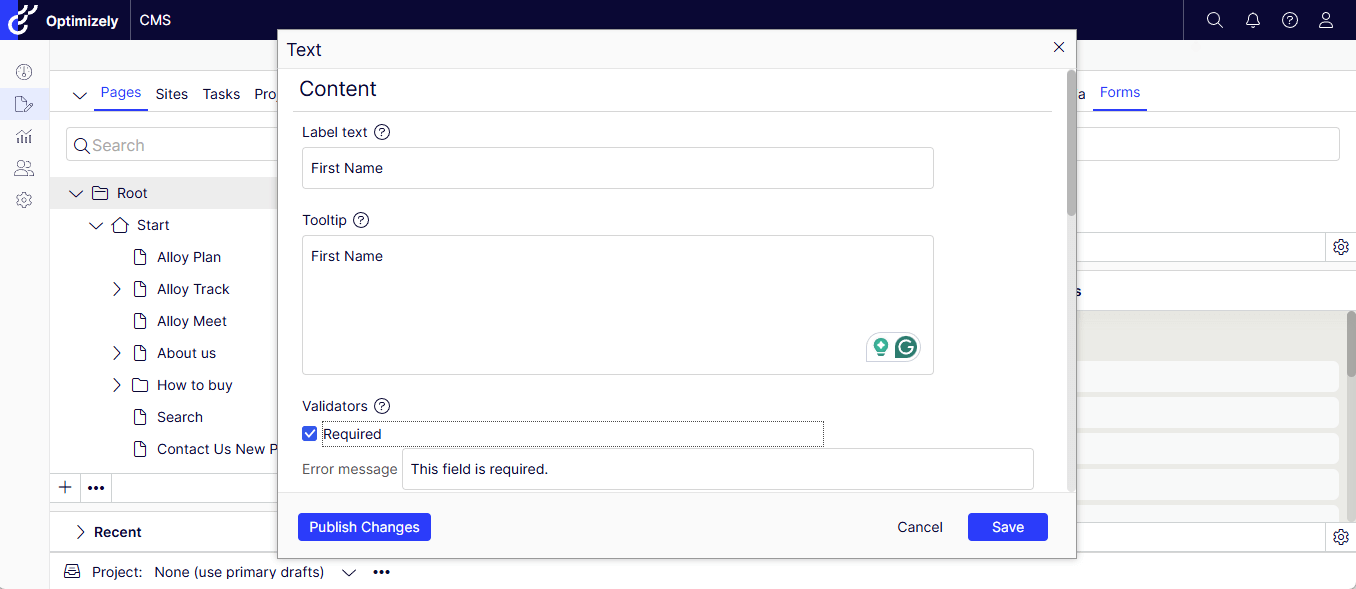
Quick Edit to change the Label, Tooltip, Required field and RegEx if needed. Save and Publish the changes.
Note: Each field needs to be published.
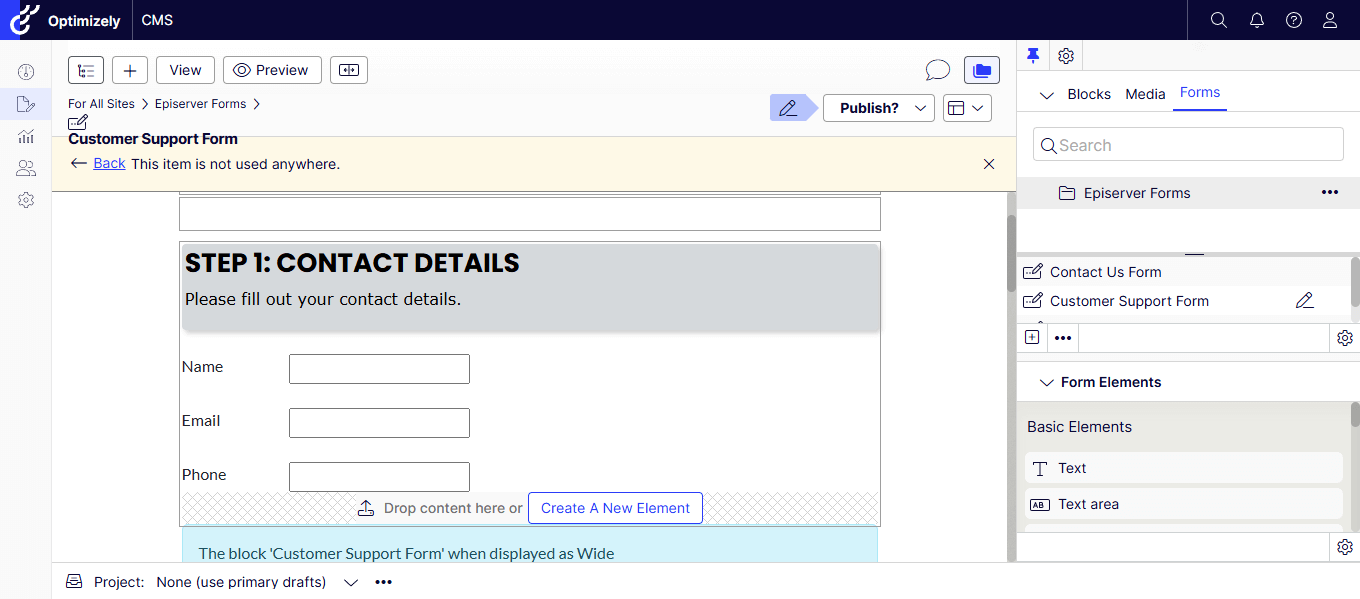
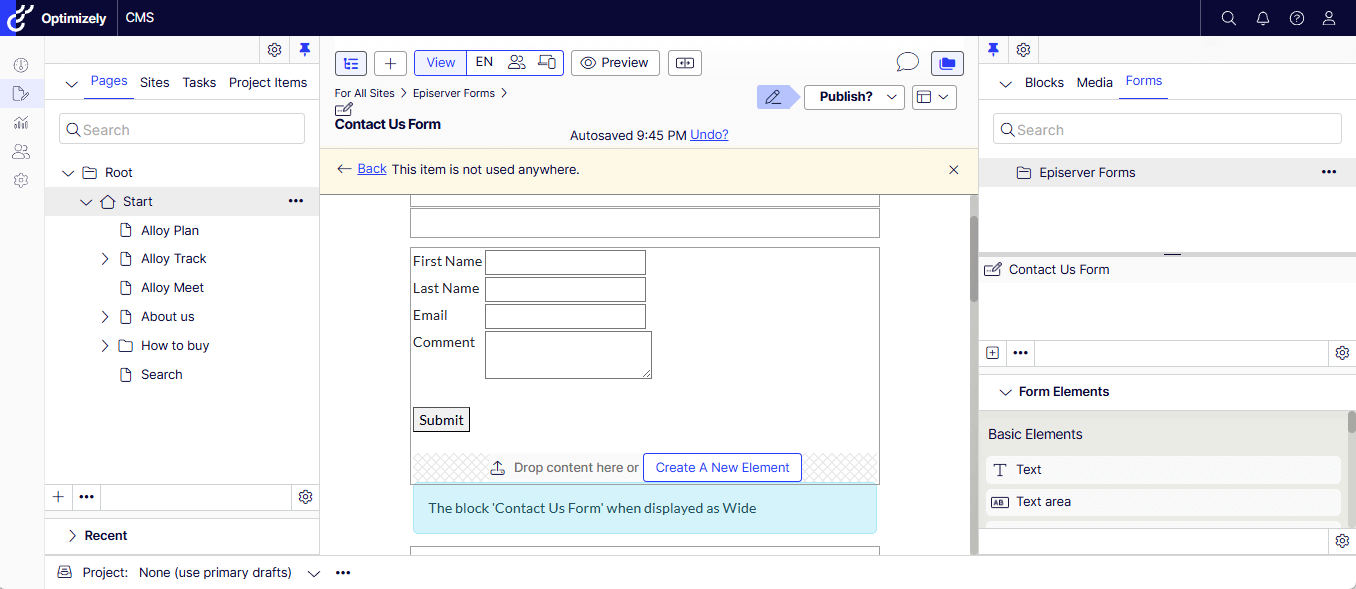
Similarly, I have created the following fields –
First Name – Text
Last Name – Text
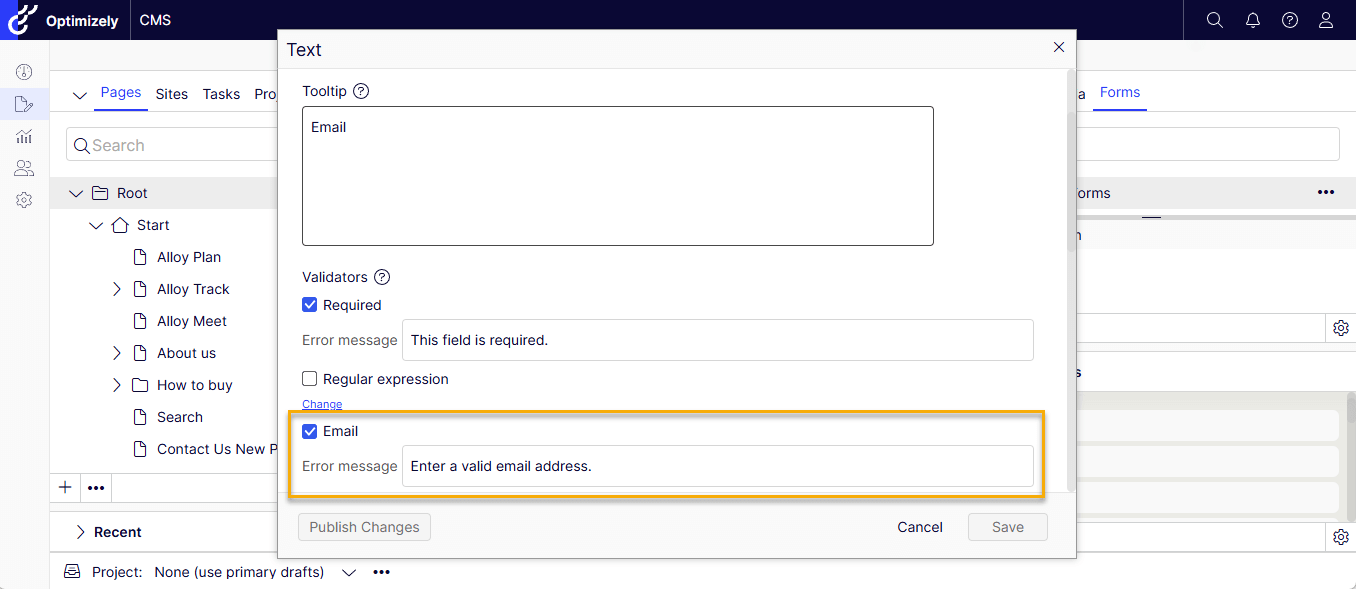
Email – Text
Comment – Text Area
Submit Button
Note: The Email is Text field with the Email checkbox checked.
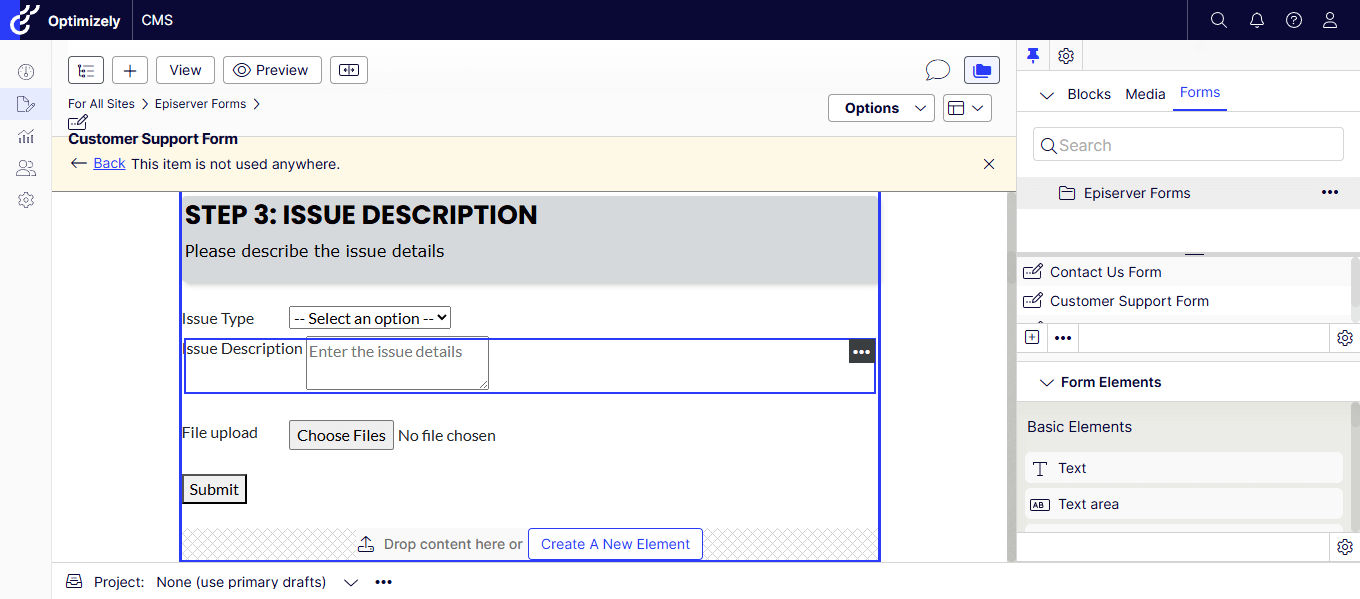
Form is now ready to be placed in any landing page.
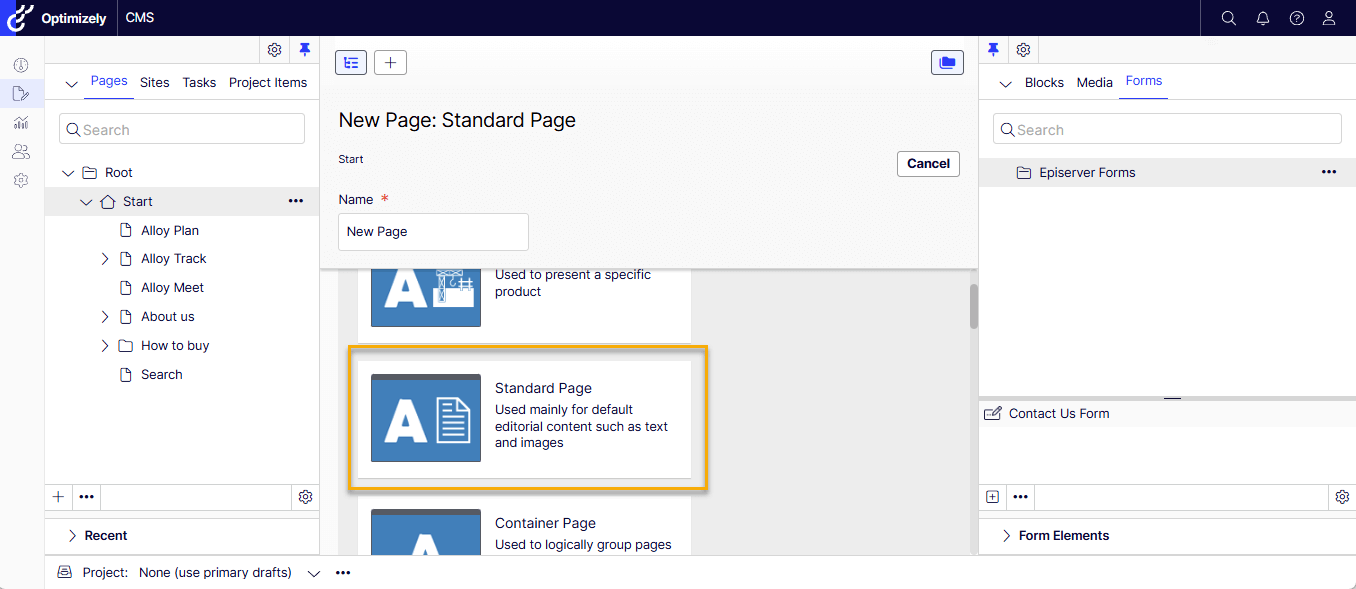
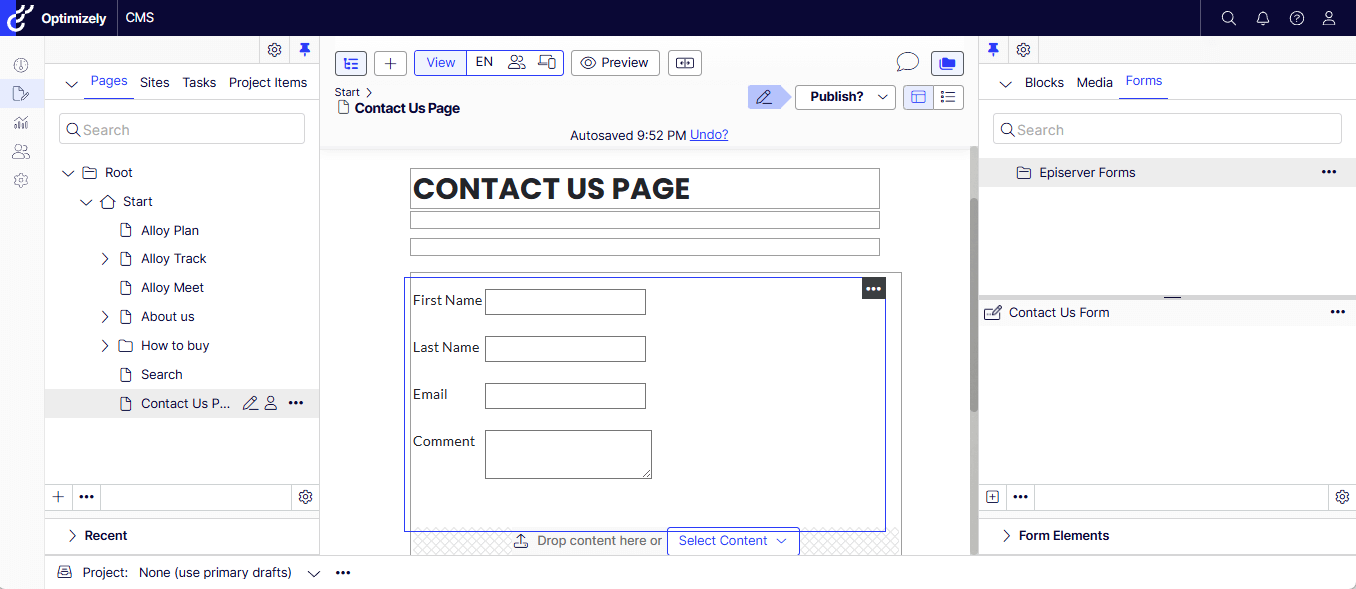
Let’s create a Standard Page or any page with Content Area.
Drag and Drop the Contact Us Form into the Content Area and publish the changes.
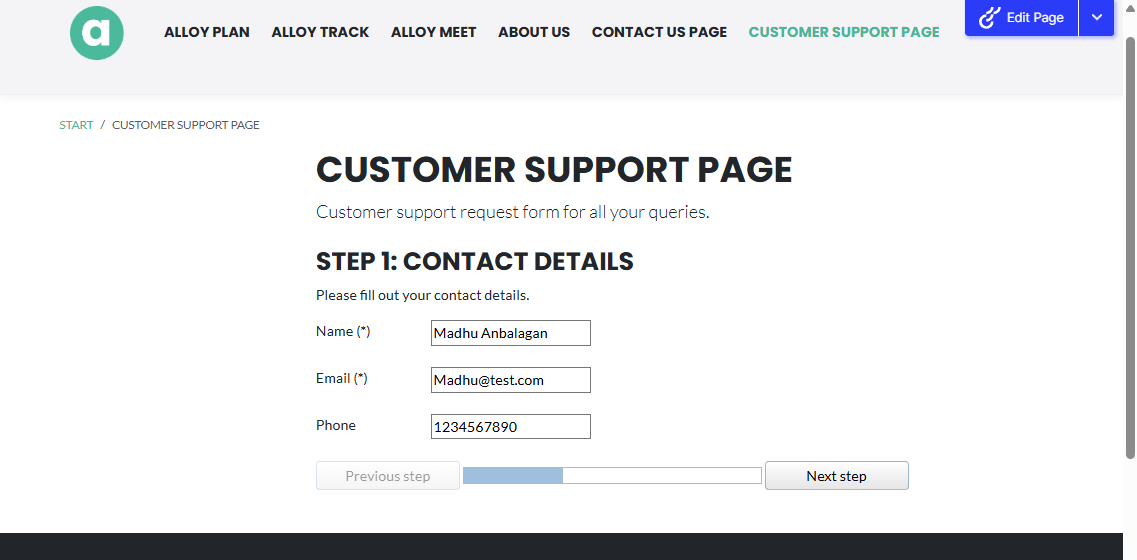
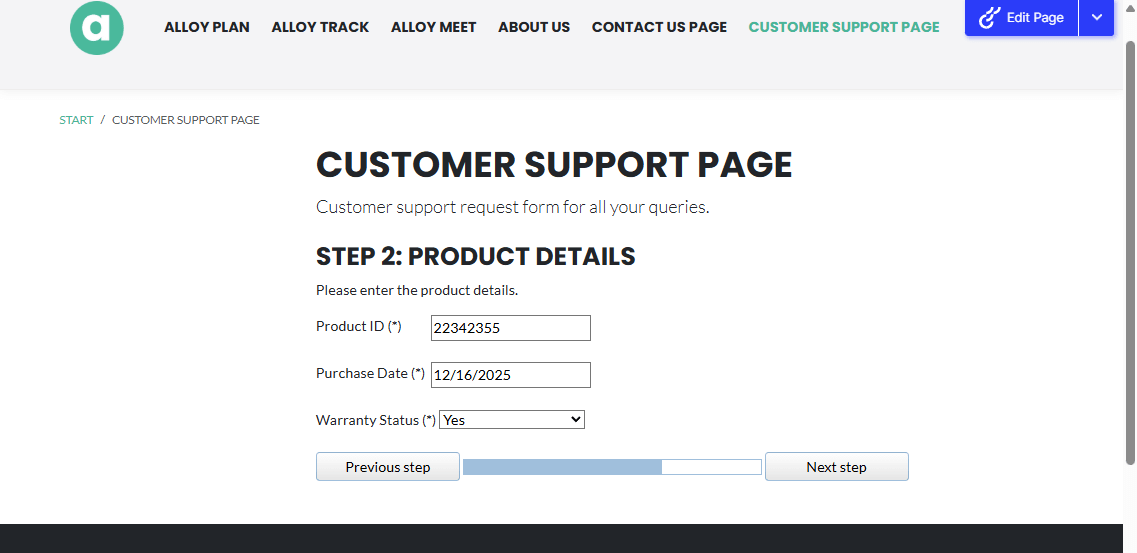
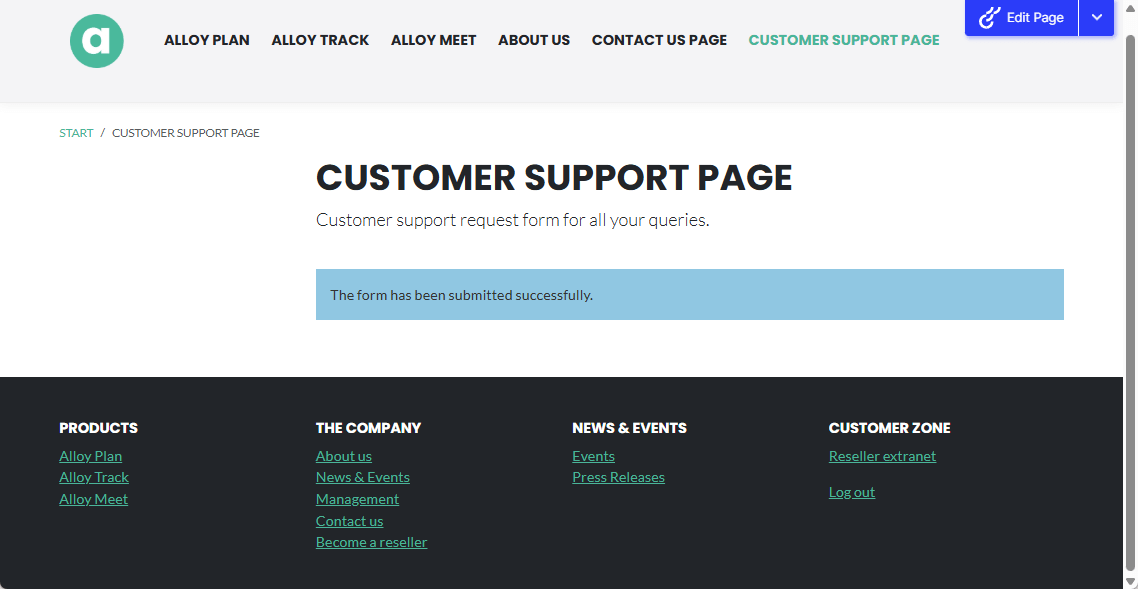
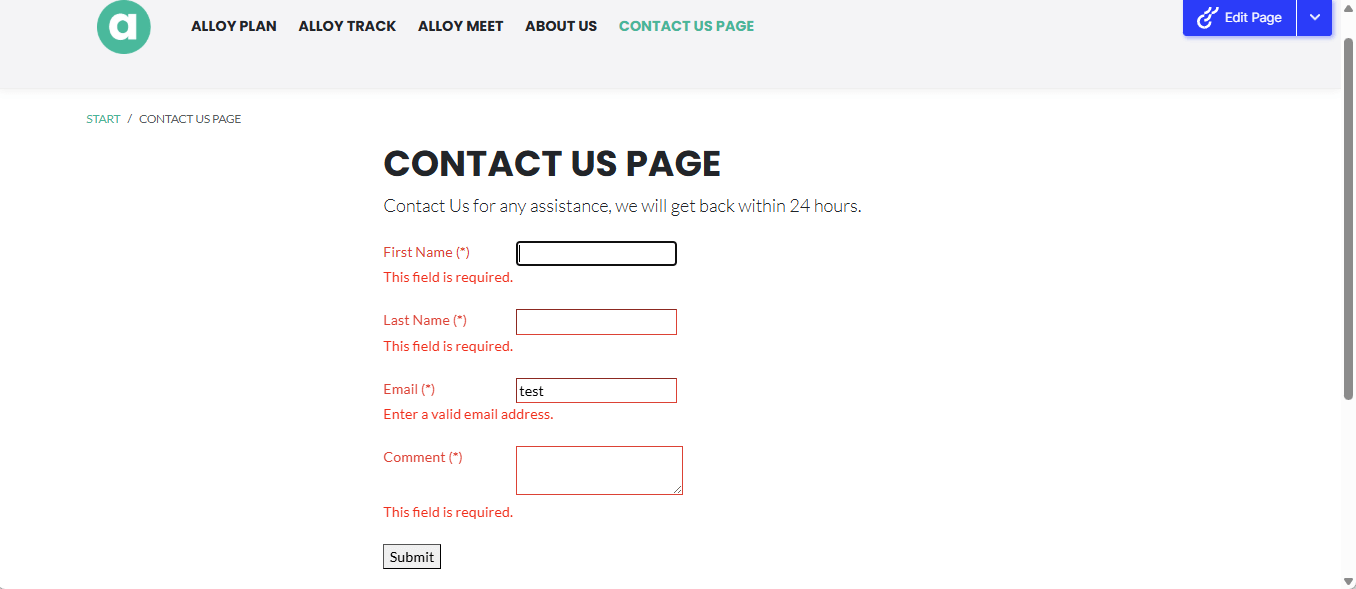
Let’s test the Contact Us Form – we could see the new menu CONTACT US PAGE is automatically added when published the page.
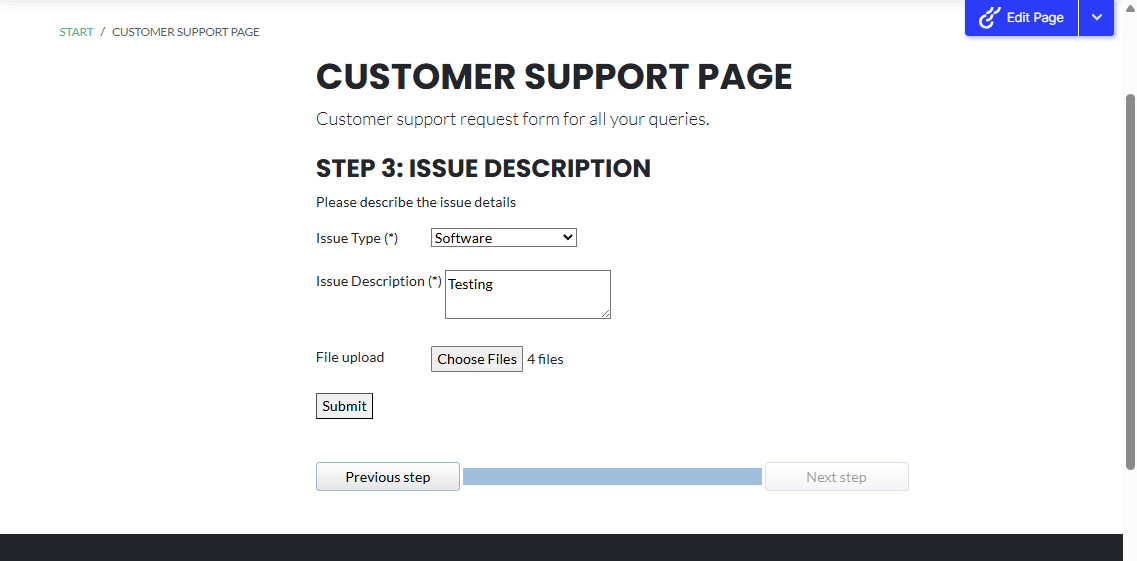
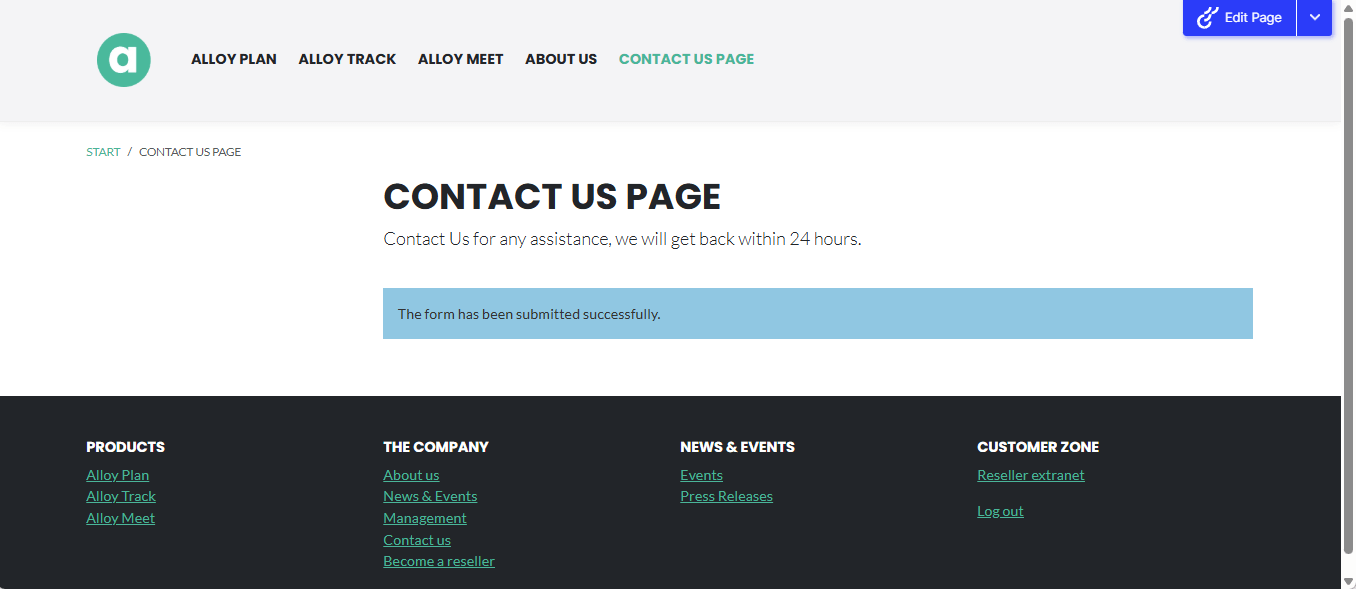
Submitted the Form – Verified that the required field validators are working as expected.
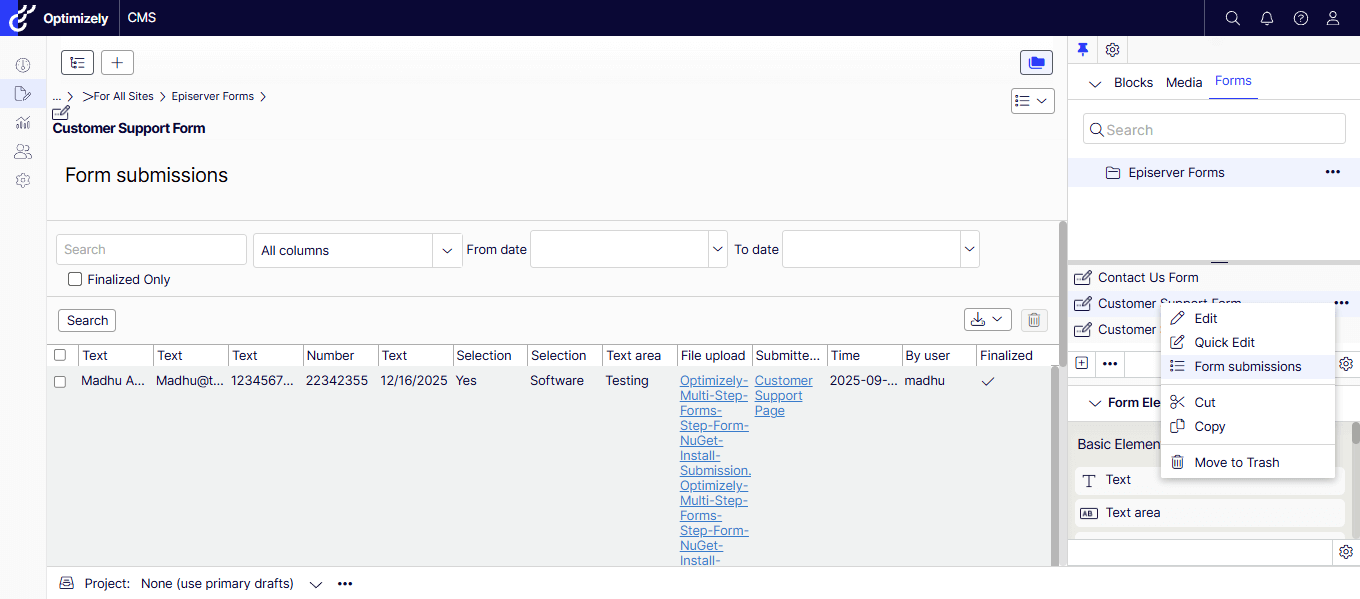
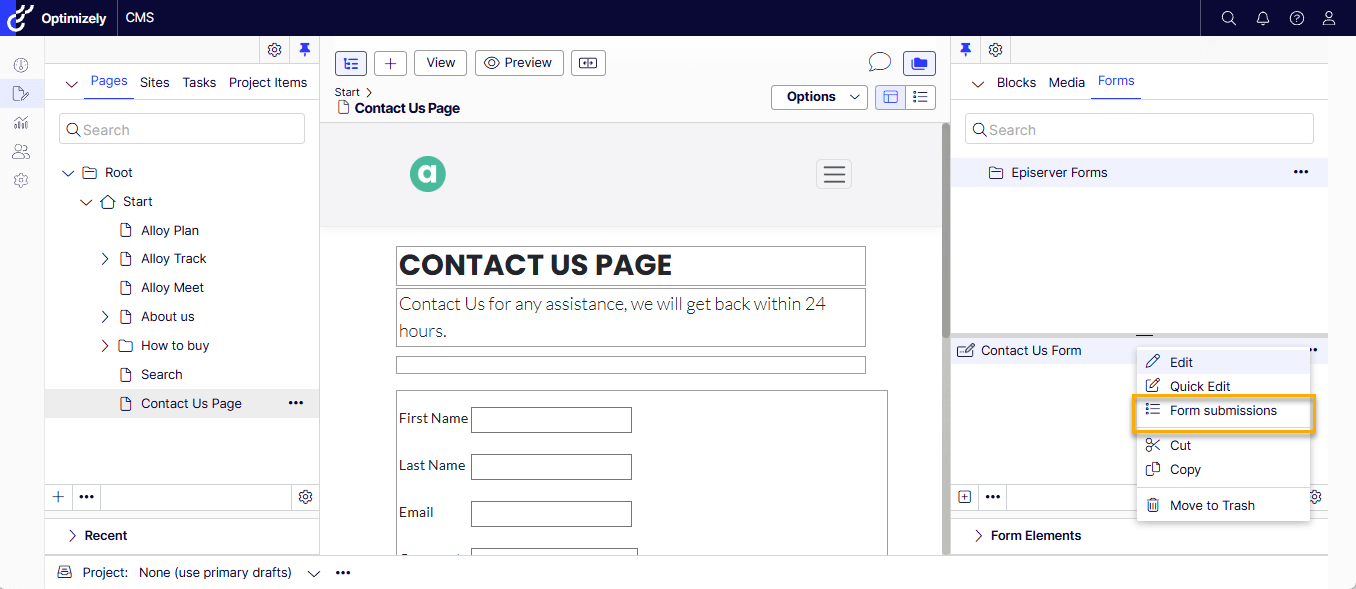
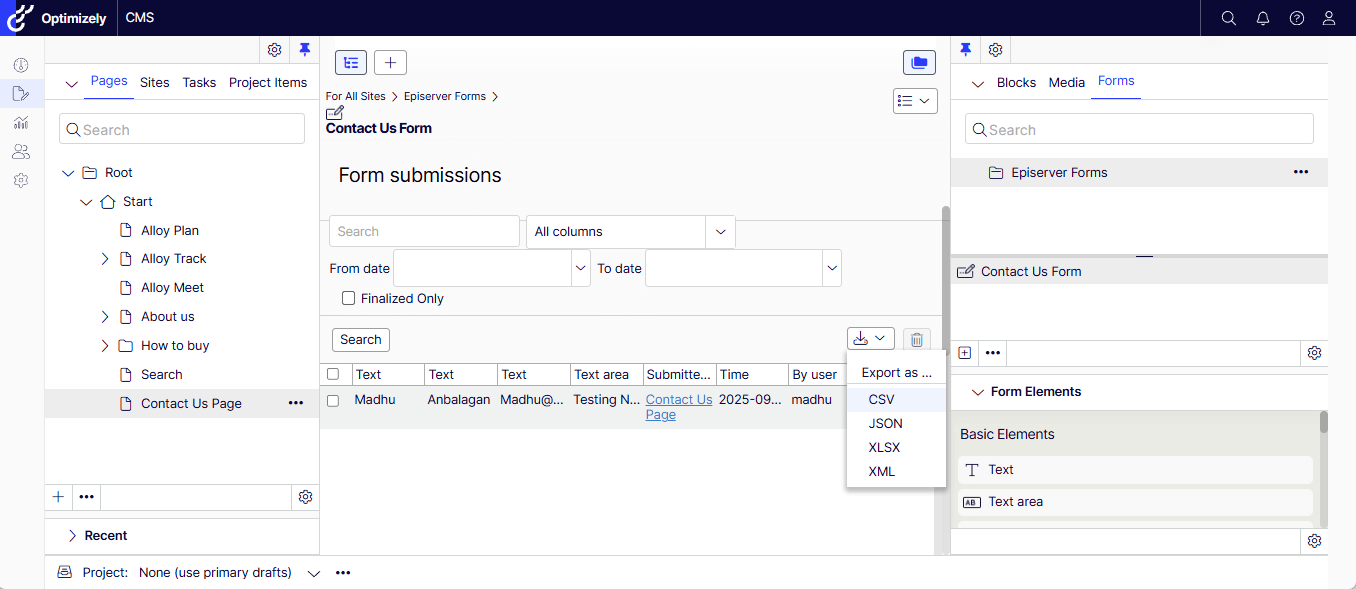
The submitted records are easy to check by pressing the Form Submissions.
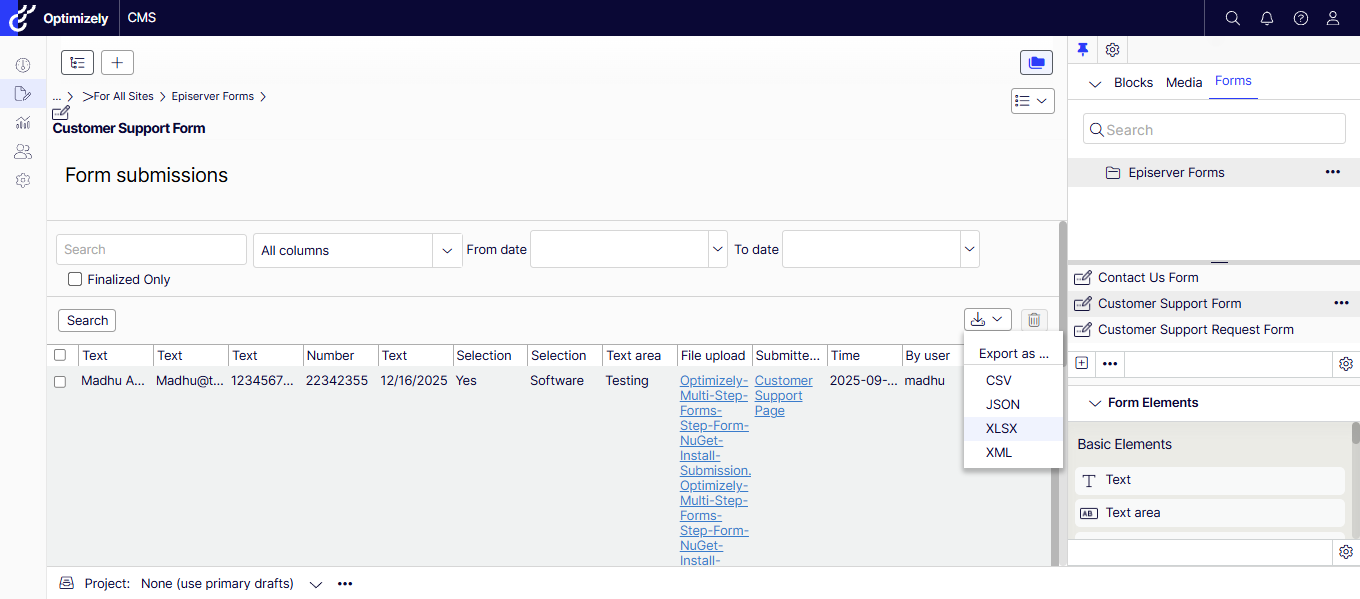
The records can be exported in any of the following formats.
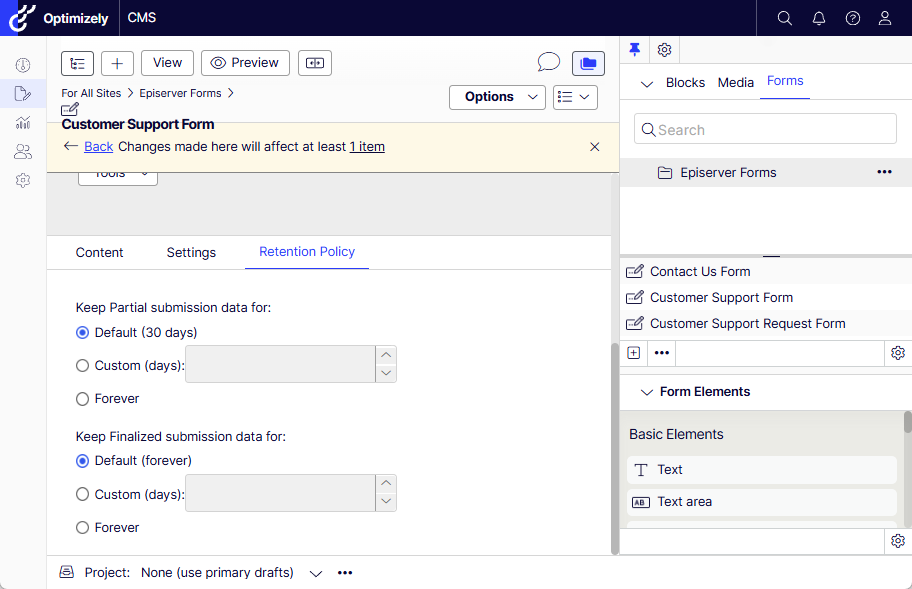
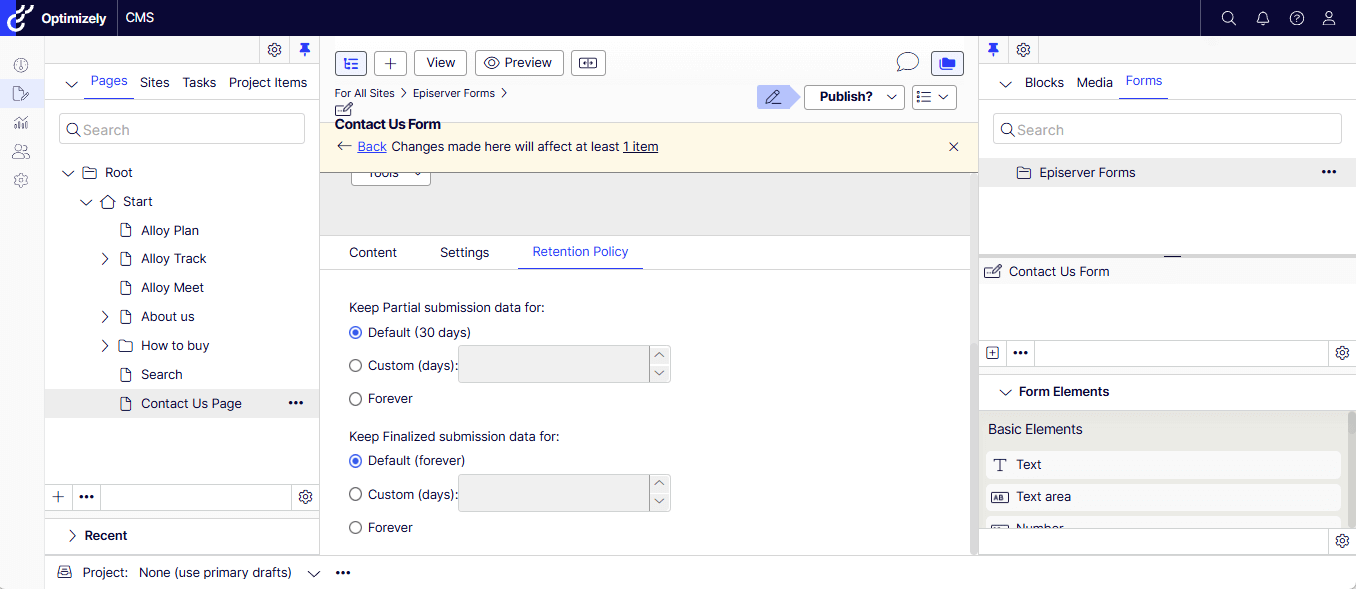
The records are stored forever by default – feel free to change the retention policy as needed for partial and full submissions.
If you prefer watching a video, my quick recording –
Create a separate Authorization in the Identity Server for Forms
Create a Controller to bridge between Custom Submit Action and API call
Set the Custom Submit Action fields
1. Create a separate Authorization in the Identity Server for Forms
Add the FormsServerClient node and its value to the Identity Server’s Sitecore.IdentityServer.DevEx.xml file. After making the change, make sure to IIS Reset for the change to be in effect.
Note: Don’t forget to add transforms for ClientSecret!
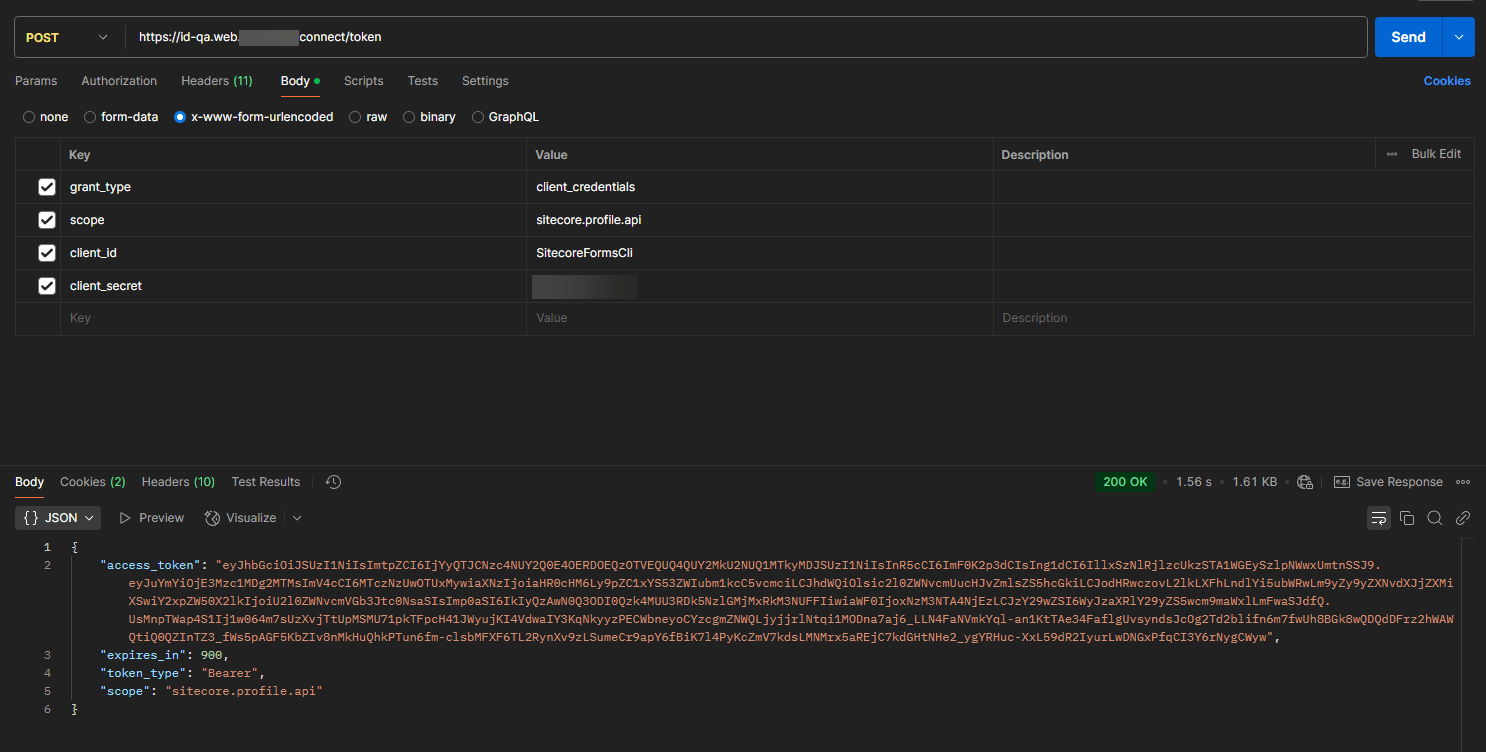
Ideally, you can call it in Postman to verify that it’s generating a token using Form’s ClientID and ClientSecret values mentioned in the Sitecore.IdentityServer.DevEx.xml file.
Now that the config is all set to have its own ClientID and ClientSecret, let’s set up the Authorize method with BearerToken specifically for Form’s Identity Credentials.
The SitecoreRestServices handles authenticated HTTP requests to Sitecore’s REST APIs, managing access tokens and retrying requests if authentication fails. It uses dependency injection to configure the HTTP client and obtain the necessary settings.
2. Create a Controller to bridge between Custom Submit Action and API call
Let’s bridge the Custom Submit Action and API call – The CustomController class extends SitecoreController and uses dependency injection to obtain an instance of ICreateAutoPublishService.
It defines a CreateAndPublish method – HTTP POST endpoint that processes CreateAndAutoPublishModel, calls the service to create and publish content, and returns a JSON response indicating success or failure.
The method includes error handling to return appropriate HTTP status codes and messages for different exceptions.
3. Set the Custom Submit Action fields
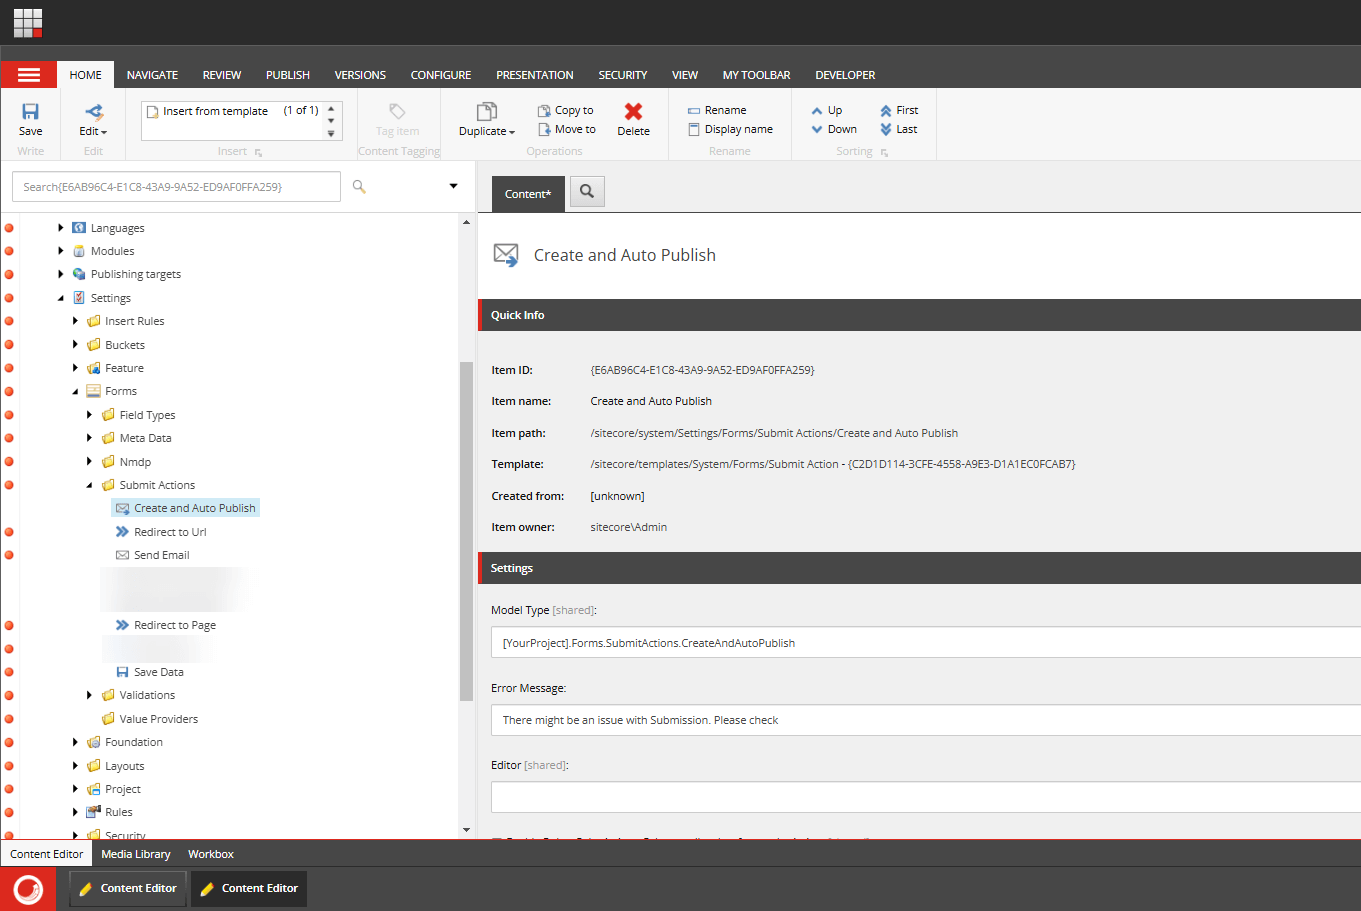
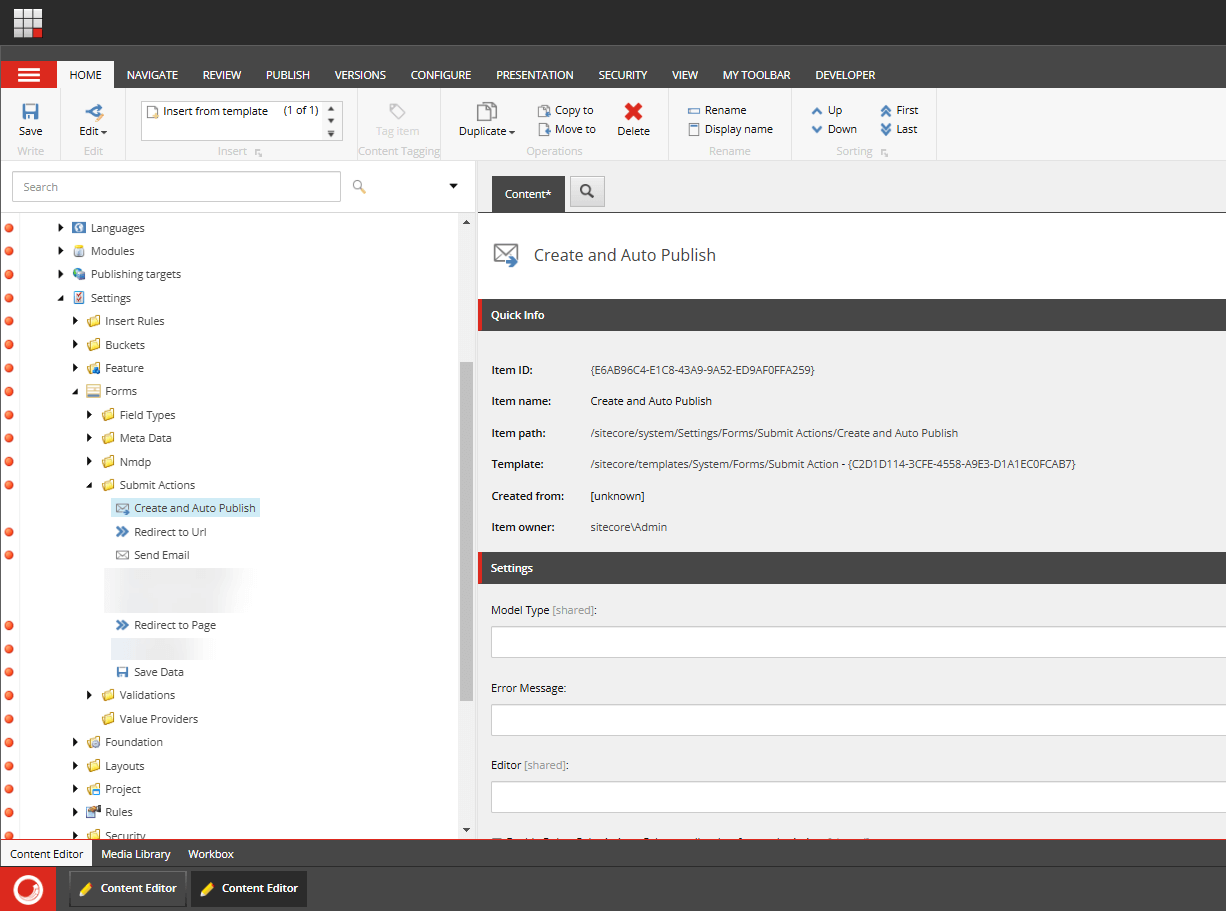
The final step – Let’s set the Model Type and Error Message based on the class we created.
Publish the form and its related items. It should be good to go!
I encountered a situation that the website was internally facing, which needed a form that would not save the data in the Experience Forms database. Also the data needs to be saved as an Item in the master database so it could be published and consumed in a listing page.
At first, I considered creating a Custom Submit Action to create and publish an item. However, I later realized that the CD server lacked access to the CM server, preventing it from directly generating an item in the master database. So, I came up with the idea of creating a custom API service and combining it with a custom submit action.
Solution
To implement this followed this process
Create Custom Submit Action in Sitecore
Create a code-behind class that inherits SubmitActionBase
Create a secure API that can create and publish an item
Create an API authorization user in the identity server
Create a Controller to proxy between Custom Submit Action and API calls
Set the Custom Submit Action fields
1. Custom Submit Action in Sitecore
Create the custom submit action in the following path /sitecore/system/Settings/Forms/Submit Actions.
2. Create a code-behind class that inherits SubmitActionBase
Create a class that inherits the SubmitActionBase class and overrides the Execute method which calls the API asynchronously to create and publish an item.
The CreateAndAutoPublish class extends SubmitActionBase<string> and is designed to handle form submissions in Sitecore, creating and auto-publishing content items.
It uses dependency injection to obtain instances of IHttpClientFactory, BaseSettings, and ISitecoreRestServices, which are lazily initialized. The ExecuteAction method validates the form submission context and parameters, then calls the Execute method to prepare a model from form fields, serialize it to JSON, and send it to a Sitecore API endpoint using an HTTP POST request.
The class includes helper methods to extract values from form fields and handles errors by logging them and adding them to the form submission context’s error collection.
3. Create an API call that creates and publishes the item
The API call does the following things –
Creates an item under a specified folder
Move and Sync the item into a bucket
Publish the item
Clear the Sitecore cache
Ensure the published item is indexed or force index the item
Clear the Vercel Cache for frontend
In Part 2, we will see how to
Create an API authorization user in the identity server
Create a Controller to proxy between Custom Submit Action and API calls
Incognito/private mode to see if Forms are showing up
Rebuilt Forms folder from Developer menu (faster way)
Rebuilt Sitecore Master Index
After doing above all, Forms weren’t still showing up 🙁 Decided to take a deeper dive.
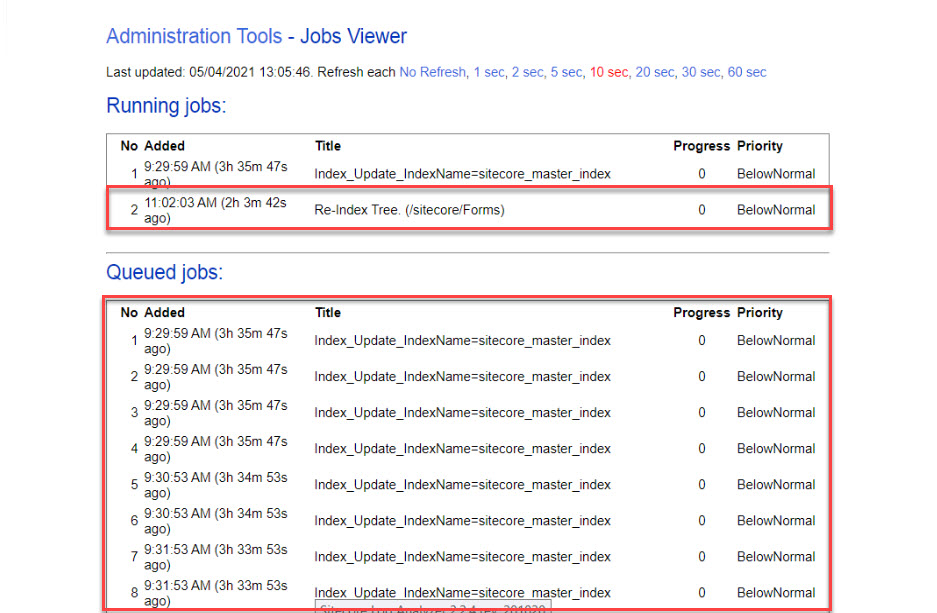
I checked the JobsViewer(/sitecore/admin/jobs.aspx) to check what jobs are running and to my surprise, the re-indexing only Forms folder was running for more than 2 hours and they were so many jobs queued up (Content Authors may be busy creating more content for the website).
I was wondering what’s causing the indexing queue to be clogged. Checked the Crawling log using Sitecore Log Analyzer to see what’s happening and for every single update, it was triggering re-index synchronously and immediately checked the Indexing Strategy for sitecore_master_index and it was set to syncMaster!
This was the root cause of the problem because every time the Content Author was making a change it was triggering the re-index synchronously, whereas it should asynchronously re-indexed with an interval. I switched it to the intervalAsyncMasterstrategy to fix the issue.
Tip: Sitecore Log Analyzer is a powerful tool for parsing Sitecore log files. It provides the interface to explore and navigate through a large amount of log data.
Here is the patch I used to update the index strategy.
Now within few minutes, all queue jobs cleared and moved to finished jobs.
Checked Forms in Designer view, all forms were showing up! Tada!
I came across a scenario, where I need to update the email field for all custom forms built with ‘EmailTemplate’. Since it’s going to be a bulk update, decided to do it in SPE(so powerful!)
Here is the script I wrote –
This file contains hidden or bidirectional Unicode text that may be interpreted or compiled differently than what appears below. To review, open the file in an editor that reveals hidden Unicode characters.
Learn more about bidirectional Unicode characters
Are you looking for a generic method to read the values from any type of Sitecore Form fields? Here is the solution.
         private static Dictionary<Guid, string> FormFieldsToDictionary(IList<IViewModel> fields)
		{
			Dictionary<Guid, string> fielDictionary = new Dictionary<Guid, string>();
			foreach (var field in fields)
			{
				fielDictionary.Add(Guid.Parse(field.ItemId), field.GetType().GetProperty("Value")?.GetValue(field, null)?.ToString() ?? string.Empty);
			}
			return fielDictionary;
		}
	private static string GetValue(IViewModel field)
		{
			if (field == null)
			{ return default(string); }


			if ((field as StringInputViewModel) != null)
			{
				return (string)(object)(field as StringInputViewModel).Value;
			}

			if (field is ListViewModel)
			{
				var listField = (ListViewModel)field;
				var array = listField?.Value?.ToArray();
				if (array == null)
				{
					return string.Empty;
				}
				return String.Join(",", array);
			}

			if (field is DateViewModel)
			{
				var dateField = (DateViewModel)field;
				return dateField.Value.HasValue ? dateField.Value.Value.ToShortDateString() : string.Empty;
			}

			if (field is NumberViewModel)
			{
				var numberField = (NumberViewModel)field;
				return numberField.Value.HasValue ? numberField.Value.ToString() : string.Empty;
			}

			if (field is TextViewModel)
			{
				var textField = (TextViewModel)field;
				return (string)(object)textField.Text;
			}

			if (field is CheckBoxViewModel)
			{
				var checkbox = (CheckBoxListViewModel)field;
				return (string)(object)checkbox.Value;
			}


			return default(string);
		}
Utilization:
protected override bool Execute(UpdateContactData data, FormSubmitContext formSubmitContext)
		{
			var fieldsDictionary = FormFieldsToDictionary(formSubmitContext.Fields);

           // From here you can create a model from fieldsDictionary, call any API and return call status

       }
Hope this helps someone. Any questions, leave a comment.