I came across a scenario in Sitecore Forms where I needed to build a hidden field. The form is intended for employees, and when they access it, it should automatically recognize them and capture their name and email address upon submission.
Let’s get started.
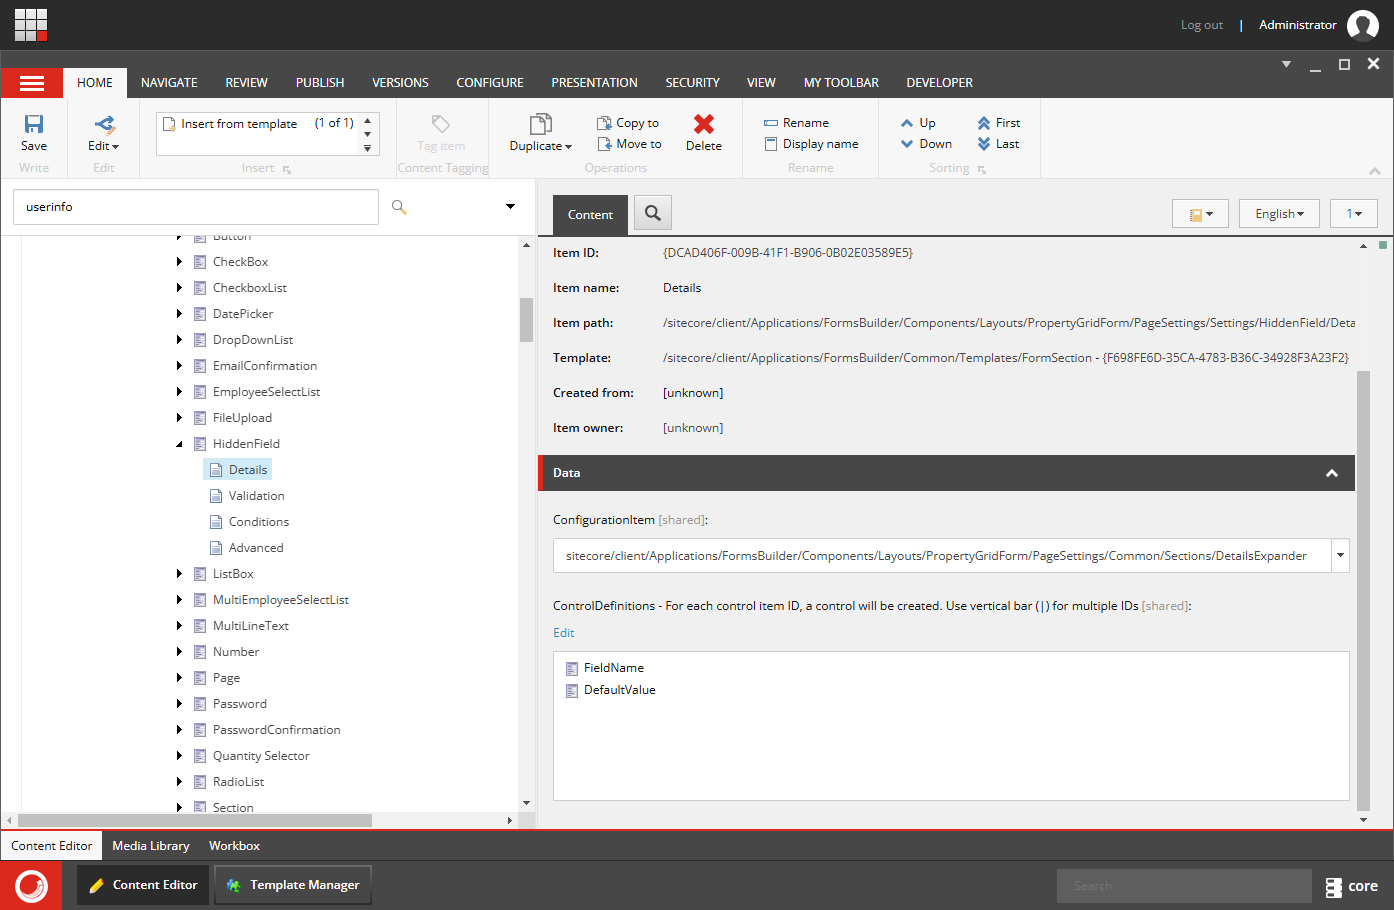
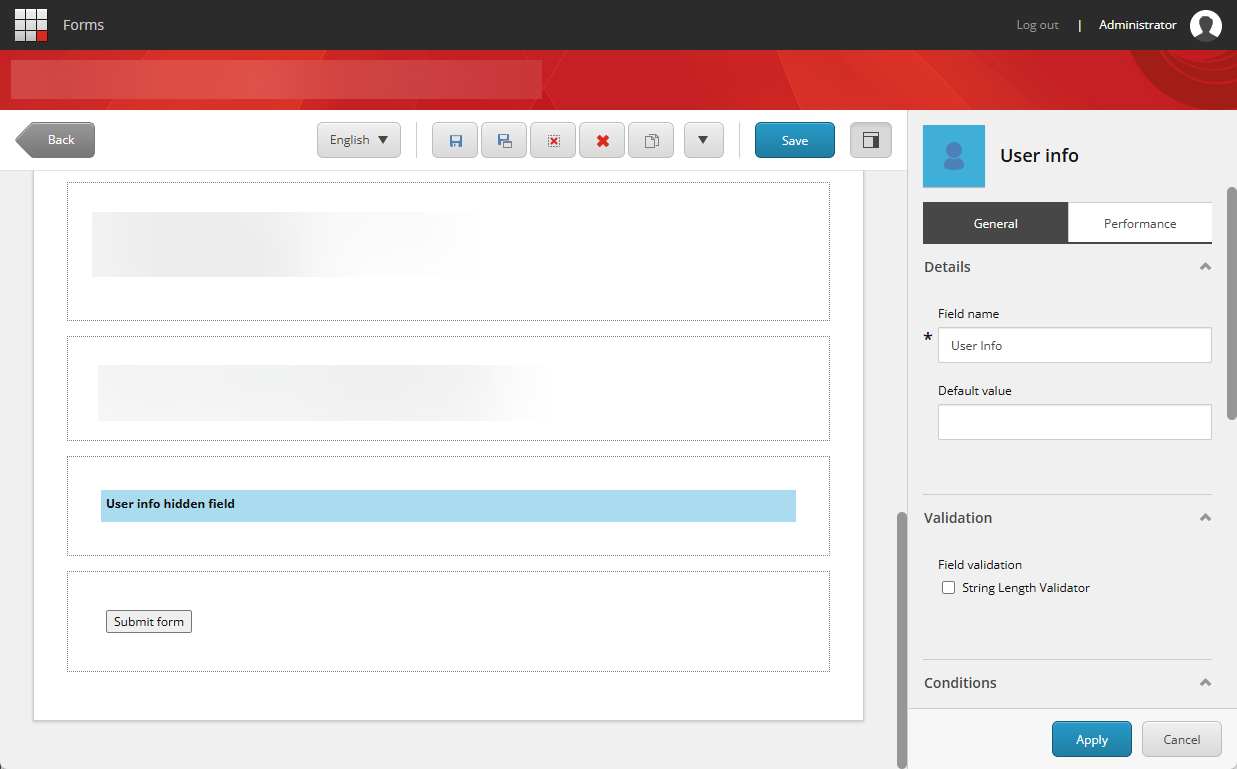
Create the Hidden Field in Core DB
Navigate to /sitecore/client/Applications/FormsBuilder/Components/Layouts/PropertyGridForm/PageSettings/Settings
Create the HiddenField based on /sitecore/client/Business Component Library/version 2/Layouts/Renderings/Forms/Form/Form Parameters
Fill out the following fields –
Details
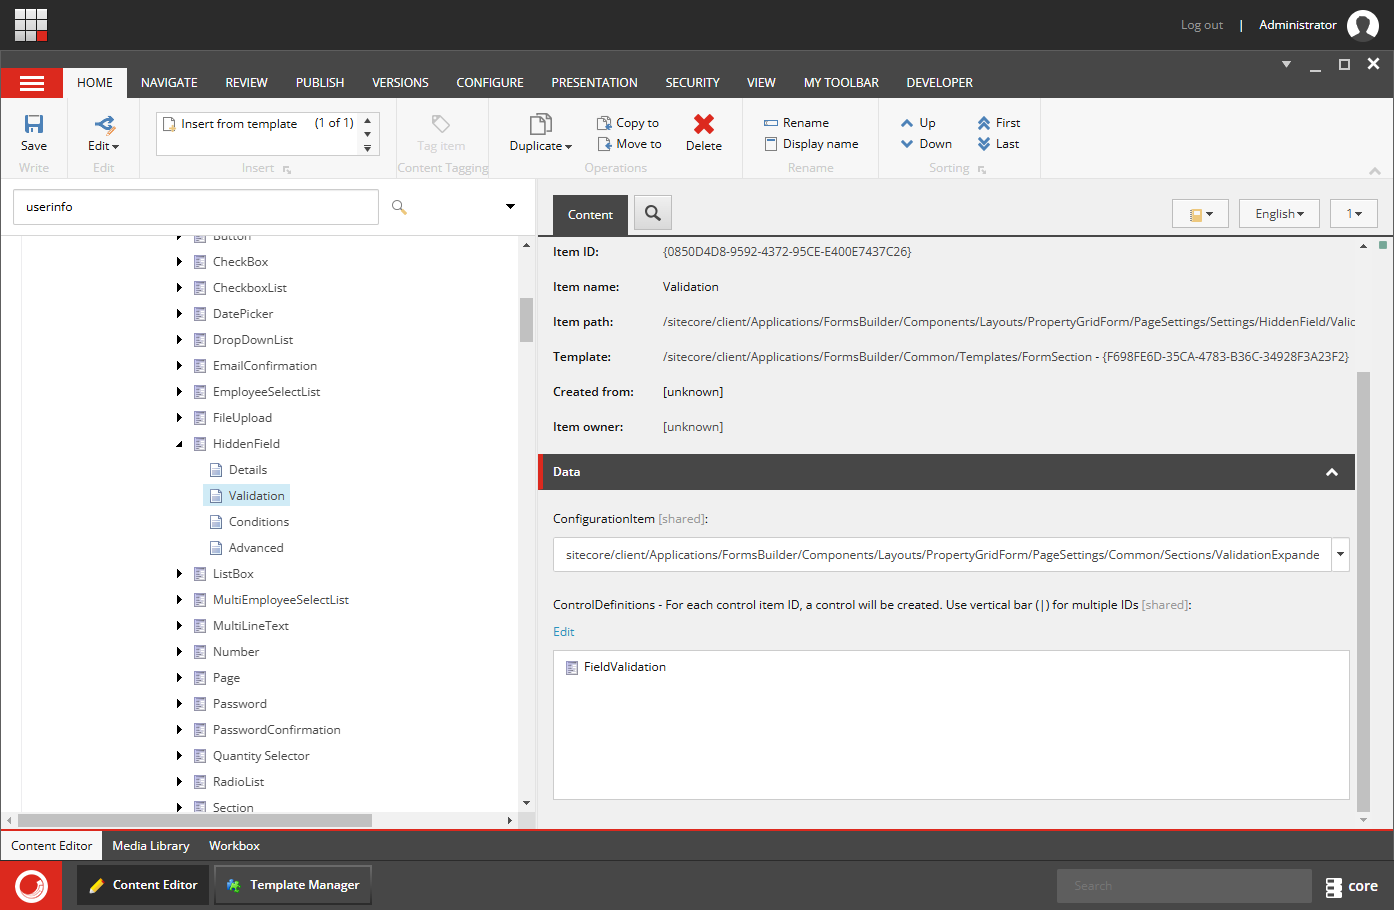
Validation
Conditions
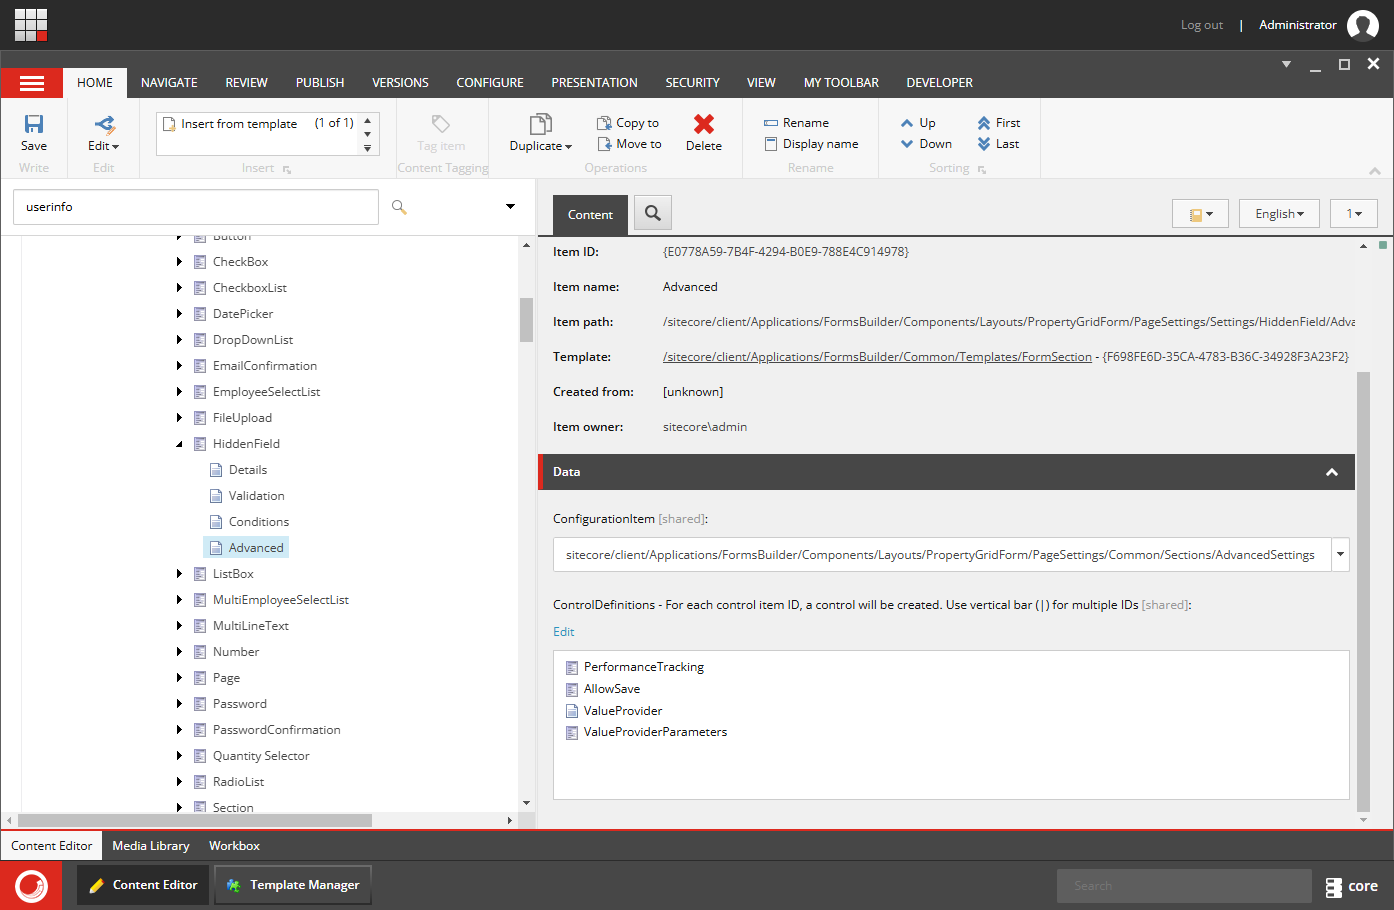
Advanced
Create a Custom Field Type
Inherit from the StringInputViewModel class to create a new view model for your hidden field.
Create the View for the Field
Define the HTML and JavaScript needed to render the hidden field and set its value.
Custom Submit Action
Let’s create a custom submit action and read the properties from formSubmitContext.
Let’s bind it to the Form’s Submit Action.
Now I’m able to drag and drop the hidden field into the Form.
Make sure to publish the Form and its related items.
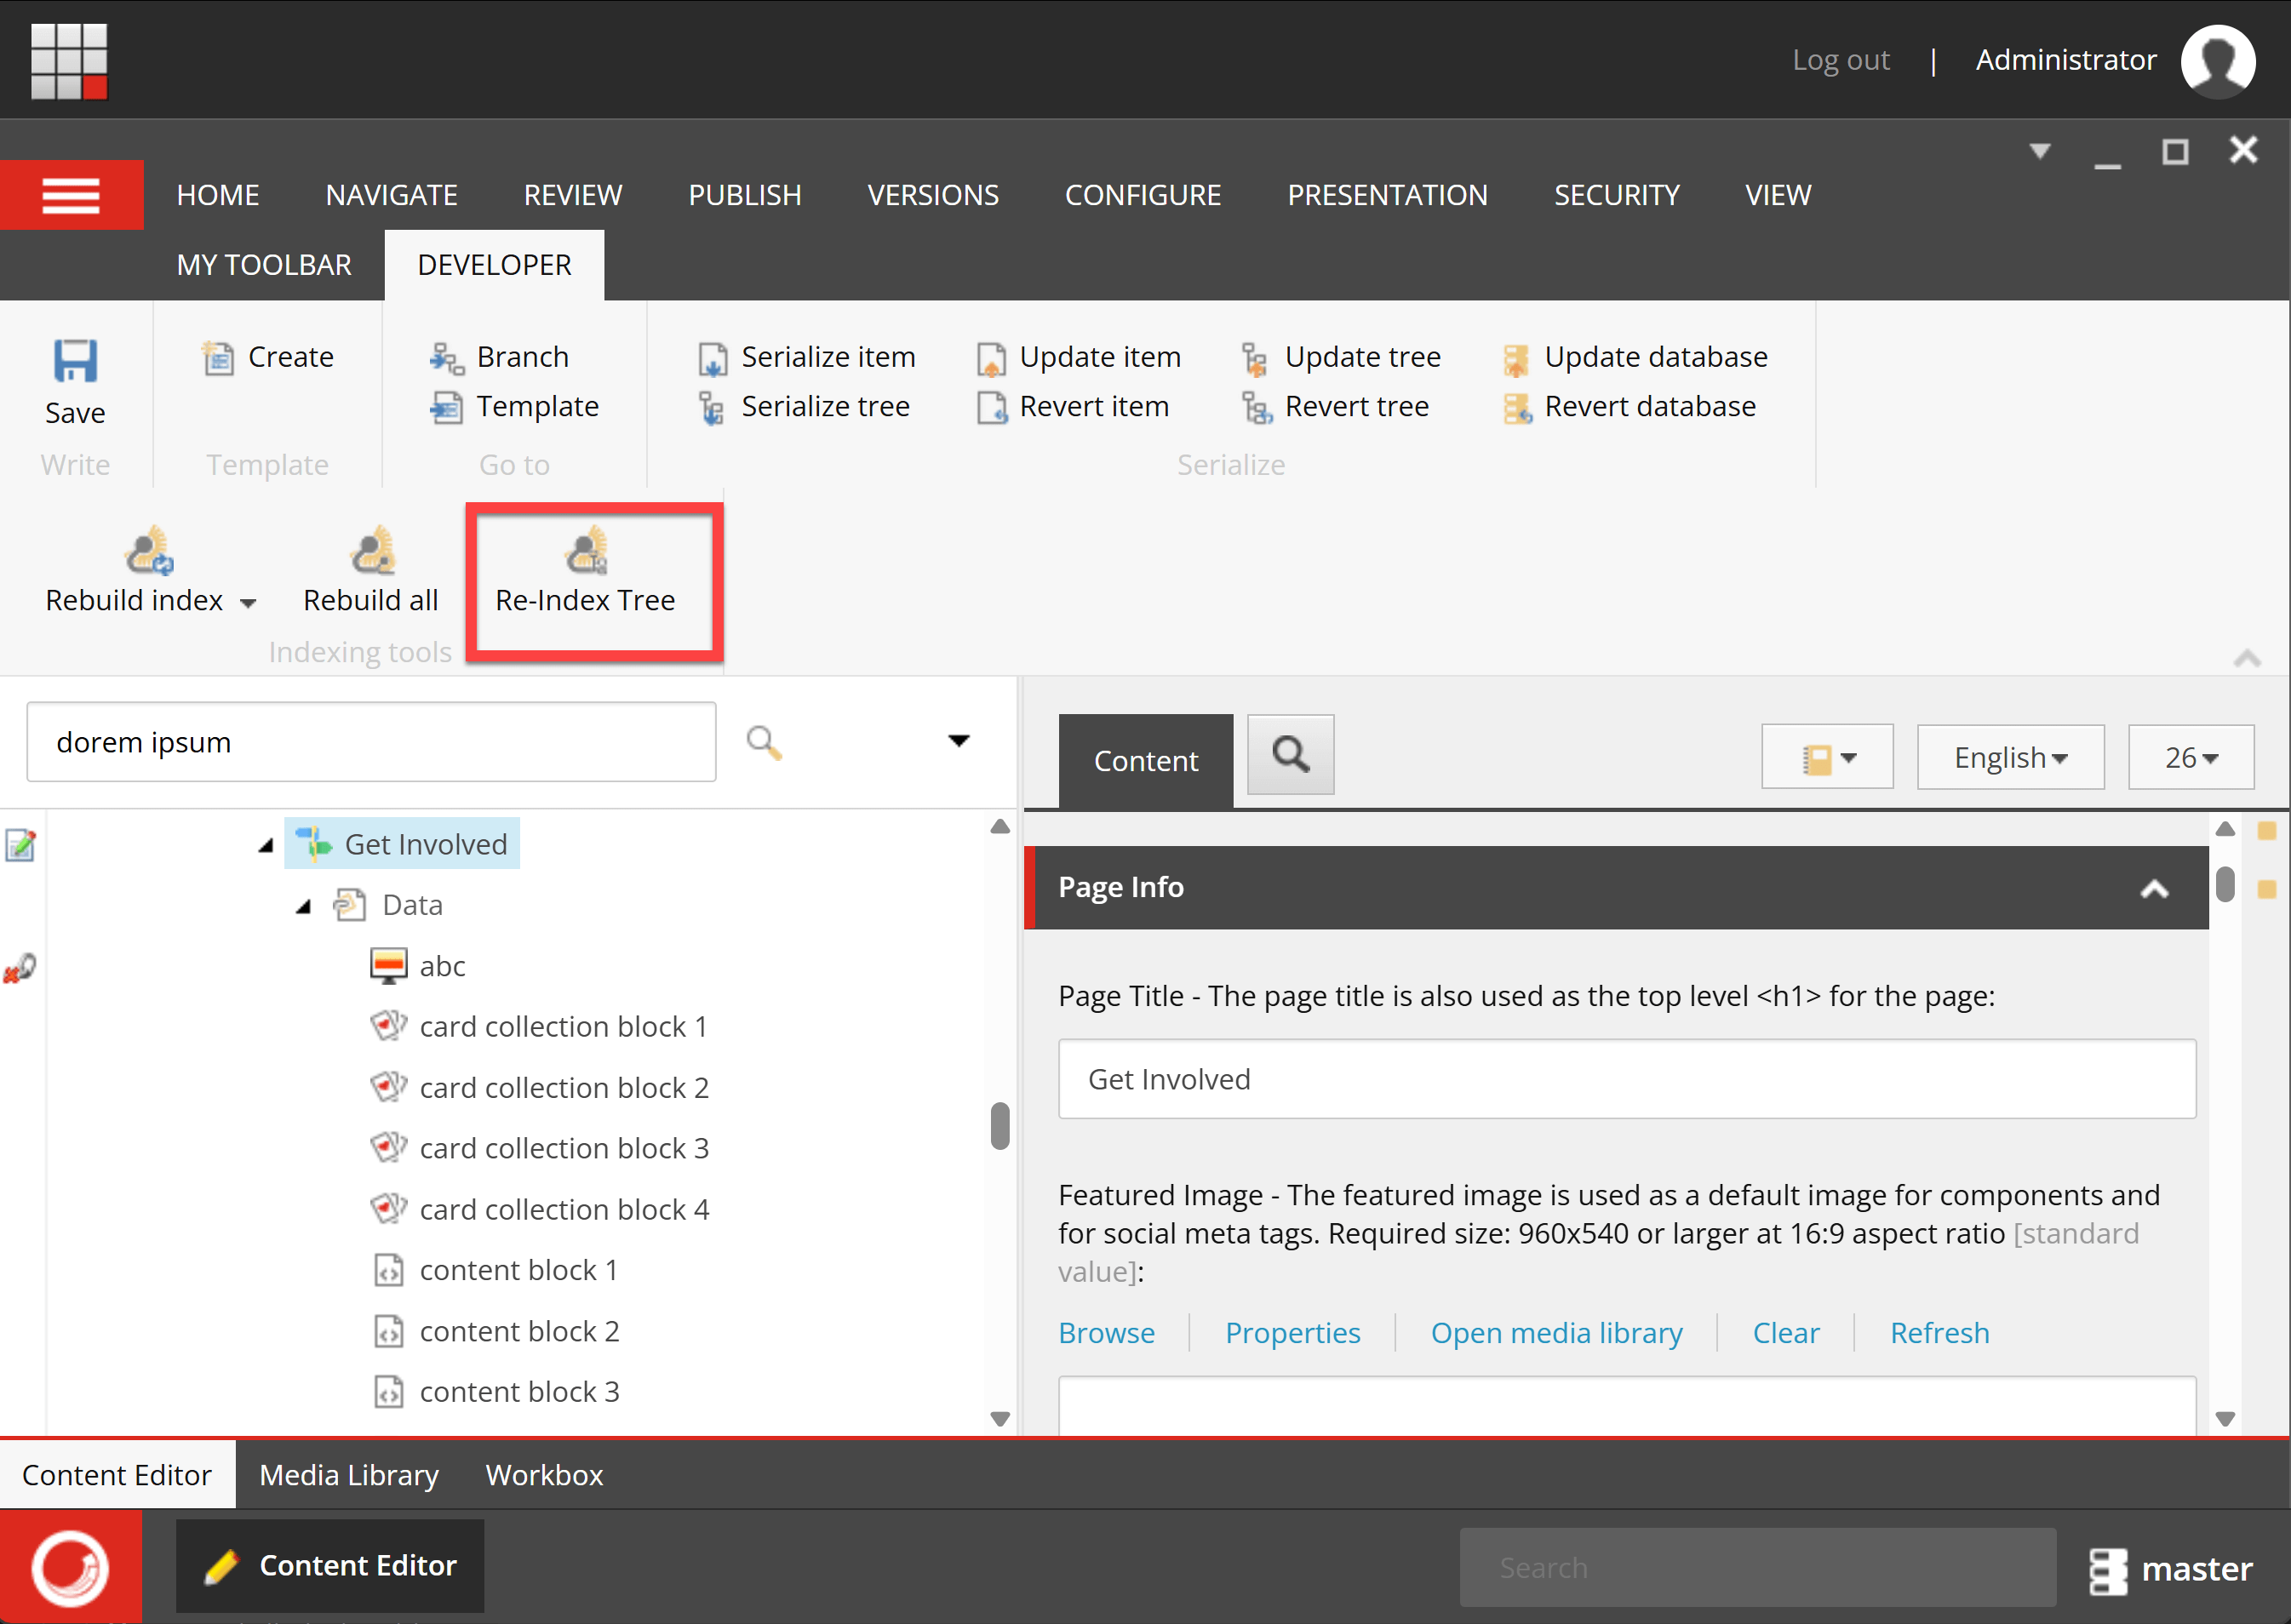
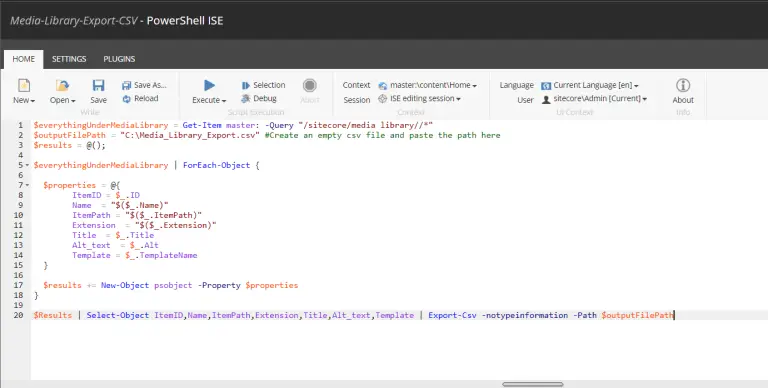
I needed to index all text from the page content and its associated renderings, including single-line, multi-line, and rich text, into a single Coveo-computed field.
Let’s get started.
Text Extraction:
Created a TextExtraction class that inherits BaseComputedField.
GetComputedFieldValue: Computes the concatenated text from the item and its renderings.
GetRenderingSource: Retrieves the source item for a given rendering reference.
GetDatasourceItem: Resolves and retrieves the data source item using the pipeline manager.
GetAllReferencedText: Extracts text from fields and adds them to a result list.
GetReferenceFieldData: Handles reference fields and extracts text from referenced items.
Configuration:
Let’s add the TextExtraction computed field into the config file.
I published all the files, and it’s time to check.
I selected the page that has many renderings and hit Rebuild Tree (I set the indexing strategy as SyncMaster. If you have intervalAsyncMaster or onPublishEndSyncSingleInstance, publish the item to see the record in Index.)
If any issues, you can put a breakpoint in Visual Studio, and Rebuild Tree will hit the breakpoint to debug.
Let’s check the Coveo index – Yay! Its page content and its associated rendering content were extracted successfully.
The year 2025 has been great, featuring presentations at various Sitecore User Groups around the world and meaningful interactions with numerous members of the Sitecore community.
I started exploring Sitecore Personalize, which allows to craft tailored web experiences based on customer behavior and preferences.
In this blog, I’ll walk through how to integrate Sitecore Personalization for the Sitecore XP/XM/XMCloud website without installing EngageSDK – using TamperMonkey, a browser extension for running custom JavaScript.
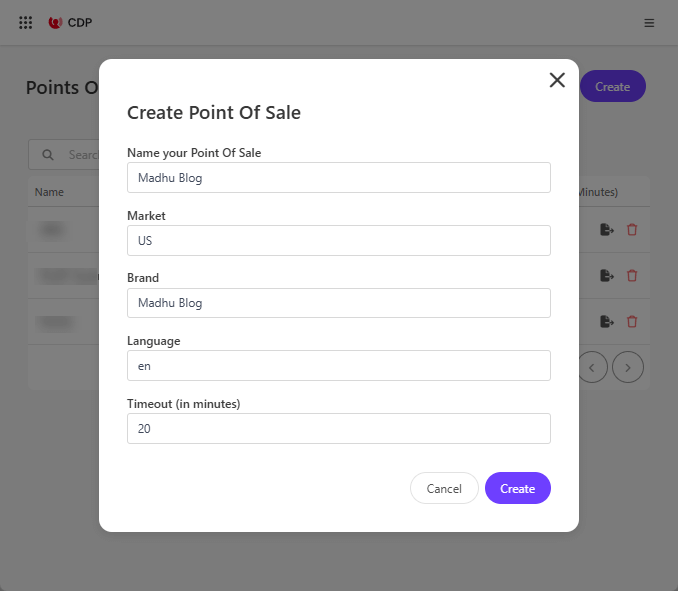
Create a Point Of Sale (PoS)
In Sitecore CDP or Personalize create a PoS for the website.
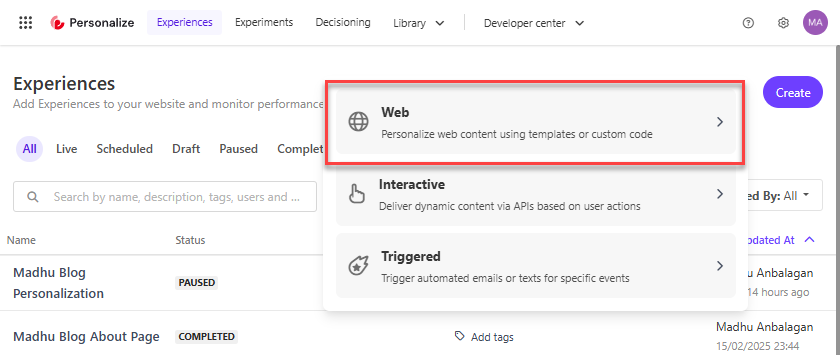
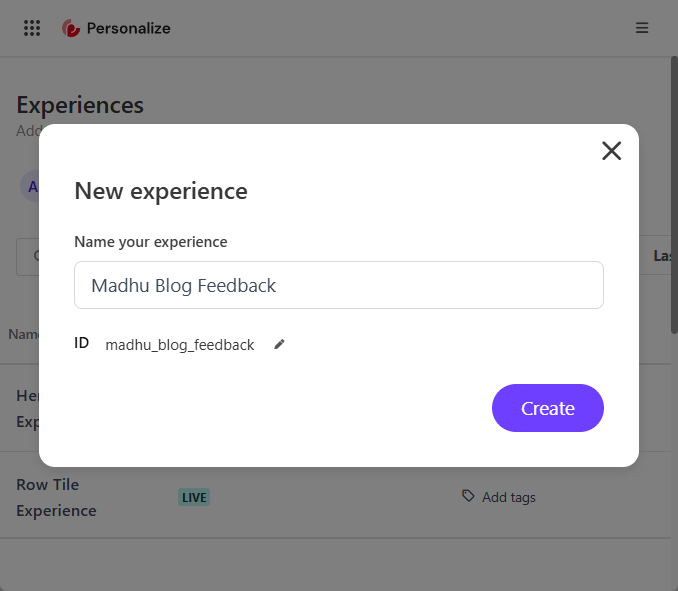
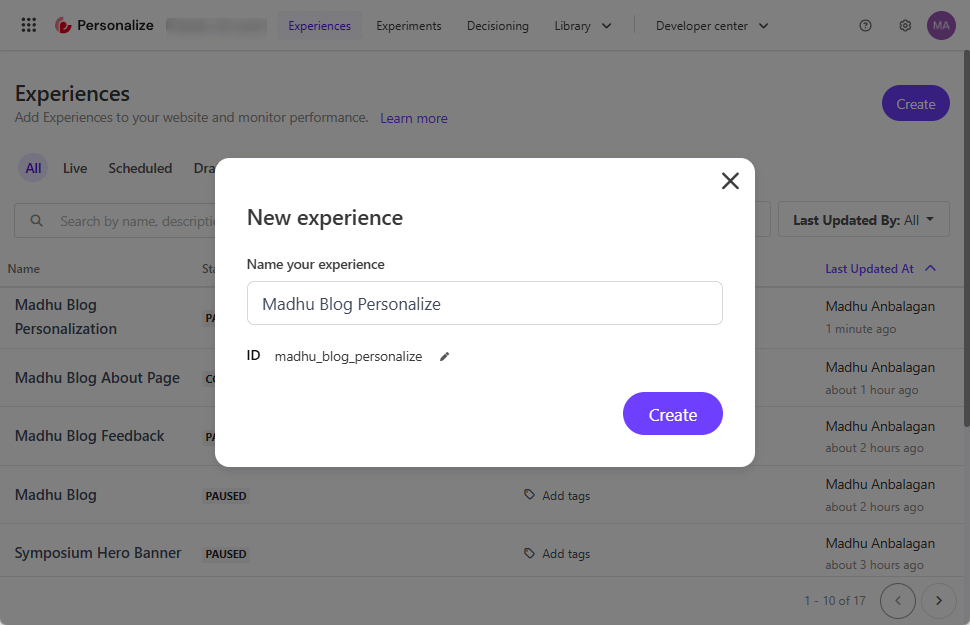
Create a Web Experience
In Sitecore Personalize, let’s navigate to the Experiences section and click Create New Experience.
Select from experience types such as:
Web Experience (e.g., personalized banners or pop-ups)
Interactive Experience (e.g., Chatbots, real-time API integrations)
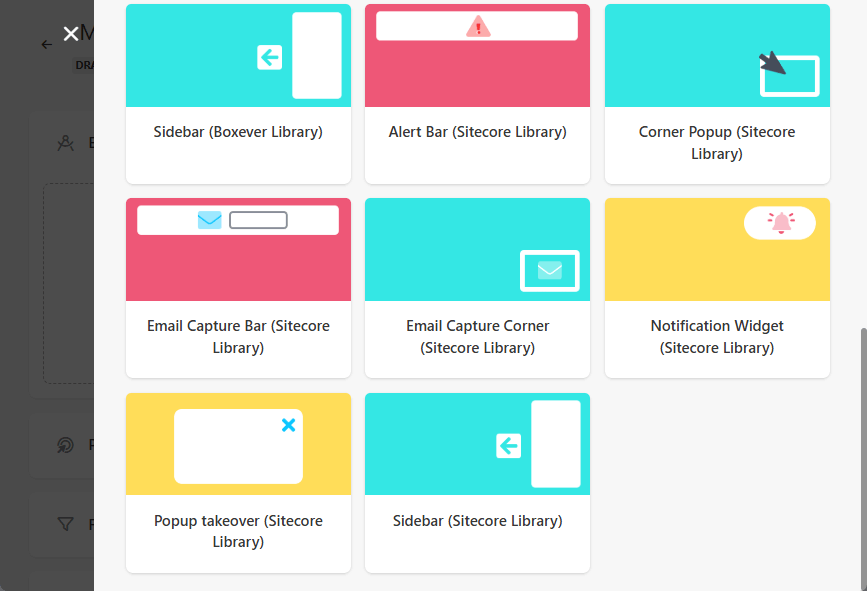
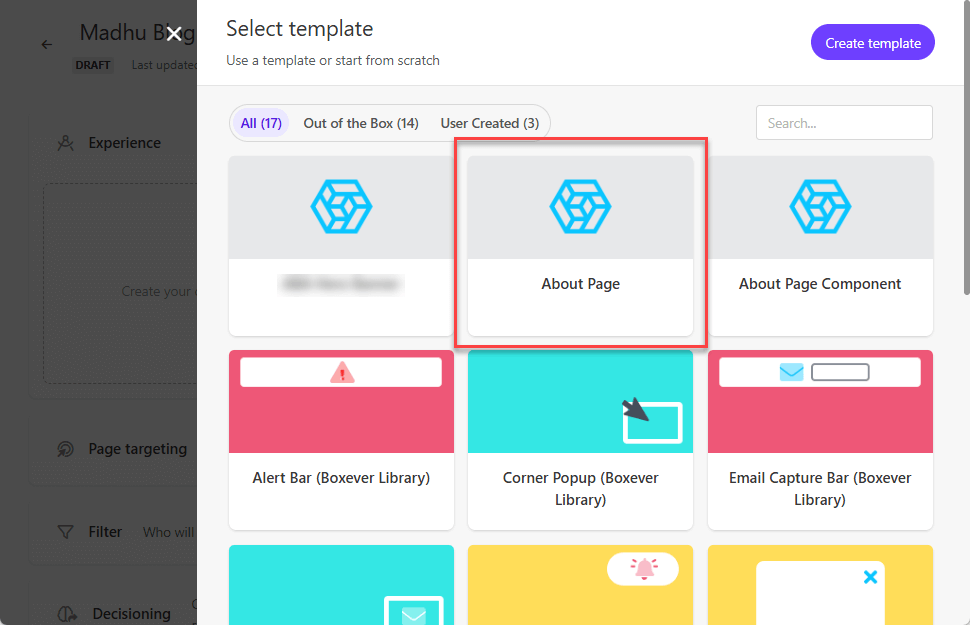
Sitecore Personalize offers 14 out-of-the-box (OOTB) templates for creating web experiences. These templates are designed to help you quickly set up and customize your web experiments and experiences without needing to write code. Here are some of the templates available:
Alert Bar (Boxever Library)
Corner Popup (Boxever Library)
Email Capture Bar (Boxever Library)
Email Capture Corner (Boxever Library)
Notification Widget (Boxever Library)
Popup takeover (Boxever Library)
Sidebar (Boxever Library)
Alert Bar (Sitecore Library)
Corner Popup (Sitecore Library)
Email Capture Bar (Sitecore Library)
Email Capture Corner (Sitecore Library)
Notification Widget (Sitecore Library)
Popup takeover (Sitecore Library)
Sidebar (Sitecore Library)
Select any of the out-of-the-box templates or custom web templates, if they have been created.
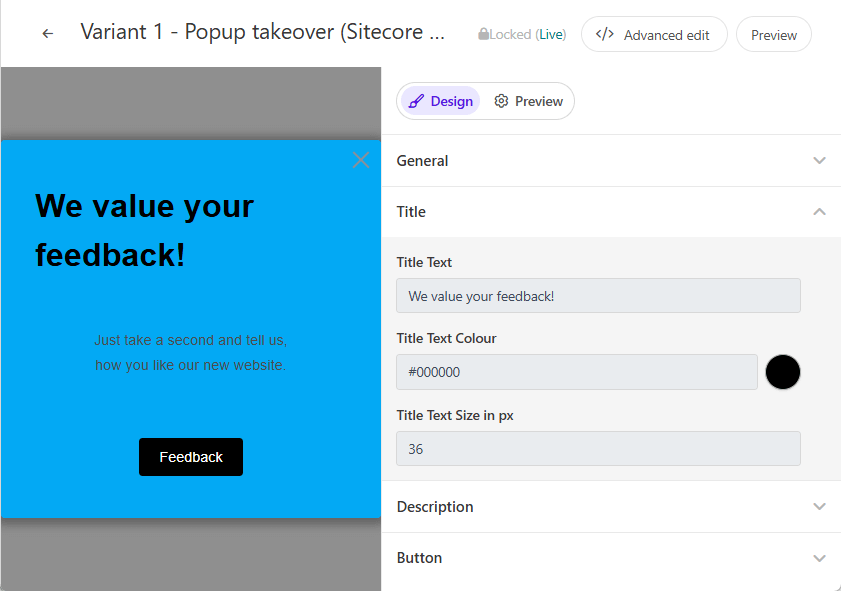
Let’s start to customize it. You have the option to use Advanced Edit for HTML, CSS, and JavaScript to enhance web templates.
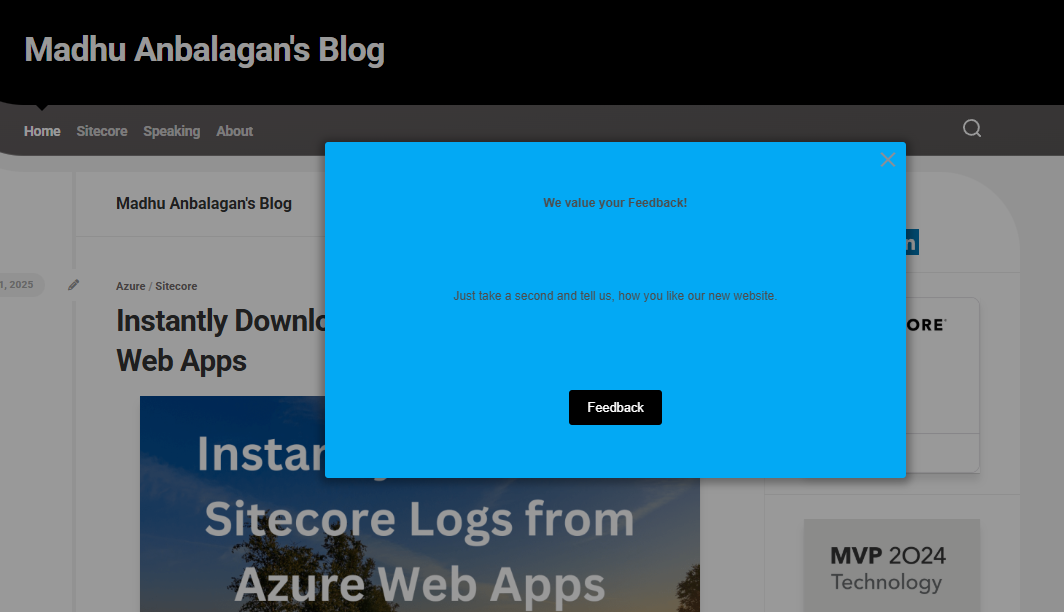
The final Popup looks like this – changed the following
Background color
Title
Description
Button Text
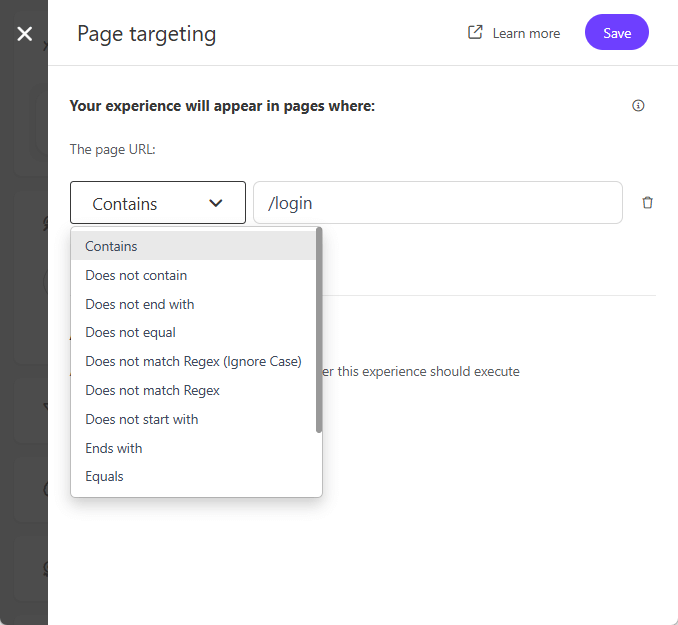
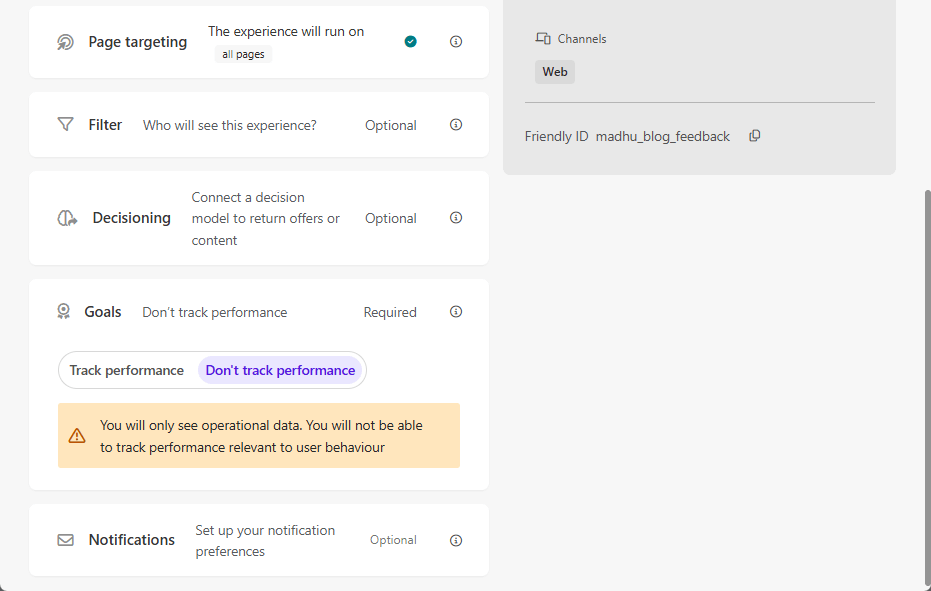
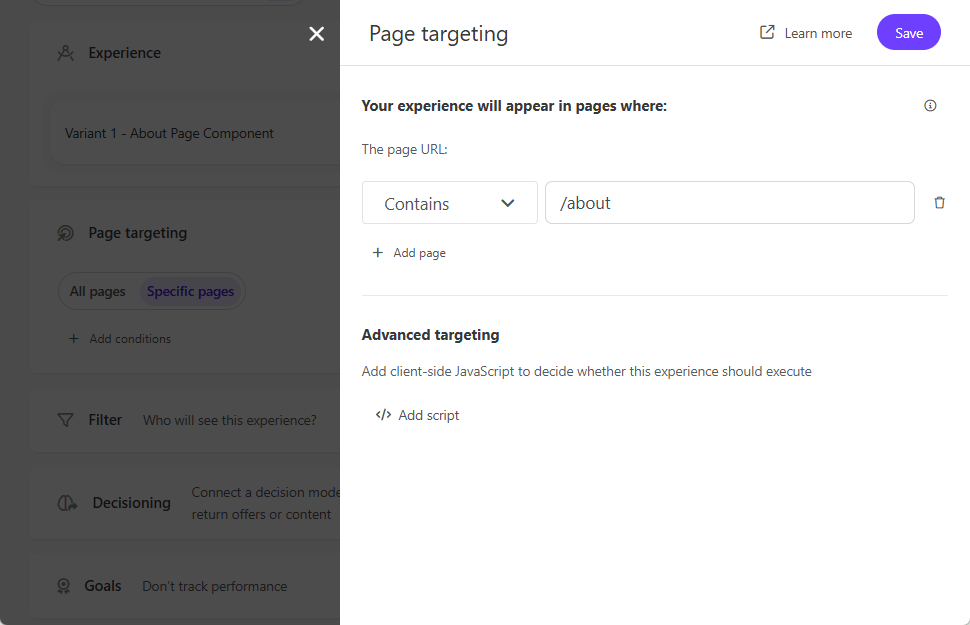
Page Targeting
I chose all the pages for simplicity.
If you like specific pages – add the condition for the page URL.
Goals
I chose not to track performance for testing purposes. Feel free to add any goal according to website needs.
Filter, Decisioning, and Notifications
They are optional, going to leave them as it is. The Decision Model is so powerful that, will be exploring it in upcoming blogs.
The preview isn’t working because the EngageSDK needs to be installed on the website. If you have EngageSDK installed on the website, feel free to skip the TamperMonkey part.
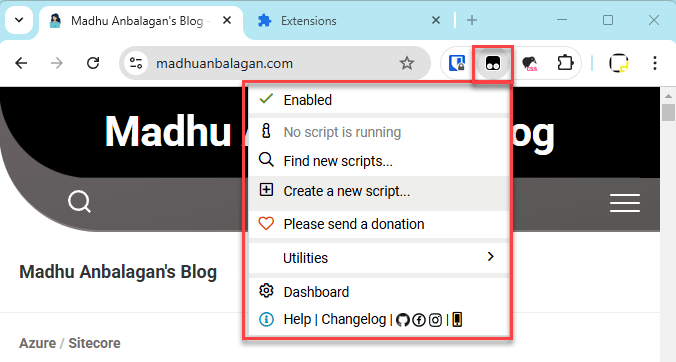
Now this is where the TamperMonkey plugin comes to the rescue to pre-load the Engage SDK on any website using Sitecore Personalize script.
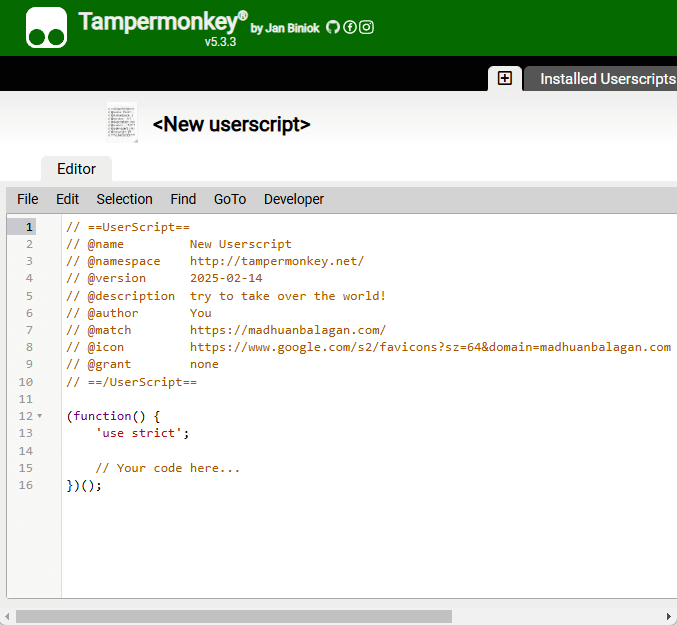
pointOfSale : <PoS that you have created for the site>
cookieDomain: <Website domain>
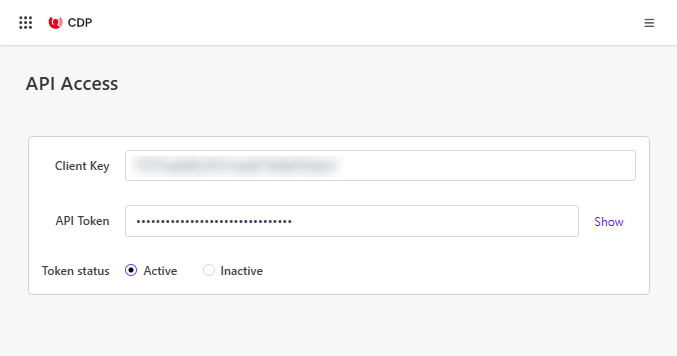
The clientkey is found in CDP->Settings->API Access
Let’s add the script to TamperMonkey and save it. The @name value determines how the script is named.
Now it should detect the script when you visit the website.
Live
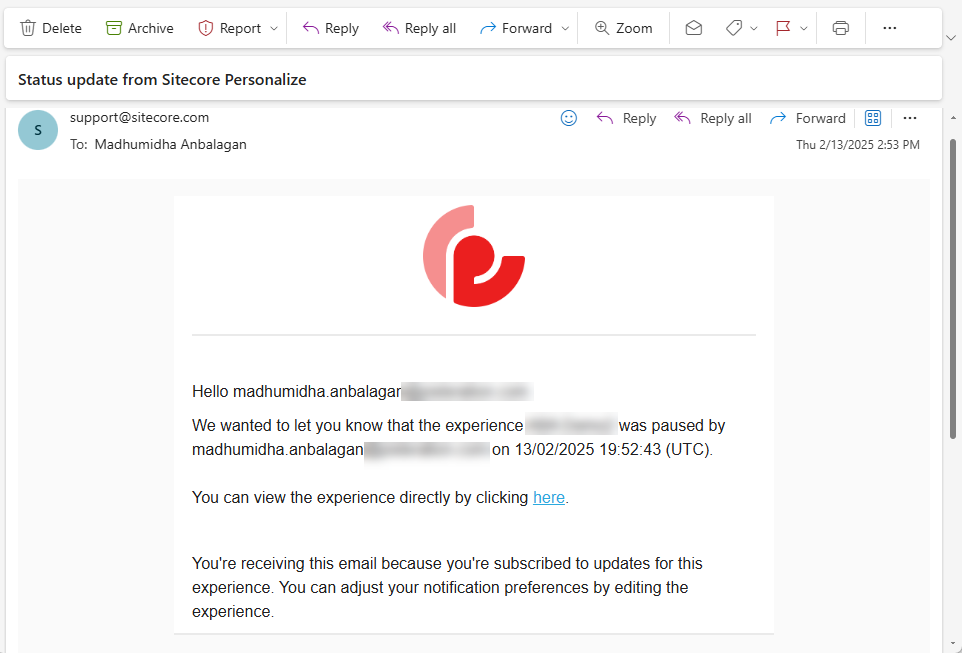
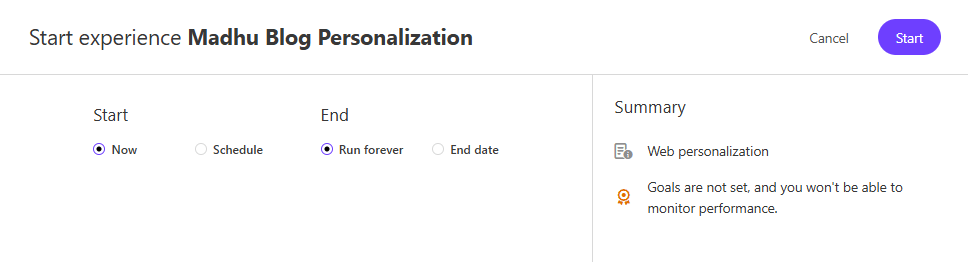
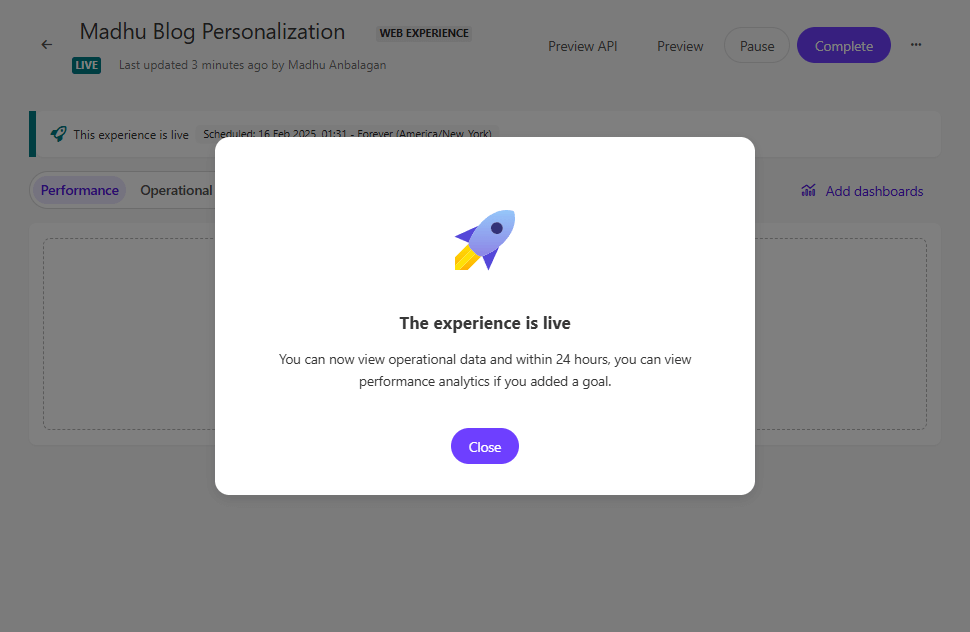
Let’s publish the Experience to make it live – If you have a notification set, it will email when it’s live, paused, etc.
The email notification is pretty helpful especially for Marketers to track their Experiences.
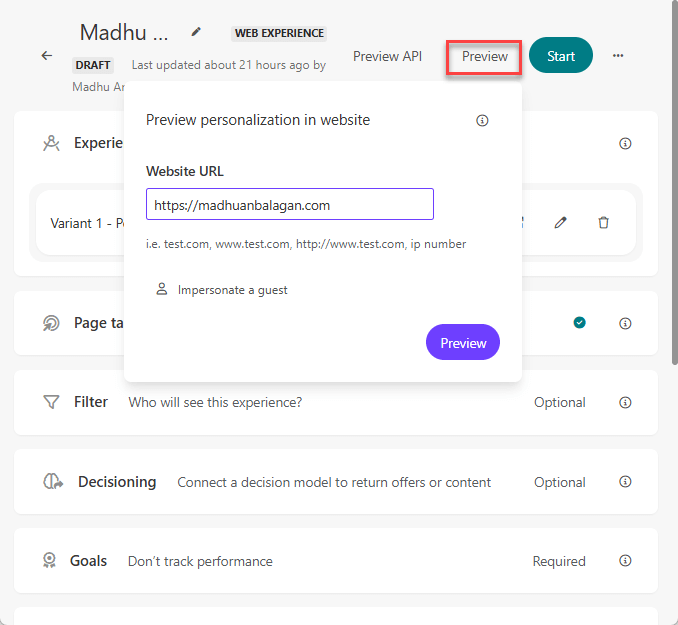
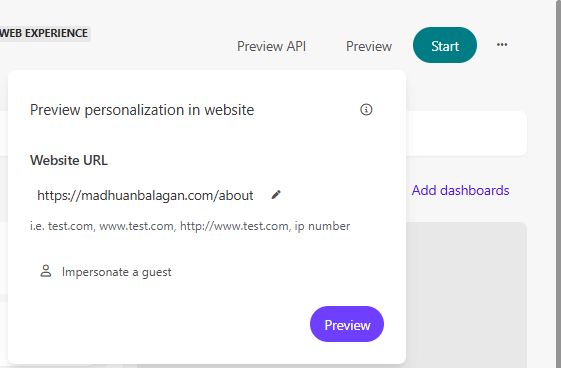
Preview
Let’s try the Preview – make sure to add a new script for the preview URL in TamperMonkey.
Let’s load the Preview with the page URL.
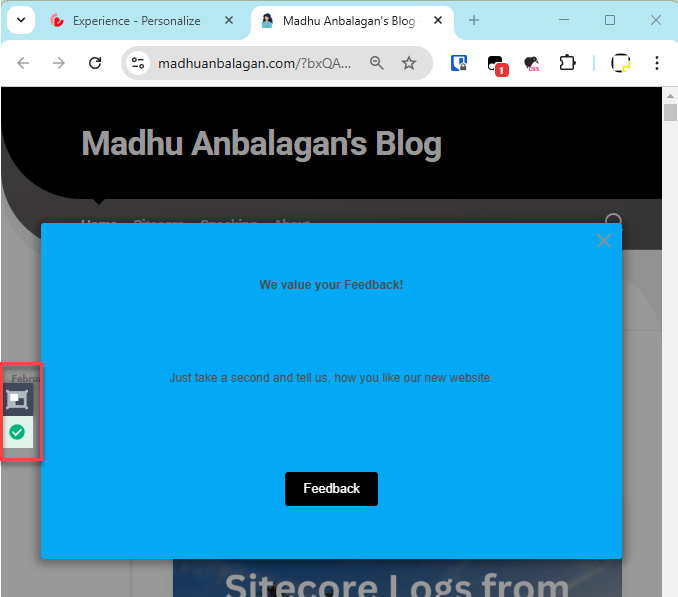
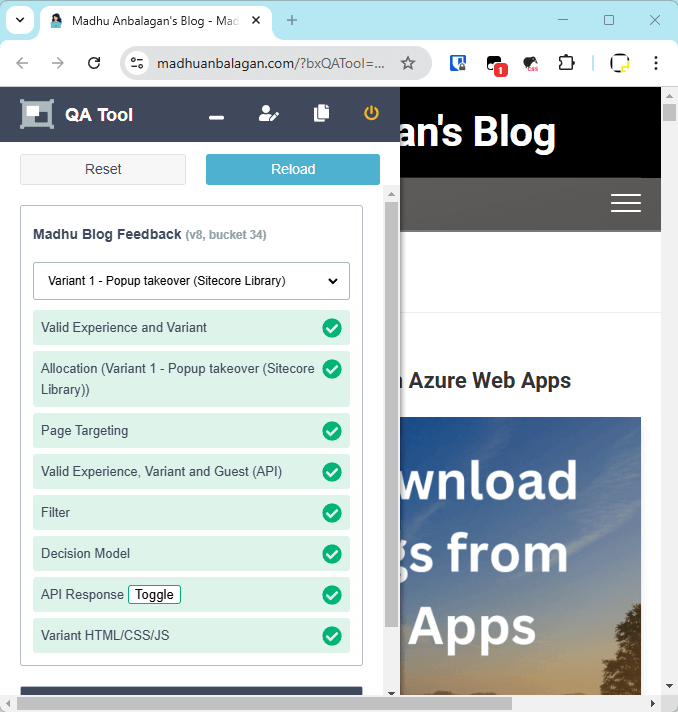
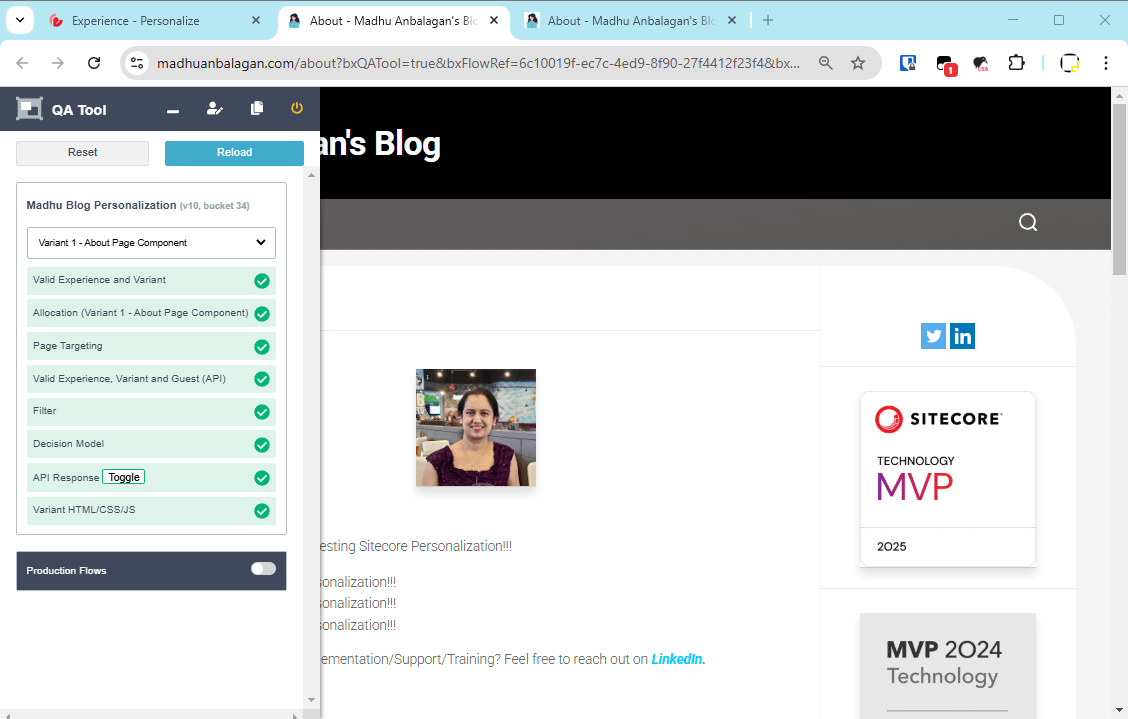
The Popup showed up and the QA Tool shows at the left side of the page.
QA Tool
The QA Tool shows the validation of everything. Feel free to change the variant to test different scenarios. It’s super helpful for troubleshooting any issues.
I came across a scenario where I needed to exclude the default value for dropdowns in Sitecore Forms. By default, dropdown fields in Sitecore Forms often preselect the first option, which might be a placeholder like “Select an option.”
If users submit the form without changing this value, it can lead to unreliable data. Custom validation helps enforce user interaction, ensuring the selection is meaningful.
Steps to Implement Custom Validation in Sitecore Forms
Step 1: Create a Custom Validator
Navigate to your Sitecore solution and open the project where Sitecore Forms is configured.
Create a new class that extends FormConditionalValidatorand override the validation logic.
Step 2: Register the Validator in Sitecore
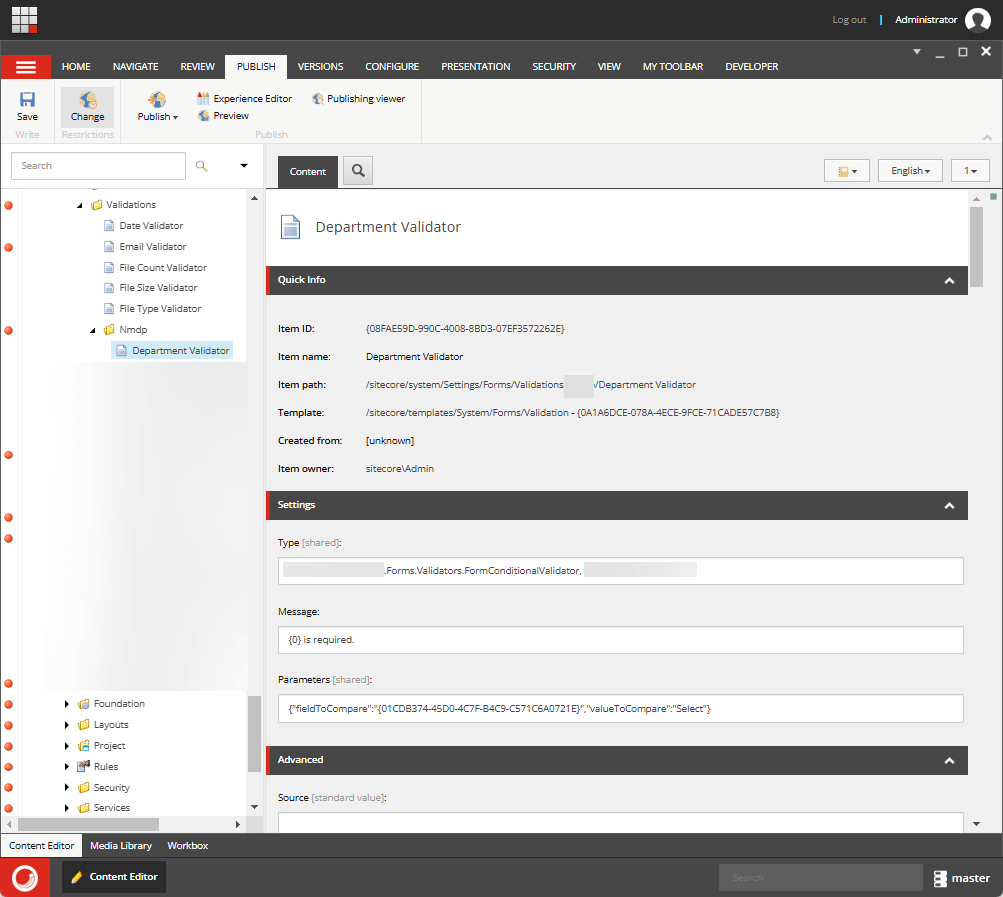
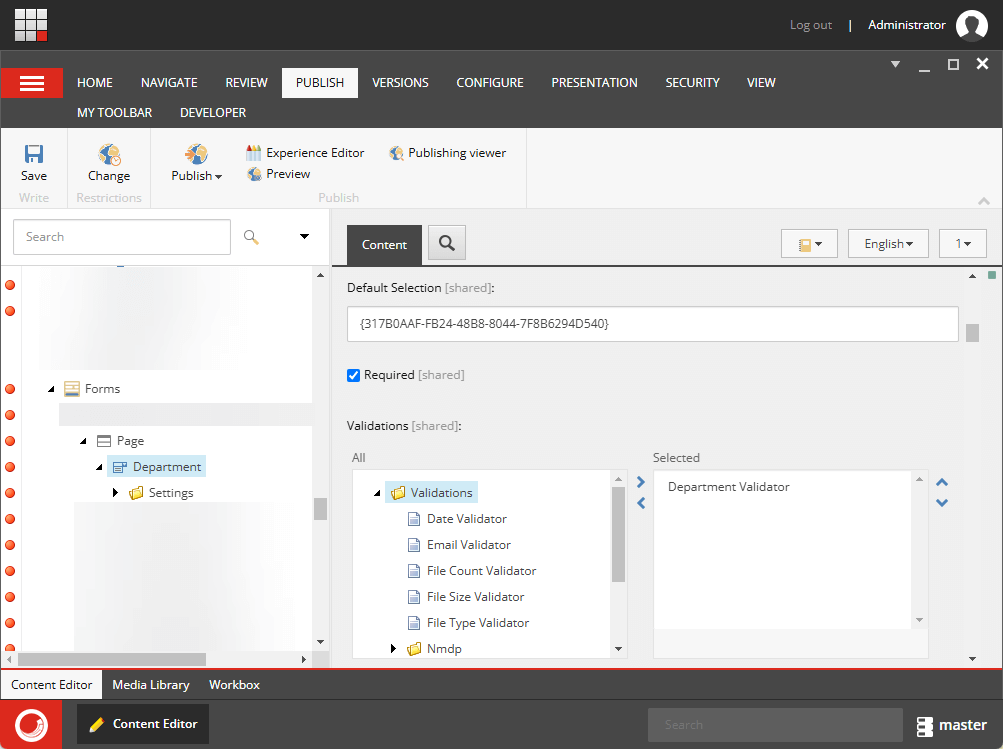
Open Sitecore Content Editor and navigate to: /sitecore/system/Settings/Forms/Validation
Create a new validation item:
Name: Department Validator (Change it according to Project needs)
Type: Reference the class you created, e.g., Custom.Validators.DropdownDefaultValueValidator, CustomAssembly
Sitecore PowerShell Extensions (SPE) (Huge thanks to Michael West, Adam Najmanowicz, and contributors) is a robust module that adds the power of PowerShell scripting to the Sitecore platform.
It empowers Sitecore developers and administrators to automate repetitive tasks and extend Sitecore’s functionality with custom scripts.
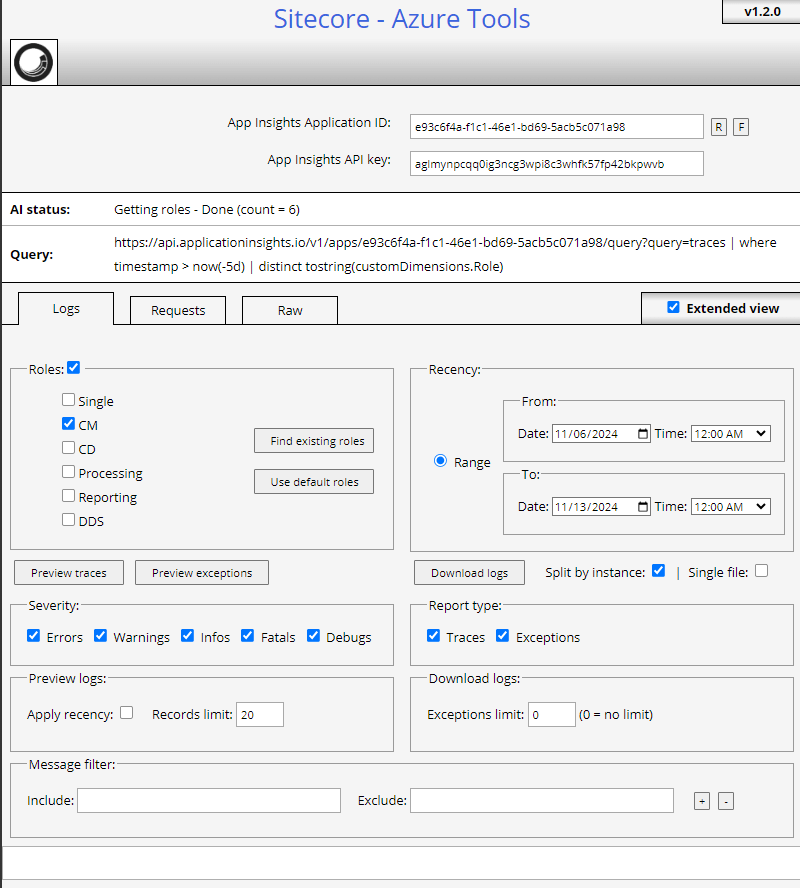
Downloading Sitecore Logs from Azure Web Apps wasn’t easy. To troubleshoot any issues, I used to spend decent time trying to find recent logs.
AzureTools (Thank you Sitecore Community – You are simply awesome!) comes to the rescue. It’s a simple .aspx page that can be dropped into CM environments and download logs in just seconds.
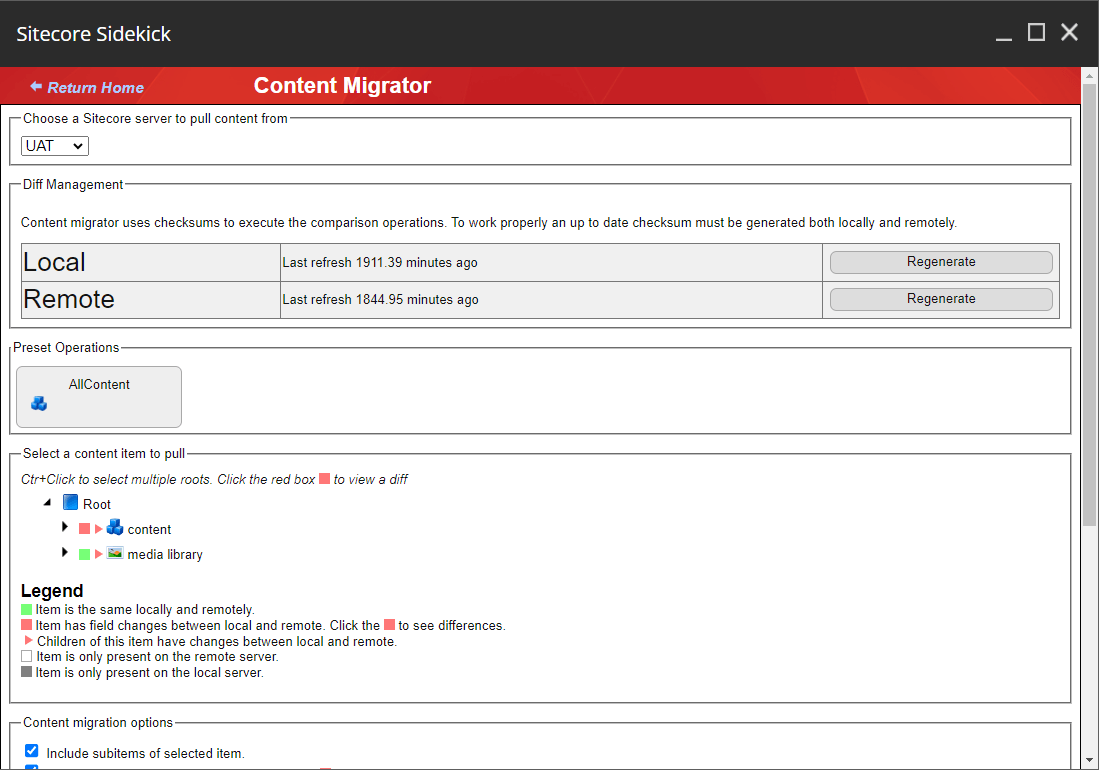
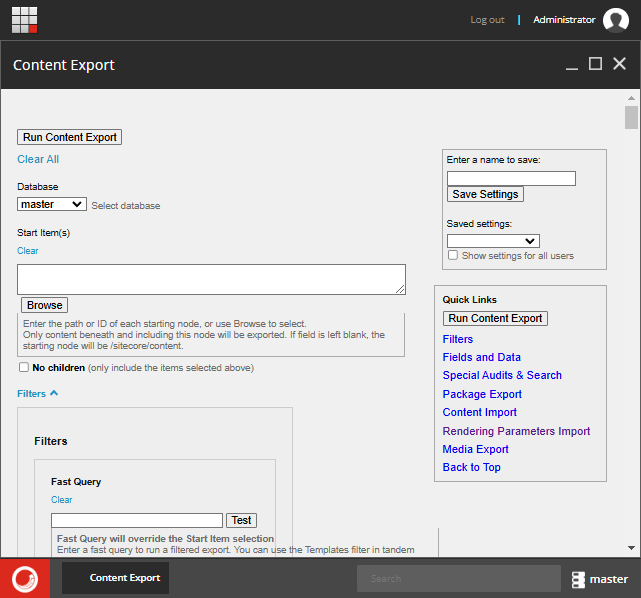
The Sitecore Content Export Tool(many thanks to Erica Stockwell-Alpert) is a powerful utility designed to streamline the process of exporting content from your Sitecore instance.
It enables developers, content authors, and administrators to easily extract content in bulk, simplifying tasks like data migration, content backups, or sharing content across environments.
The Sitecore Log Analyzer (SCLA) (Sitecore Community Rocks!) is a powerful tool designed to help Sitecore developers analyze and interpret log files with ease.
It simplifies the process of identifying issues, tracking errors, and monitoring system performance by providing a user-friendly interface to view and filter Sitecore logs.
This ClickOnce installer sets up the application and enables automatic updates. After installation, the app can be launched from the Start menu or pinned to the taskbar for easy access.
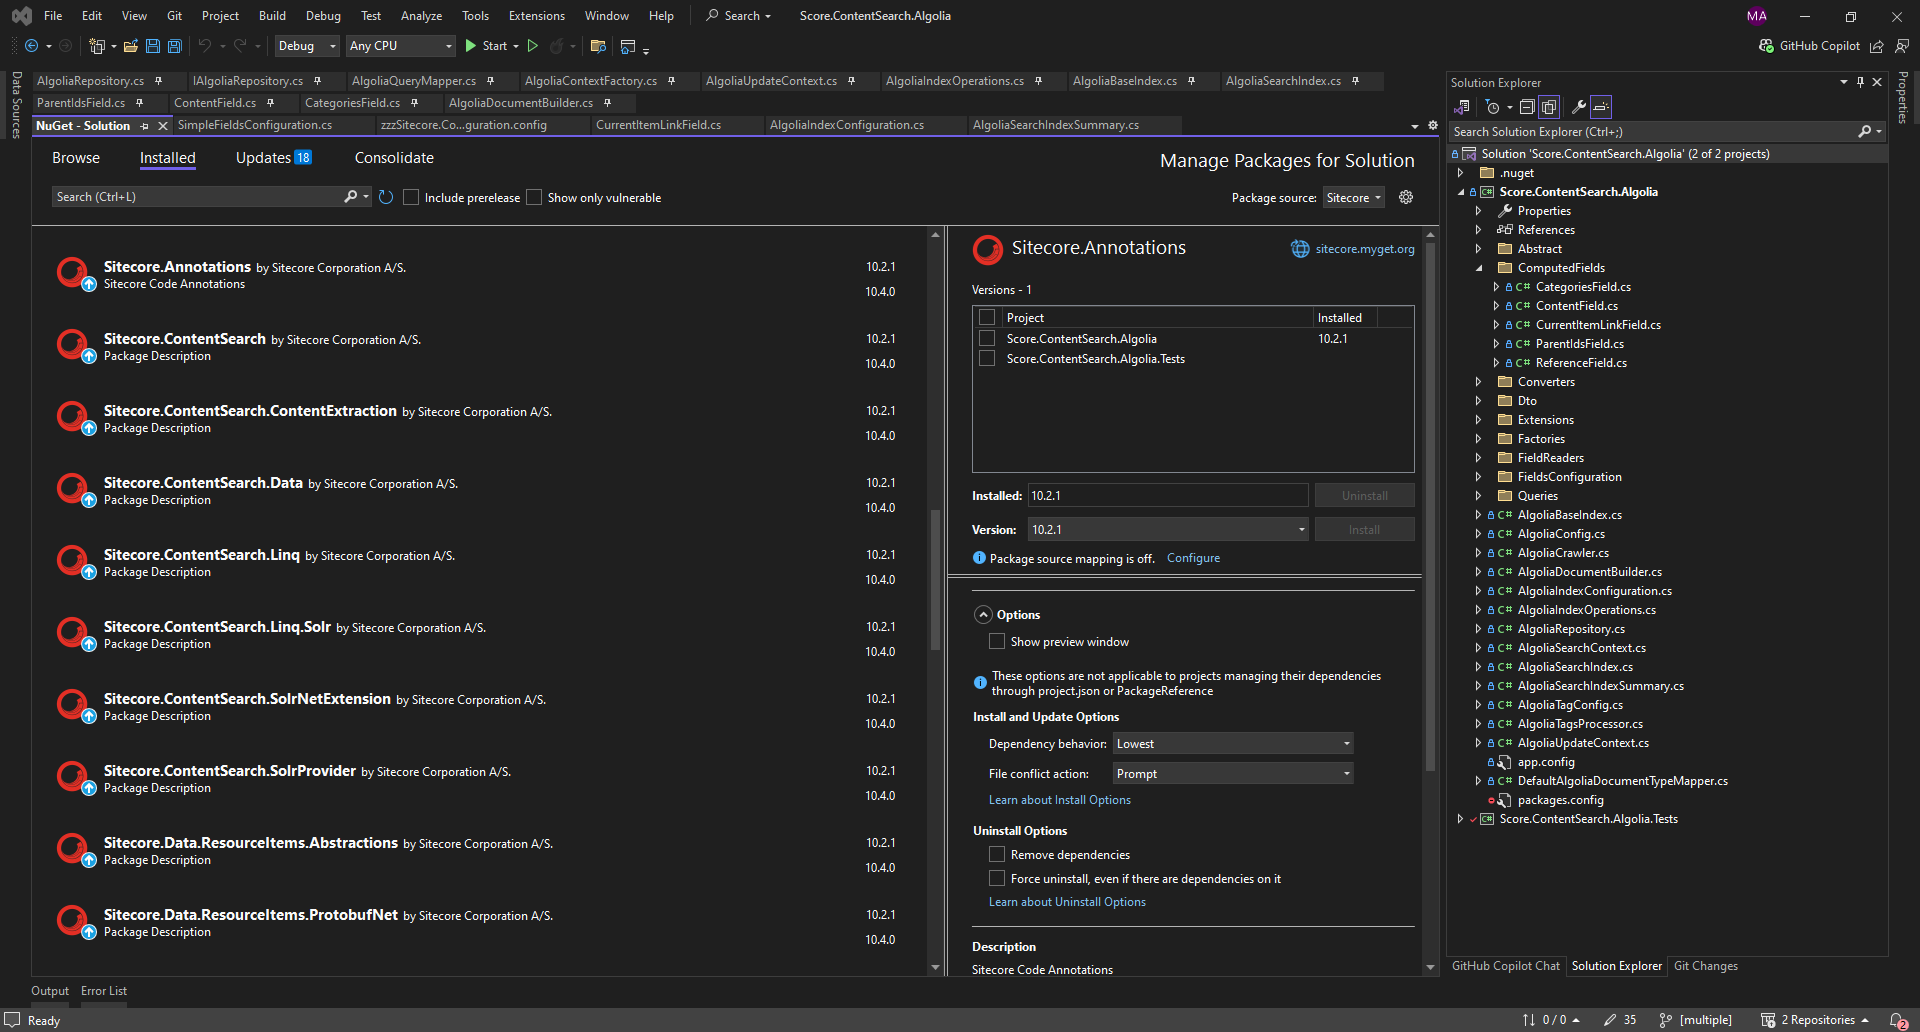
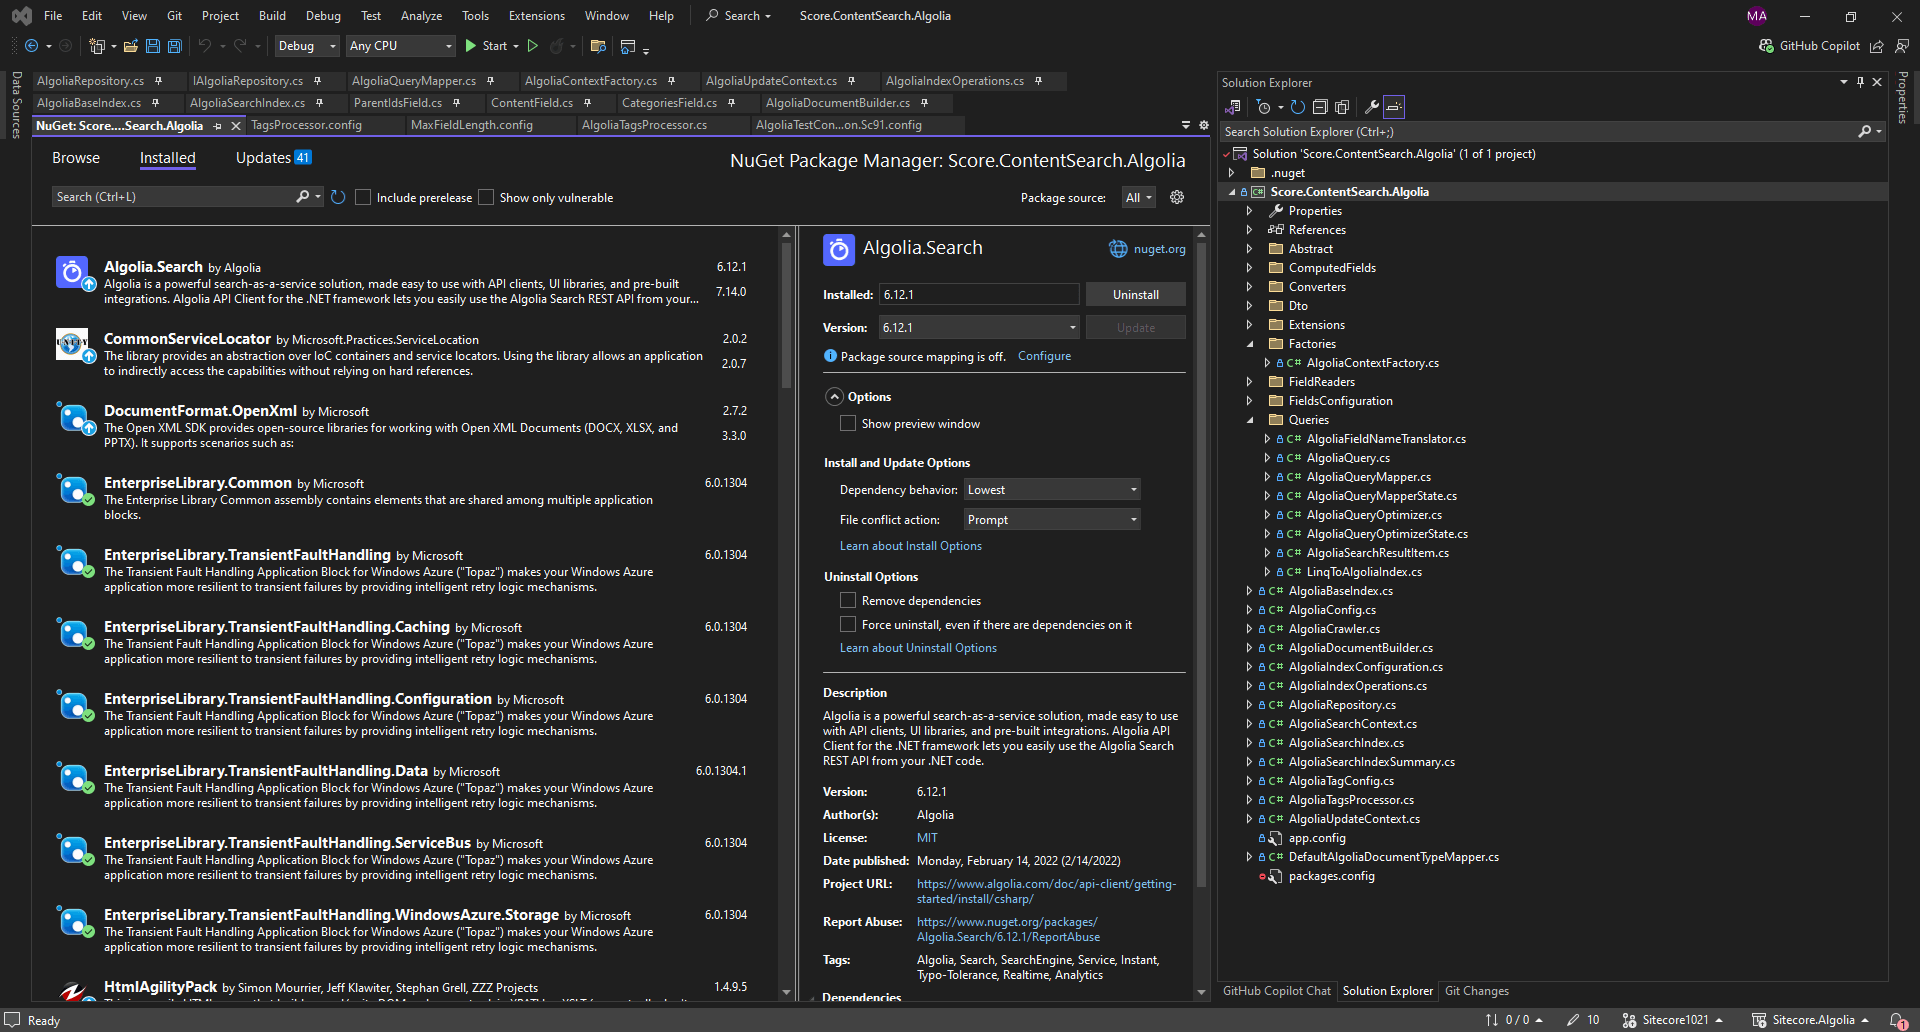
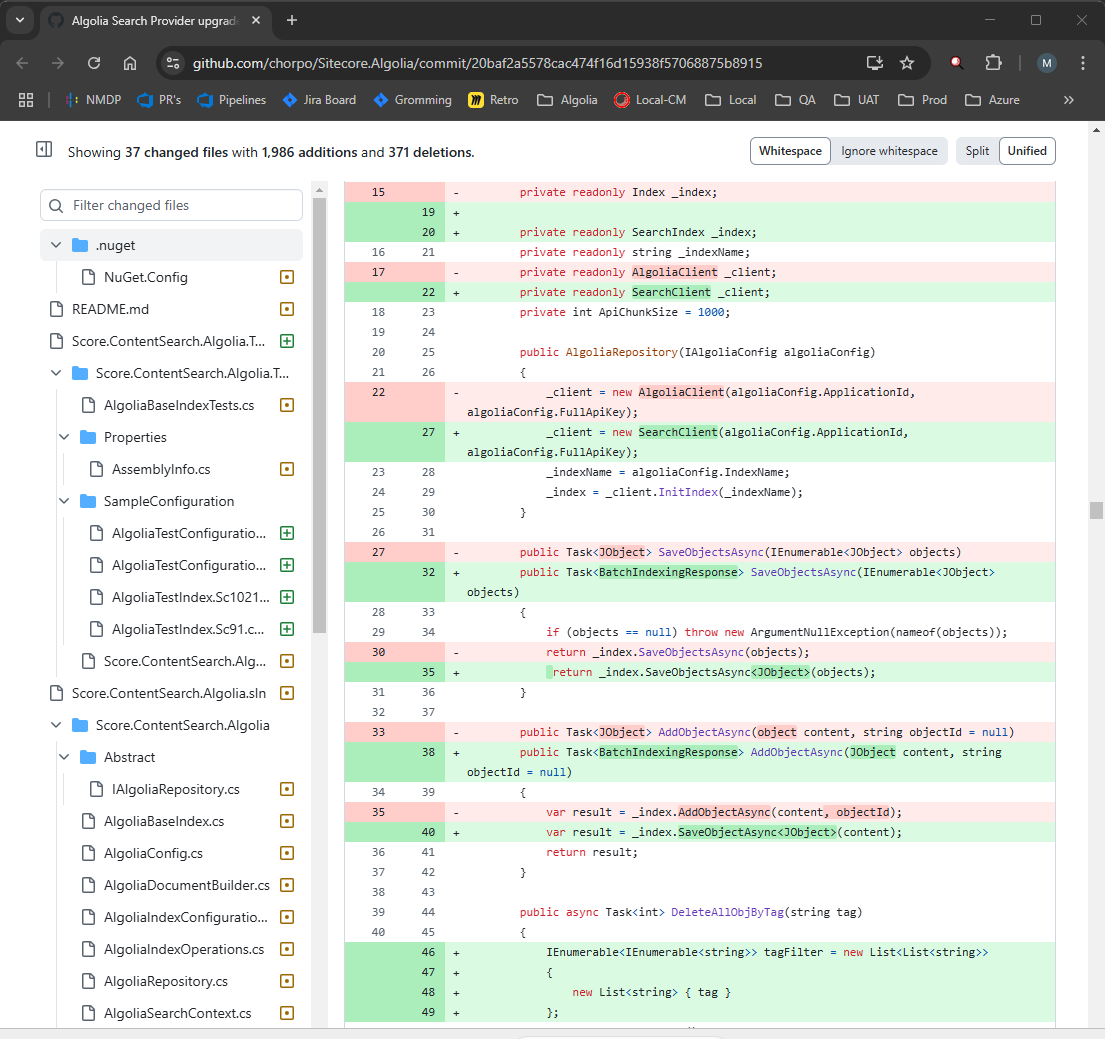
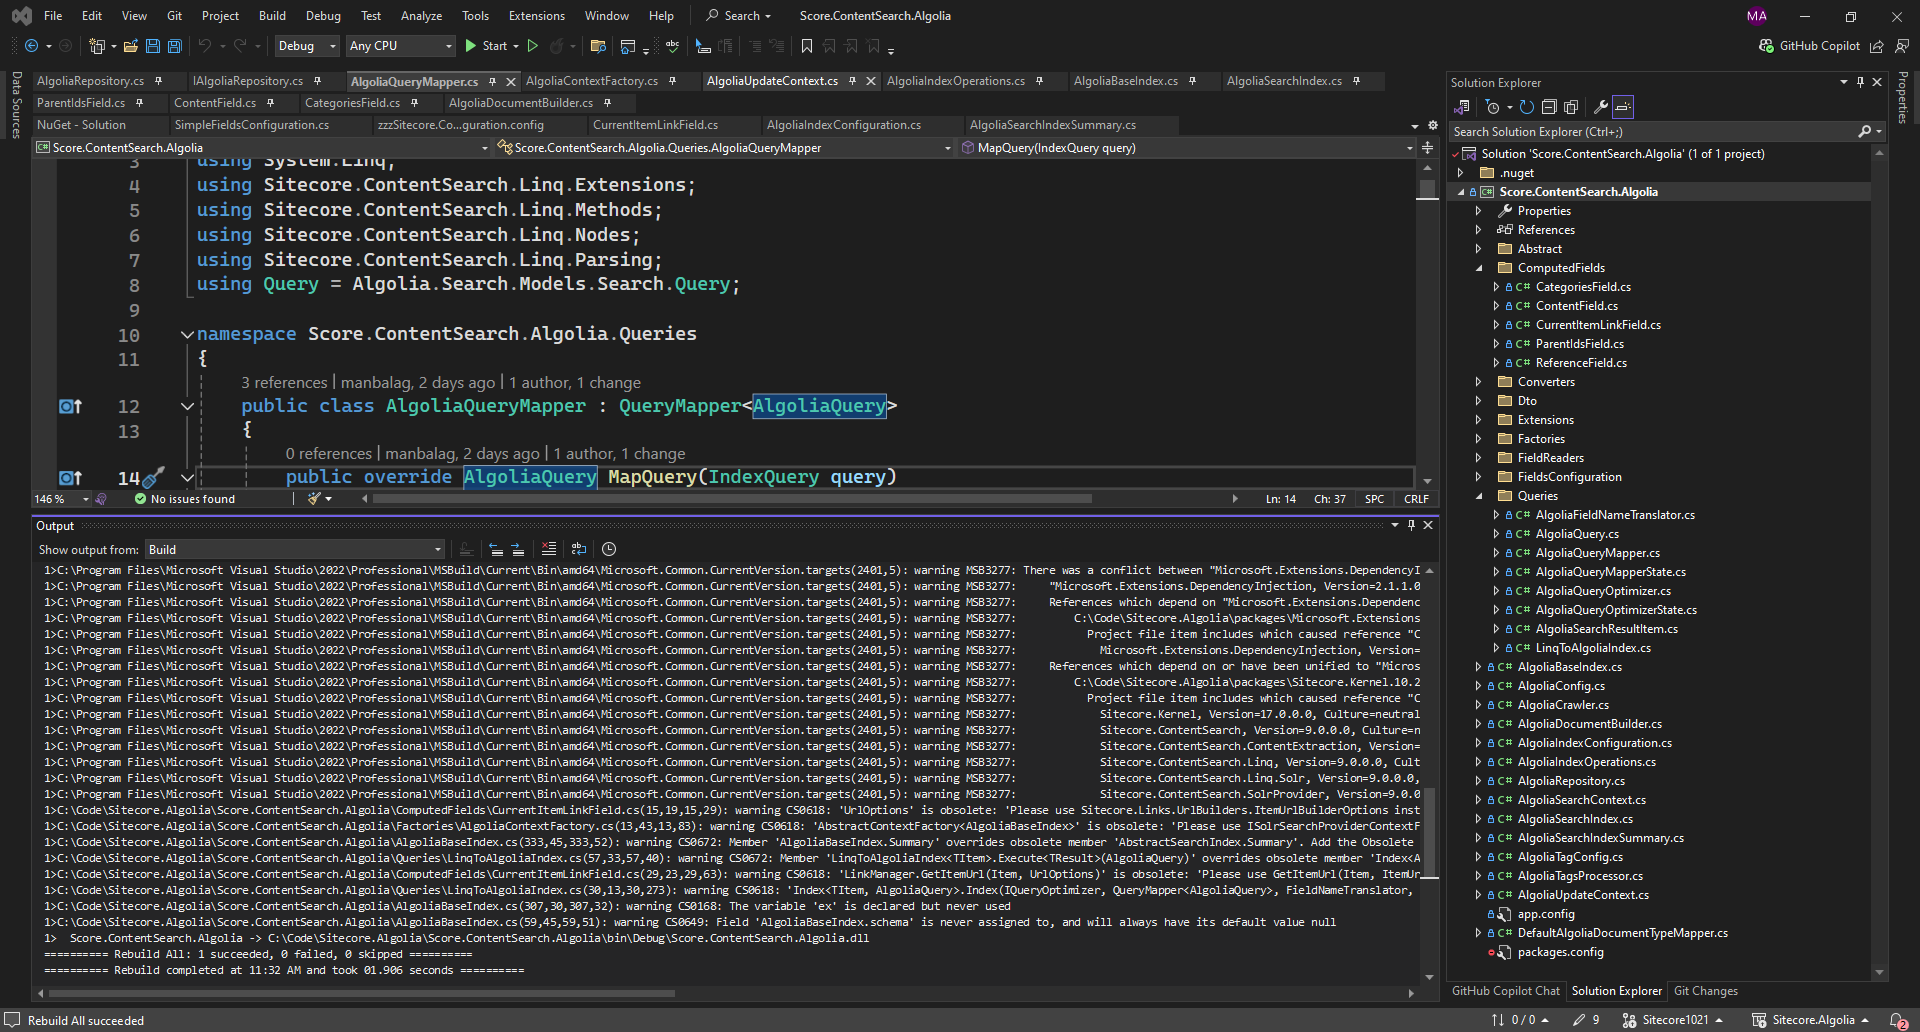
The Algolia Search Provider for Sitecore is a powerful integration combining robust content management capabilities with Algolia’s lightning-fast, full-text search engine.
This provider enables Sitecore-driven websites and applications to deliver instant, relevant, and highly customizable search experiences to end-users, ensuring faster content discovery and improved user engagement.
While exploring, I found that Dmitry Harnitski and Peter Procházka have implemented the Algolia Search Provider for Sitecore 9.1 and previous versions. Thank you so much!
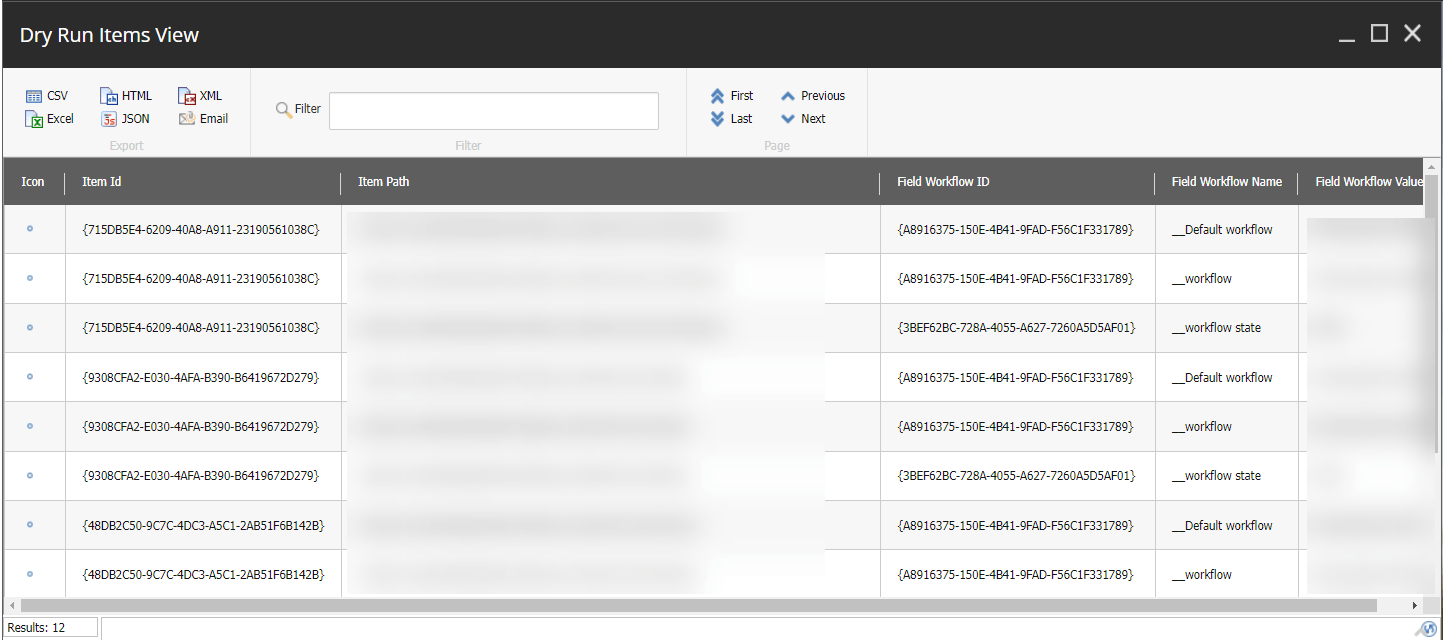
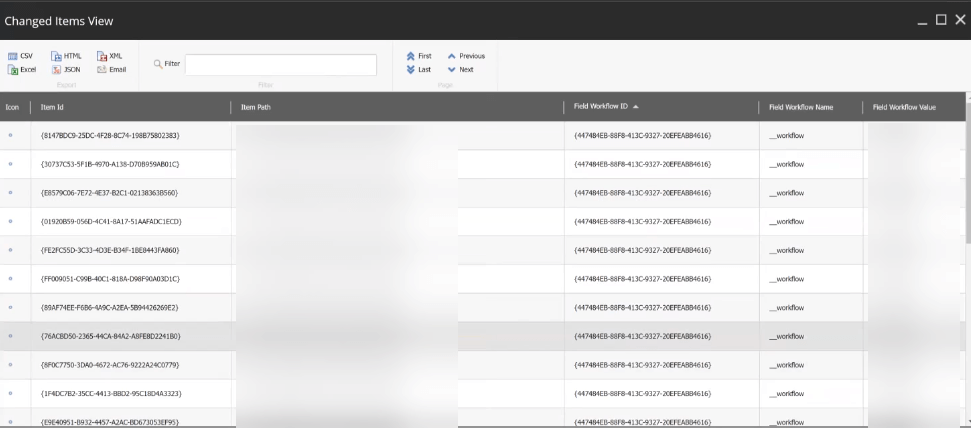
I was working on Sitecore SXA 10.3.1 and the workflow was somehow messed up.
Manually modifying can be time-consuming and error-prone. Sitecore SPE is a powerful tool that allows for efficient modification of content in bulk through find and replace text functionality.
In this article, we will explore the steps of using Sitecore SPE to quickly and easily bulk update workflow, streamlining the process, and saving time.
Dry-Run Script:
Running the script won’t make any changes to items, it will give the items that are going to be modified.
I’ve been delving deeper into Sitecore Personalize and have discovered how to incorporate its custom Web Templates into the website.
Let’s dive into the process of creating custom Web Templates and how to utilize them in Web Experiences.
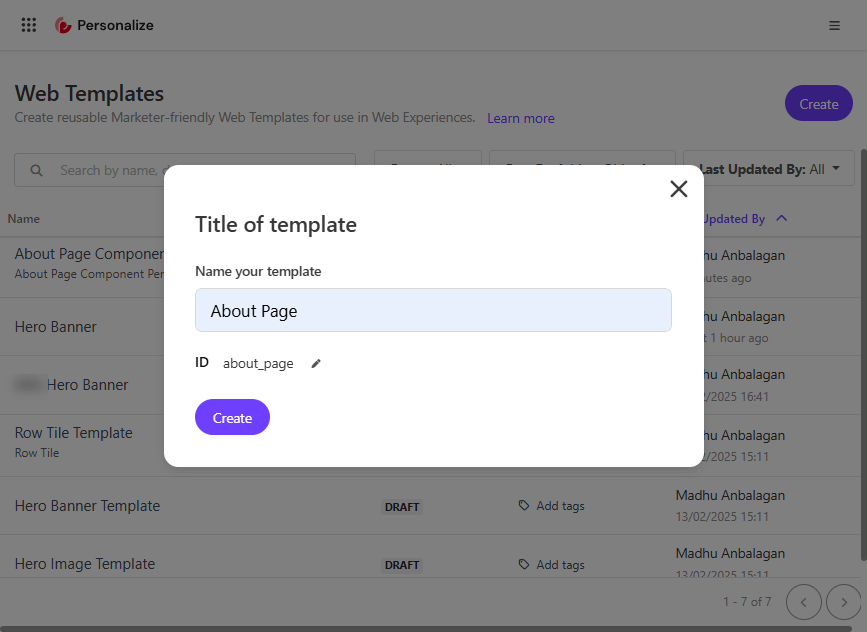
Create Web Template
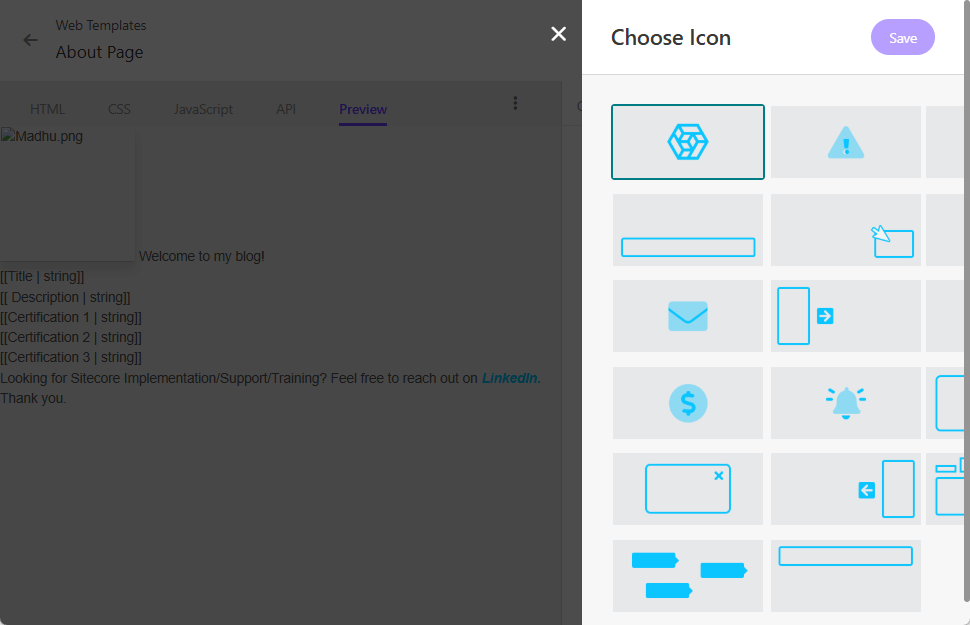
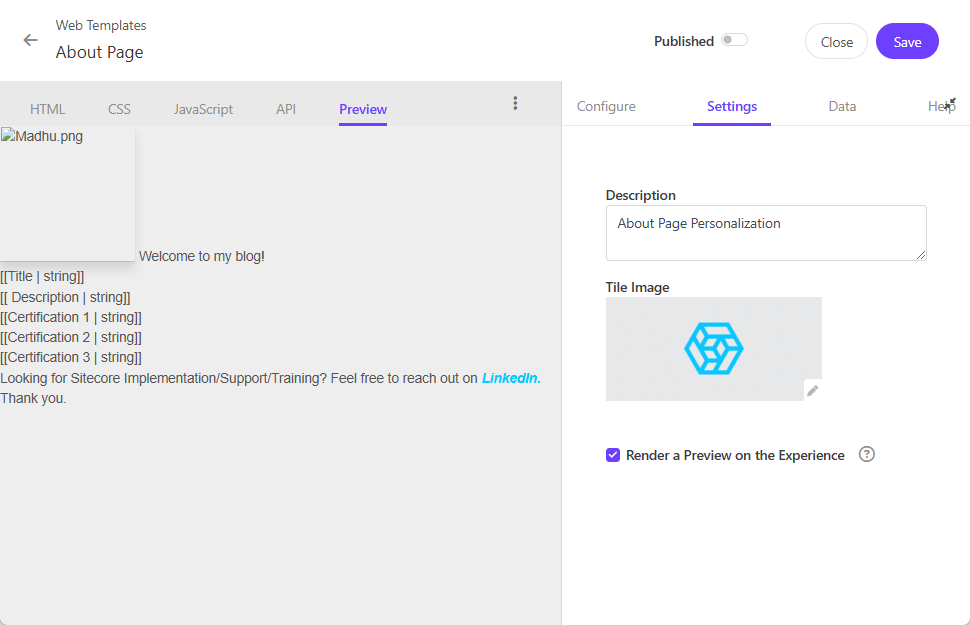
Let’s navigate to Web Templates in Sitecore Personalize and create it.
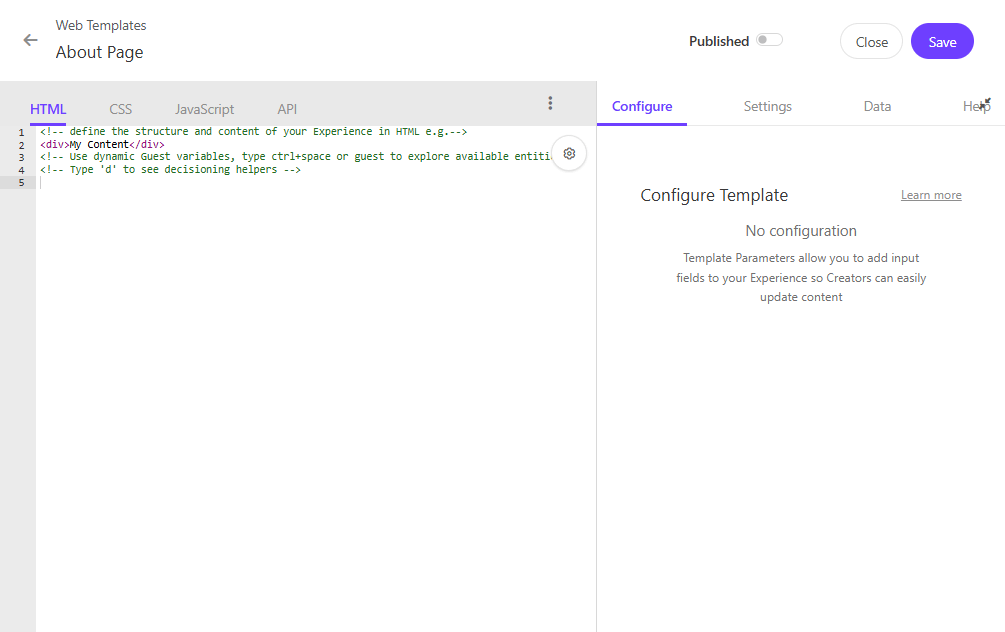
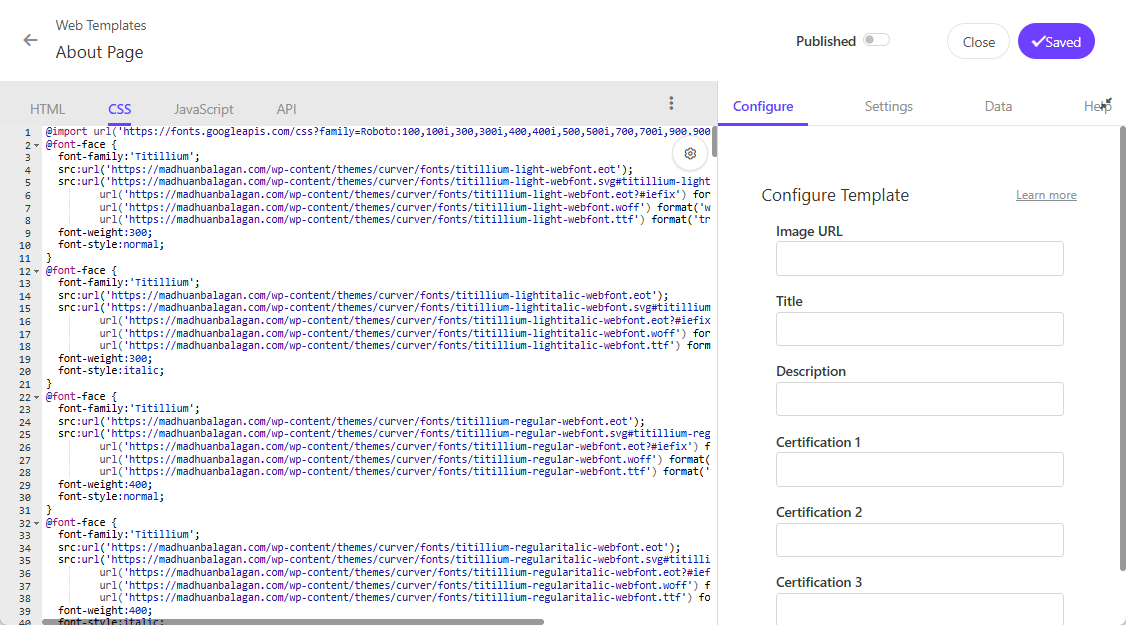
The Web Templates have the high flexibility of HTML, CSS, JavaScript, and API tabs to configure.
HTML: Define the structure and content of your web template. This is where you can create the basic layout and elements that will be displayed on your website.
CSS: Style your web template to match your brand’s look and feel. You can add custom styles to ensure that the template is visually appealing and consistent with your website’s design.
JavaScript: Add interactivity and dynamic behavior to your web template. JavaScript allows you to create engaging user experiences by adding features like animations, form validations, and more.
API: Configure API responses to integrate with your organization’s data.
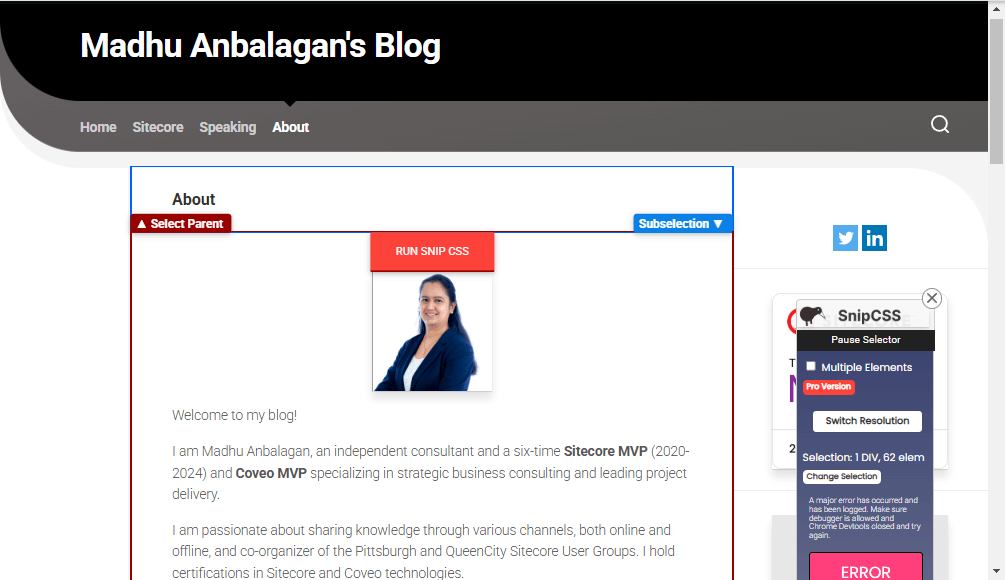
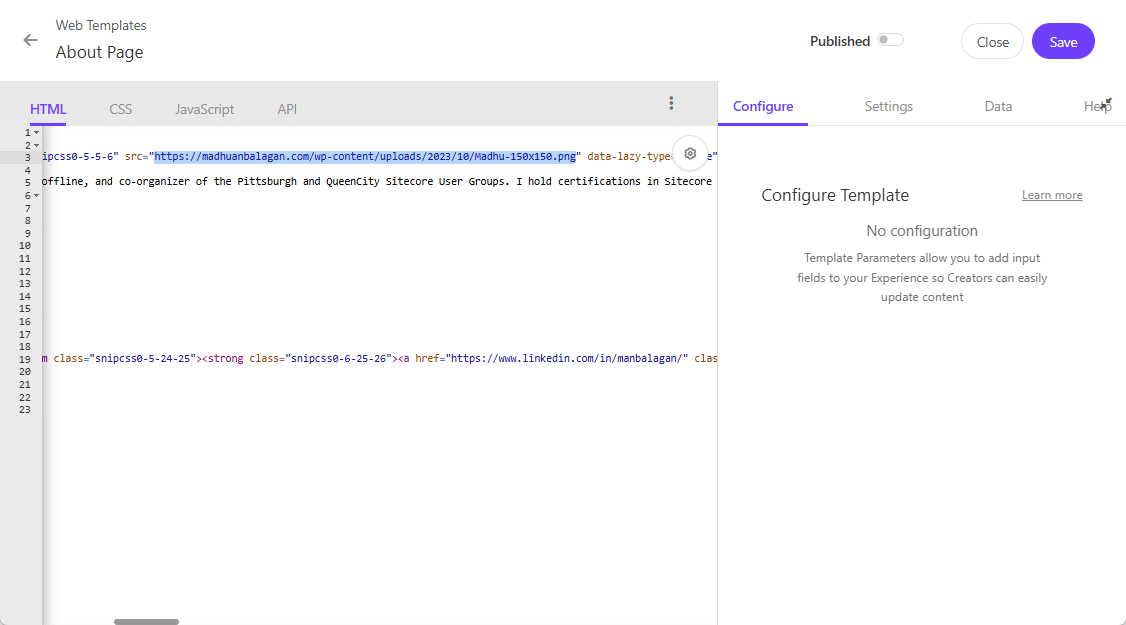
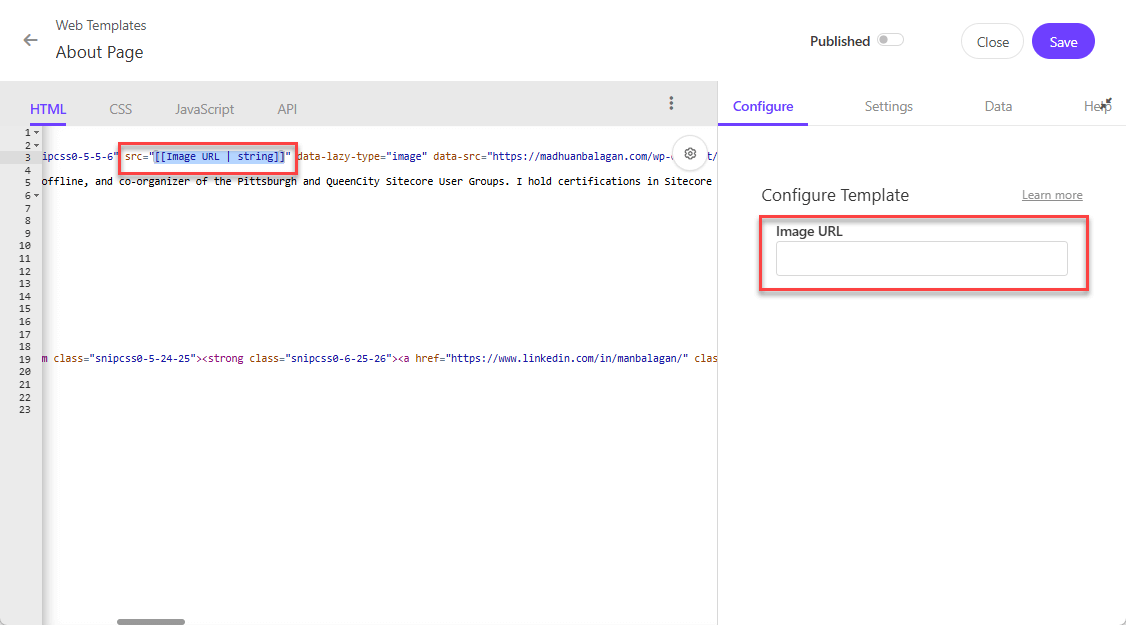
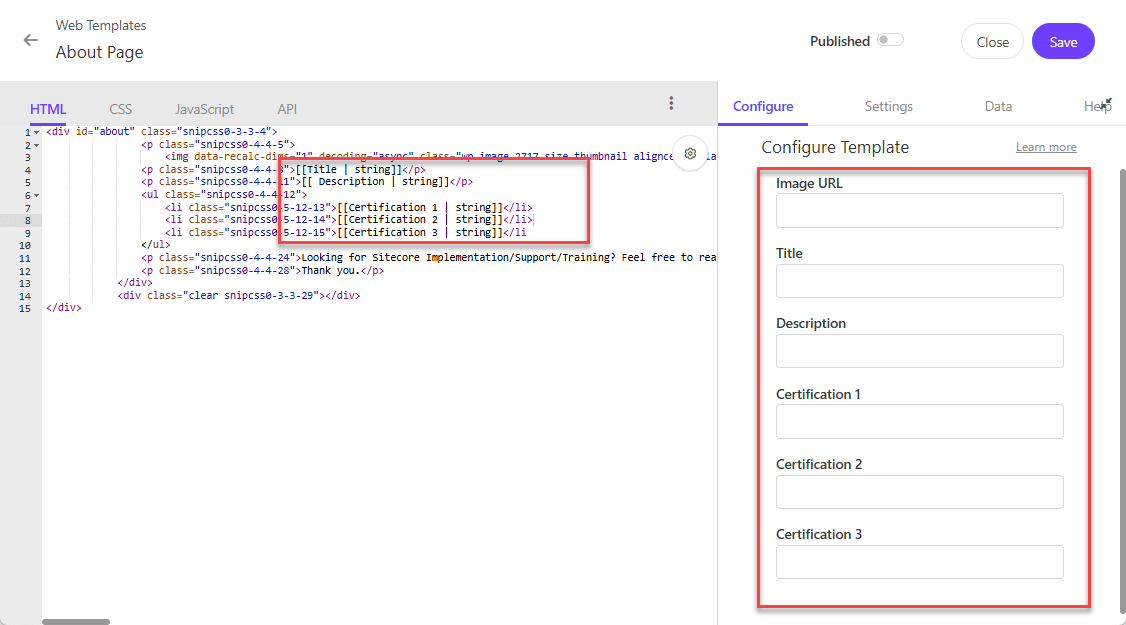
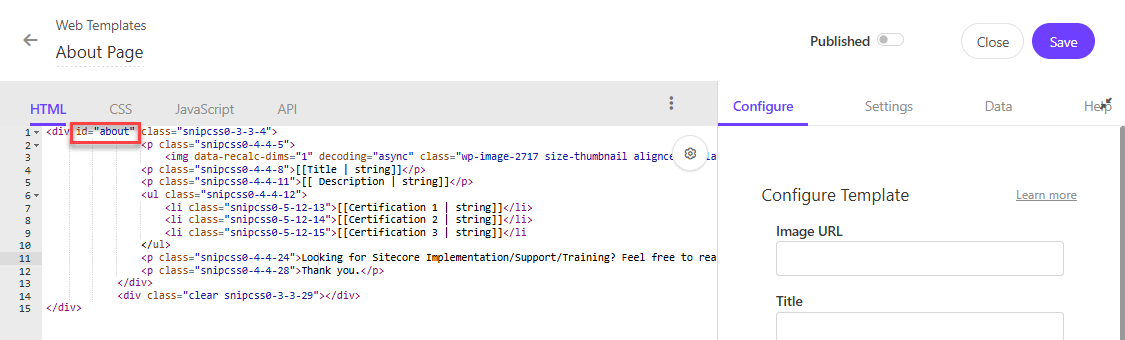
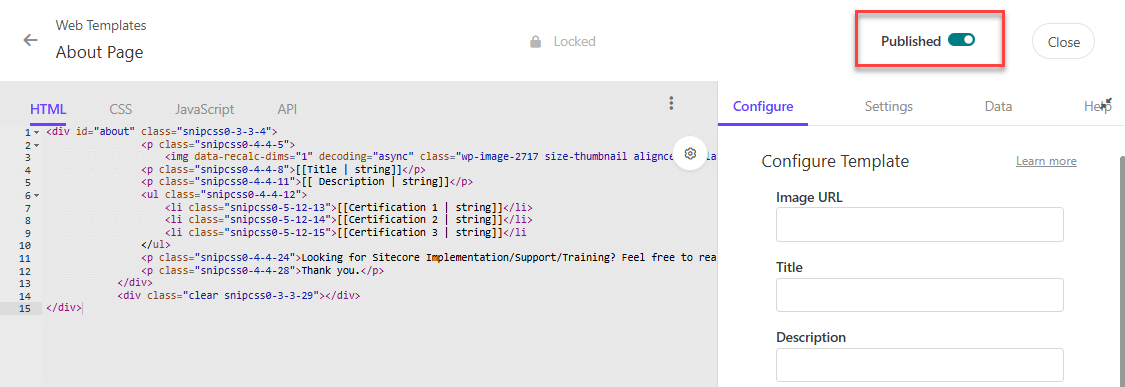
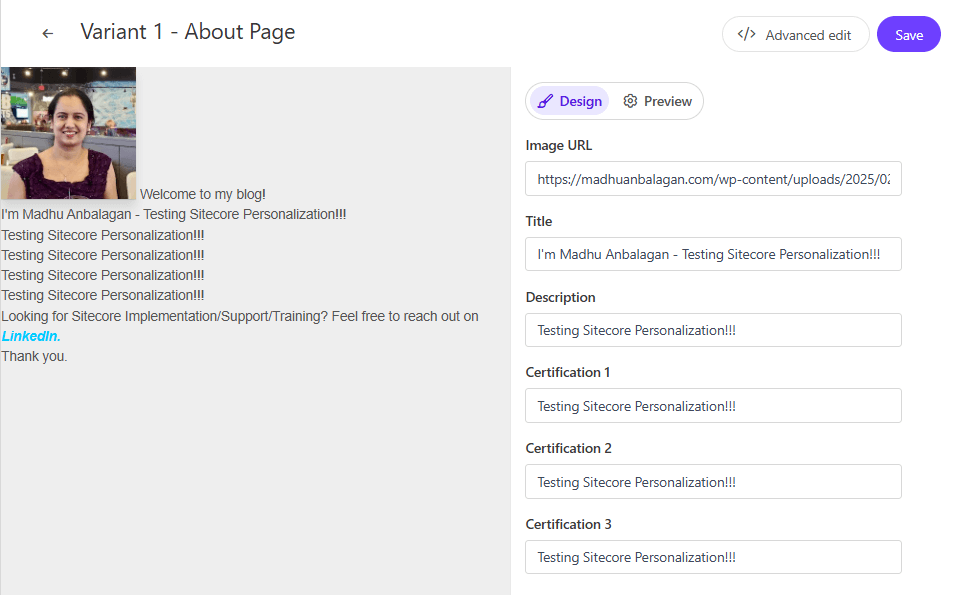
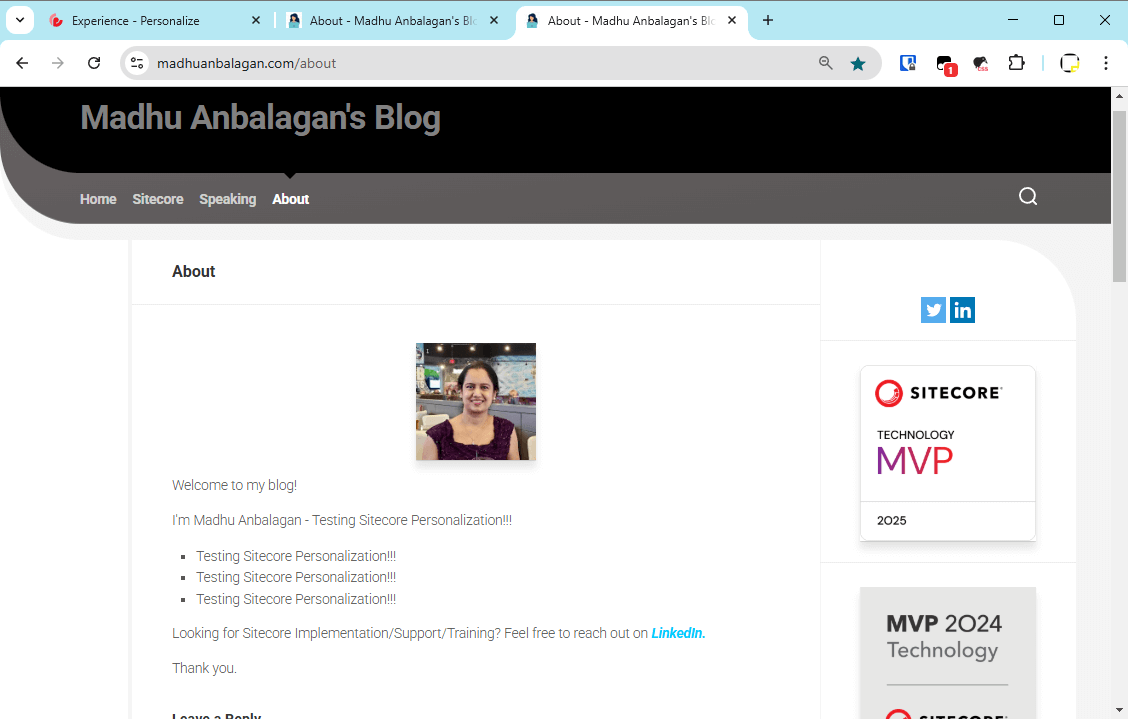
To build the custom web template, let’s say I want to Personalize the About page of my blog.
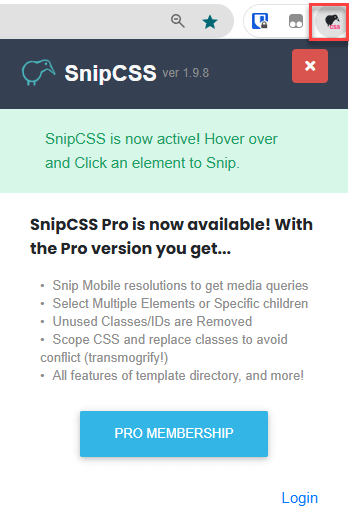
To create HTML and CSS, we don’t need to dive into the code. A tool called SnipCSS can turn any section of the website into a reusable component.
SnipCSS
SnipCSS is a powerful tool designed to help web developers extract CSS and HTML snippets from any web element or widget. The main key feature is extracting all HTML, images, and CSS with a single click.
Create a separate Authorization in the Identity Server for Forms
Create a Controller to bridge between Custom Submit Action and API call
Set the Custom Submit Action fields
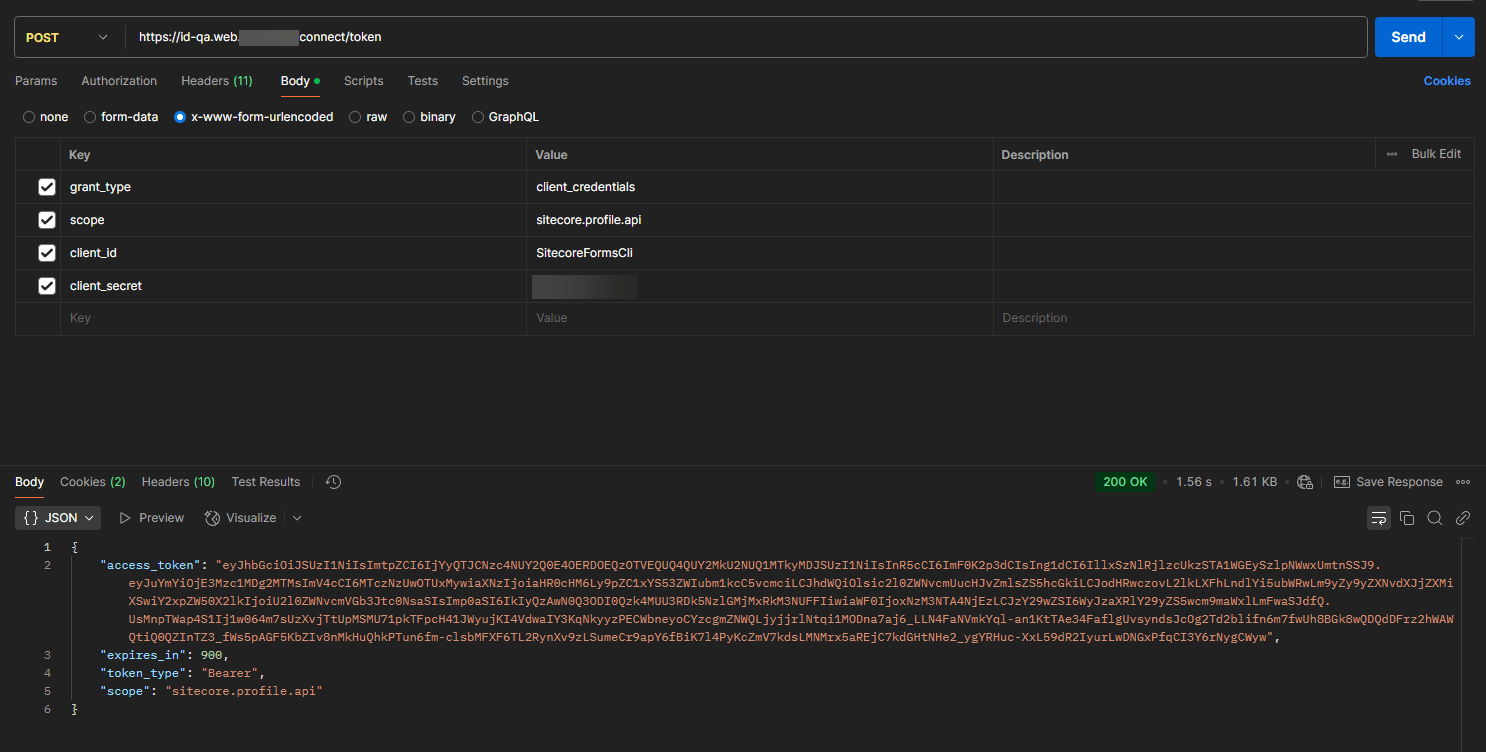
1. Create a separate Authorization in the Identity Server for Forms
Add the FormsServerClient node and its value to the Identity Server’s Sitecore.IdentityServer.DevEx.xml file. After making the change, make sure to IIS Reset for the change to be in effect.
Note: Don’t forget to add transforms for ClientSecret!
Ideally, you can call it in Postman to verify that it’s generating a token using Form’s ClientID and ClientSecret values mentioned in the Sitecore.IdentityServer.DevEx.xml file.
Now that the config is all set to have its own ClientID and ClientSecret, let’s set up the Authorize method with BearerToken specifically for Form’s Identity Credentials.
The SitecoreRestServices handles authenticated HTTP requests to Sitecore’s REST APIs, managing access tokens and retrying requests if authentication fails. It uses dependency injection to configure the HTTP client and obtain the necessary settings.
2. Create a Controller to bridge between Custom Submit Action and API call
Let’s bridge the Custom Submit Action and API call – The CustomController class extends SitecoreController and uses dependency injection to obtain an instance of ICreateAutoPublishService.
It defines a CreateAndPublish method – HTTP POST endpoint that processes CreateAndAutoPublishModel, calls the service to create and publish content, and returns a JSON response indicating success or failure.
The method includes error handling to return appropriate HTTP status codes and messages for different exceptions.
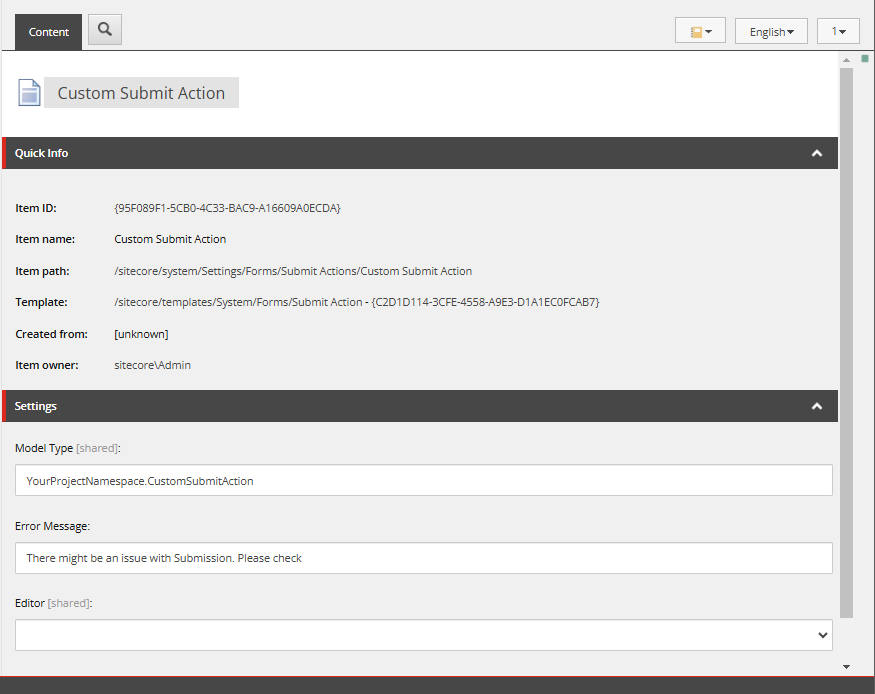
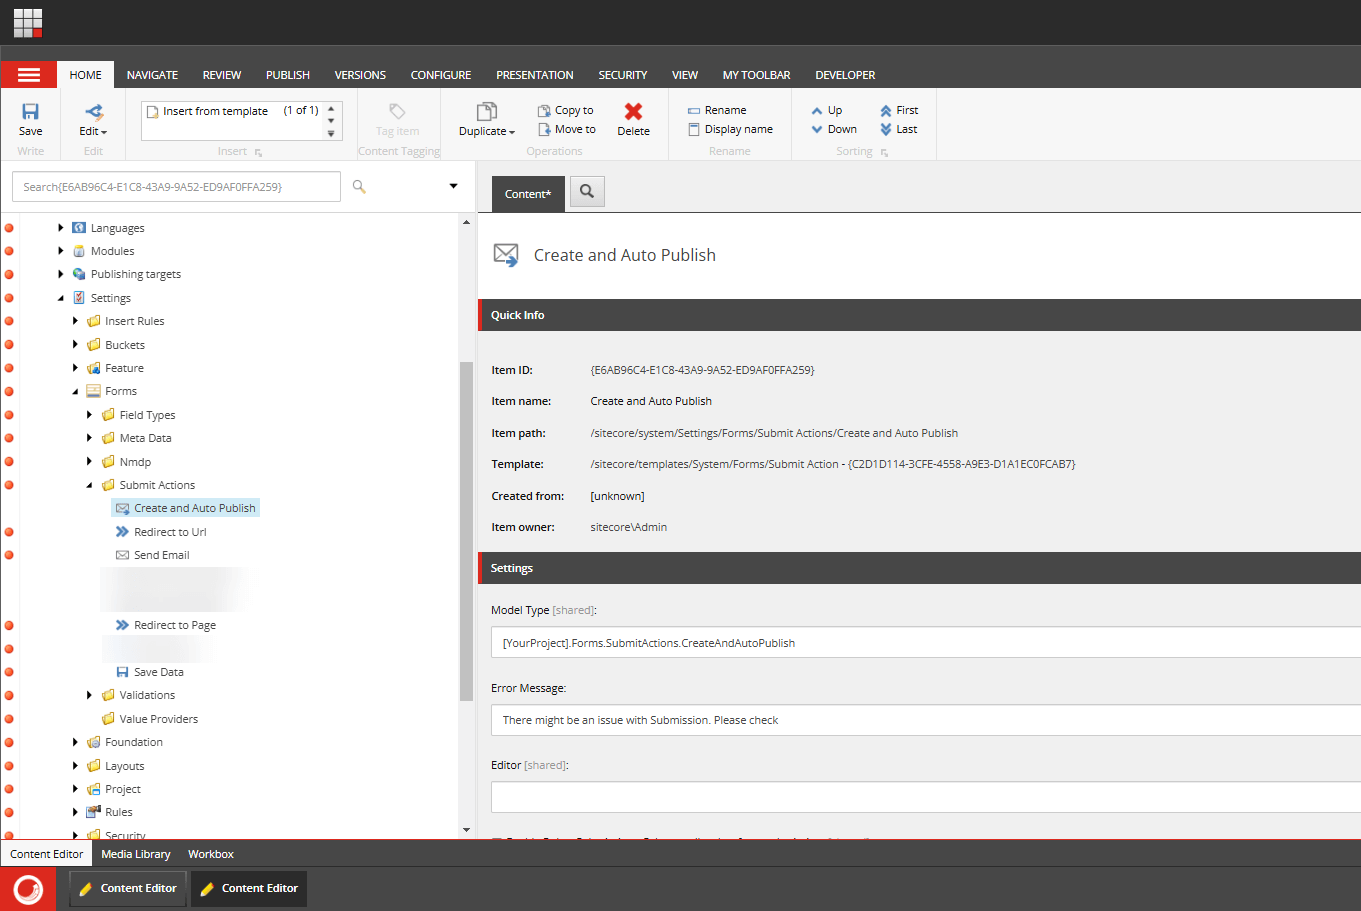
3. Set the Custom Submit Action fields
The final step – Let’s set the Model Type and Error Message based on the class we created.
Publish the form and its related items. It should be good to go!