
I have been exploring Optimizely Forms recently and created a multi-step Customer Support Request Form with File Upload Functionality.
Let’s get started.
Note: Assuming that you have installed the Forms module. If not, please check out my blog post –
https://madhuanbalagan.com/optimizely-forms-setup-configuration-and-submission
Creation of Multi-Step Form
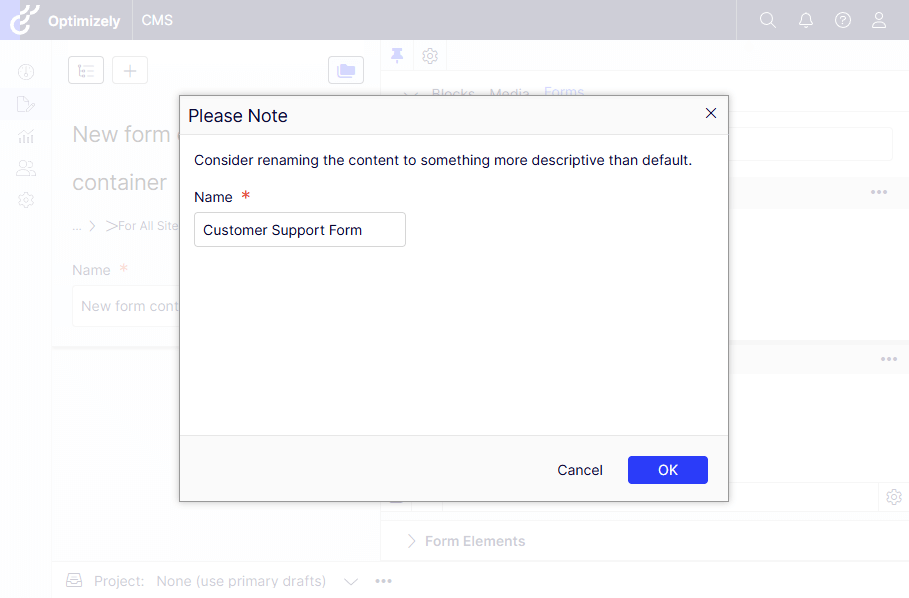
- Create a new Form Container in the Forms Tab – named it Customer Support Form.
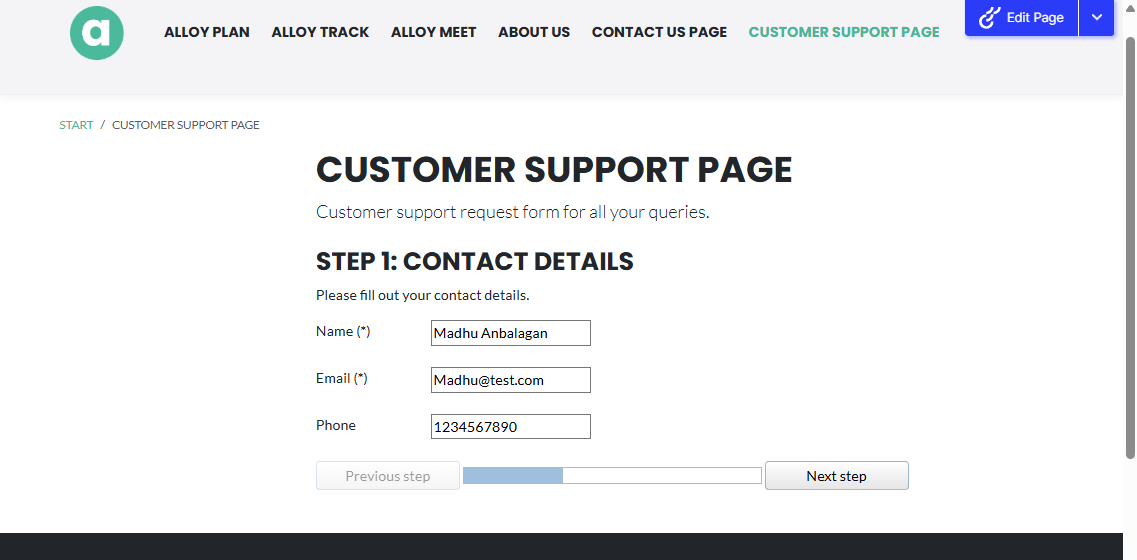
Step 1: Contact Details
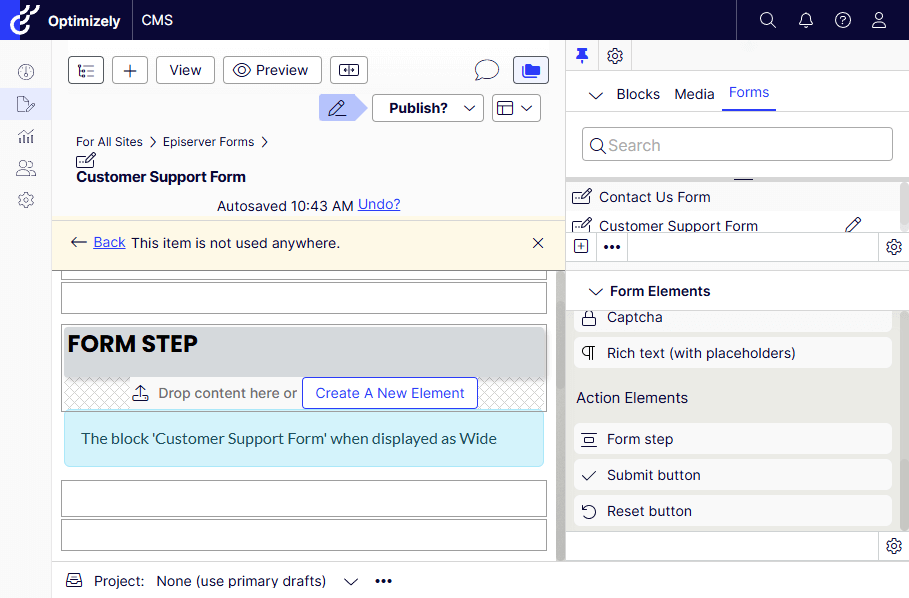
- Let’s create the first step by dragging and dropping the Form Step in the Content Area.
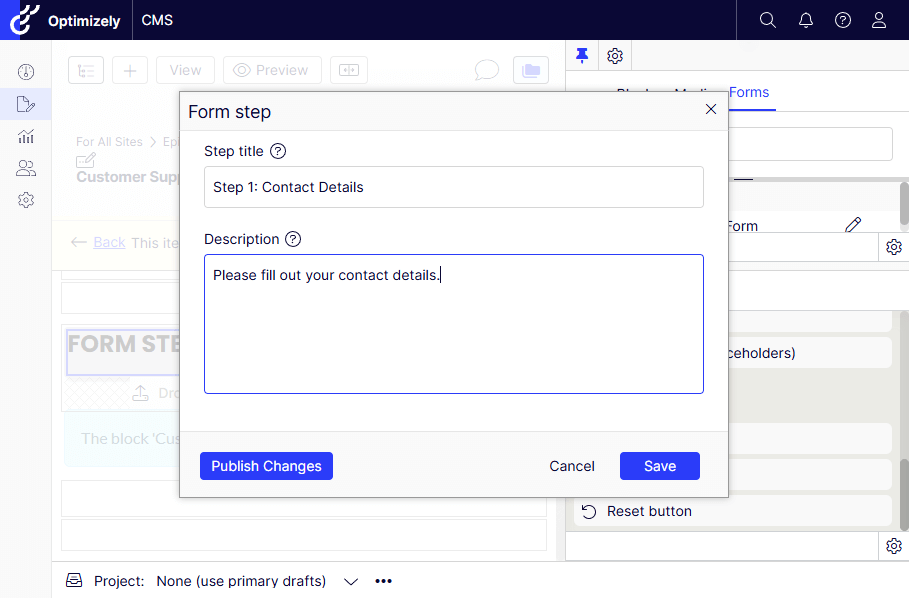
- Quick Edit to fill the Title, Description, and publish the changes.
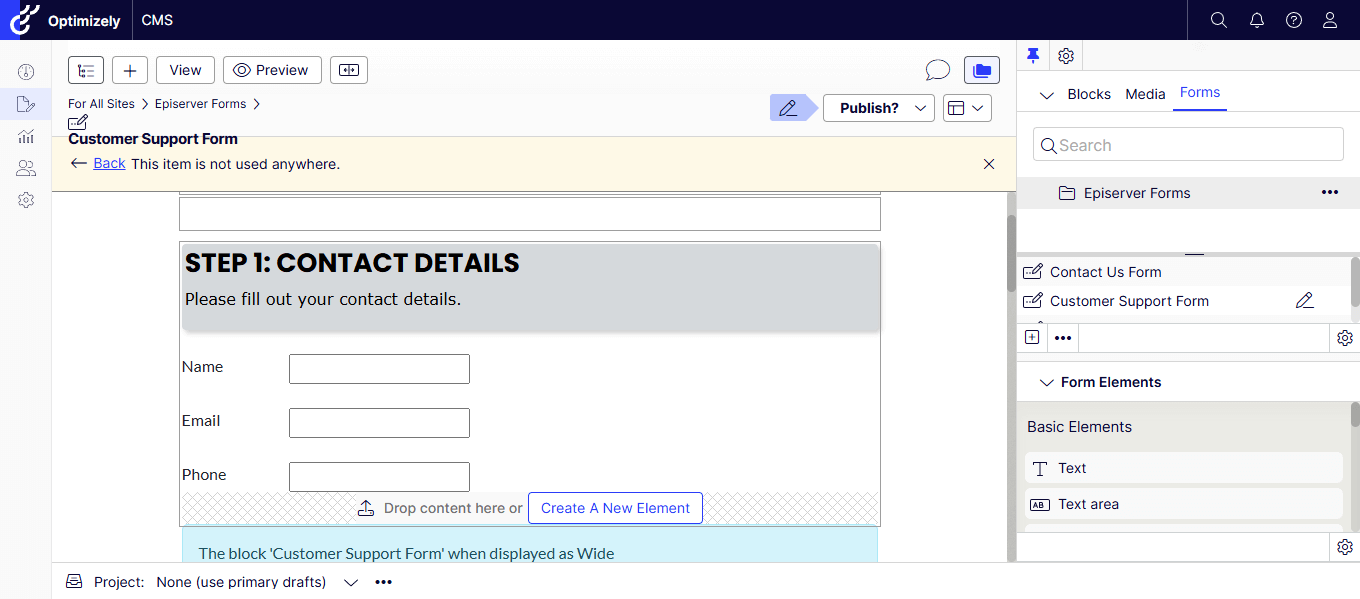
- Inside the Form Step 1 – Drag and drop the Text elements for the following fields.
- Name
- Phone
Note: Publish each field to reflect on the Content Area.
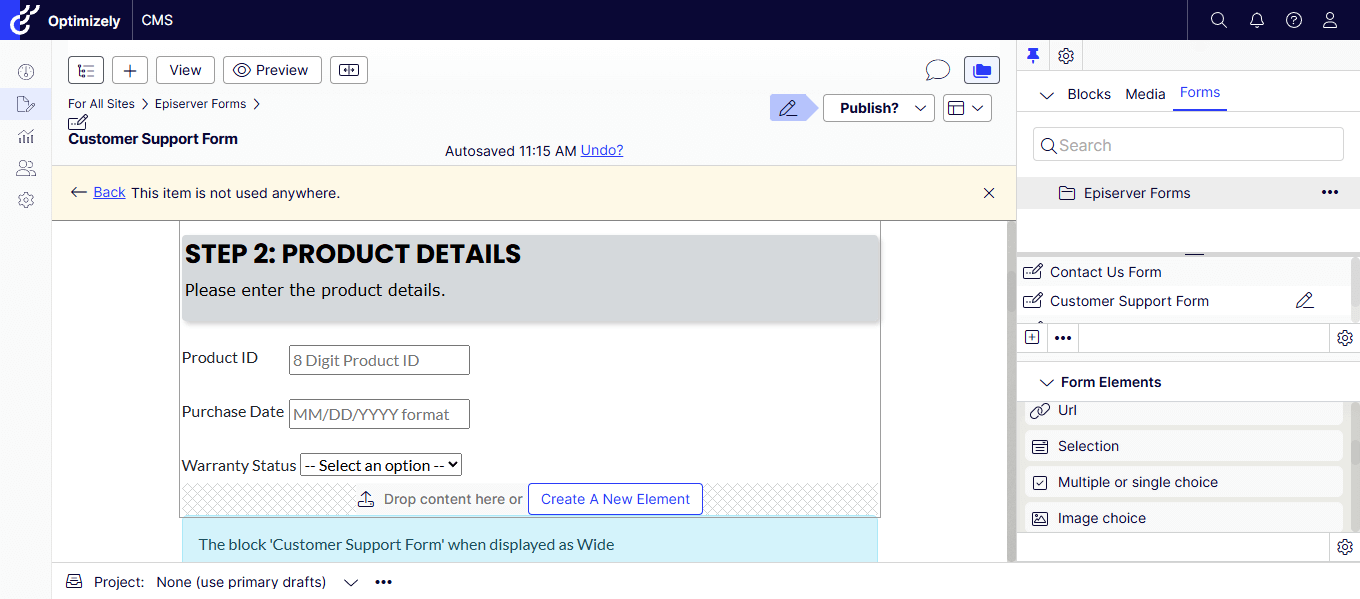
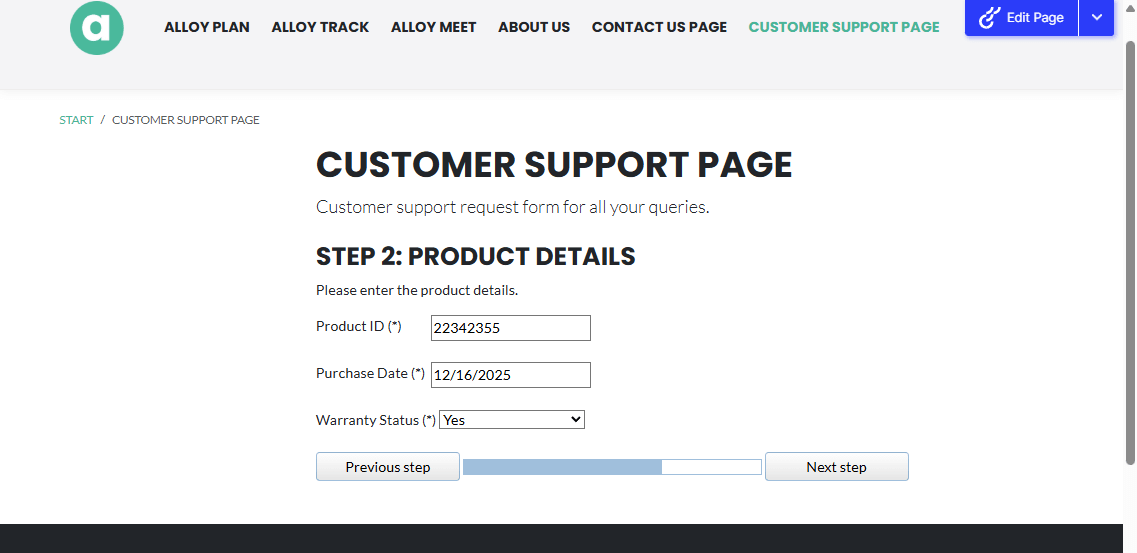
Step 2: Product Details
- Let’s drag and drop the Form Step element like before, and the following fields.
- Product ID
- Purchase Date
- Warranty Status
- Product ID – Created as a Number and checked all validators.

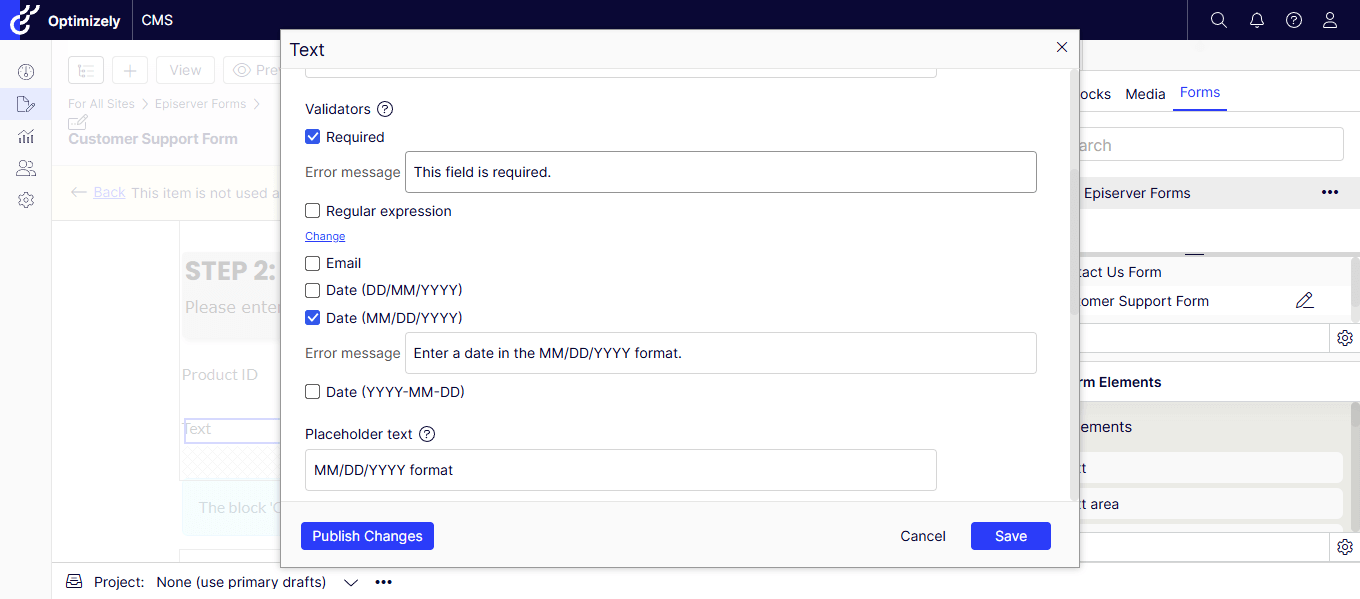
- Purchase Date – Text field with Date Format validation.
- The Step 2 form is ready now.
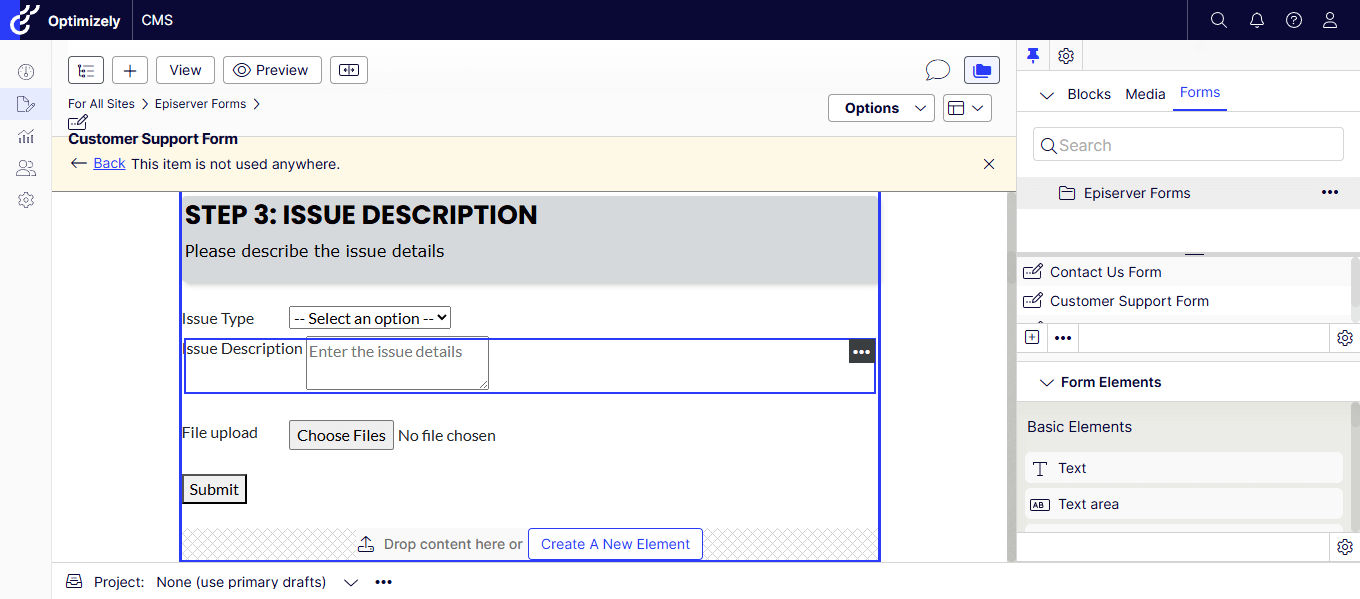
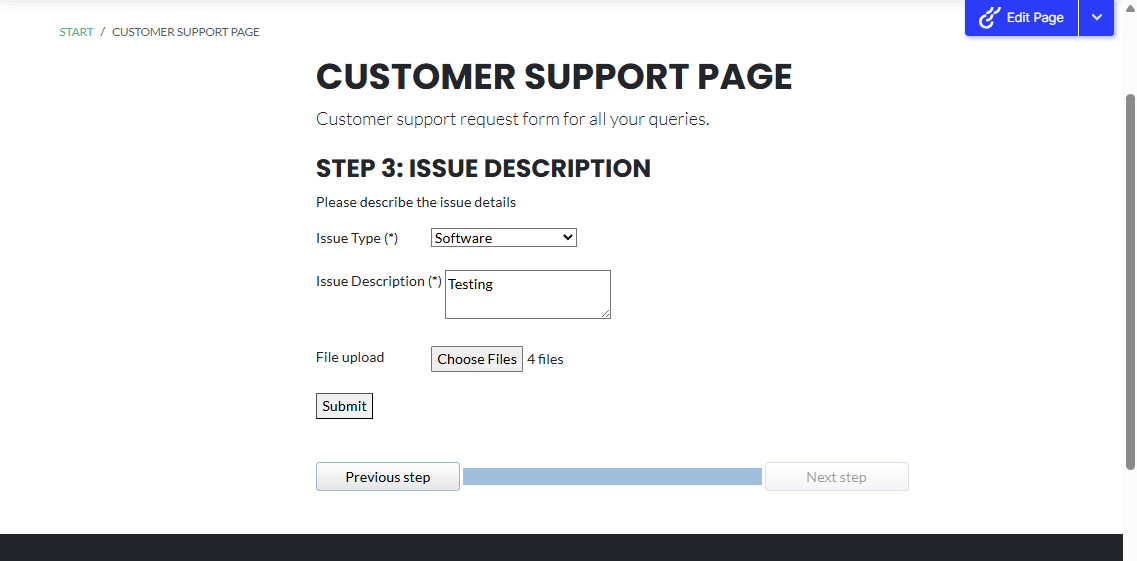
Step 3: Issue Description
- Let’s drag and drop the Form Step element like before, and the following fields.
- Issue Type
- Issue Description
- File Upload
- Submit button
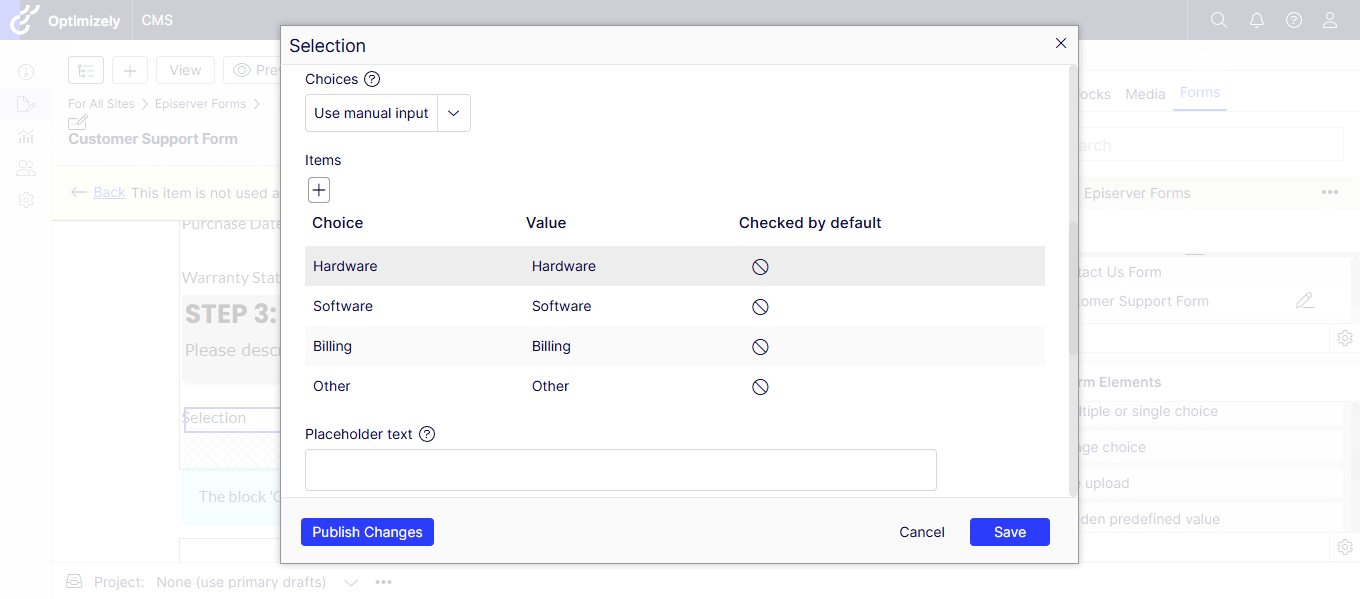
- Issue Type – Selection element options entered manually – could be a datasource as well.
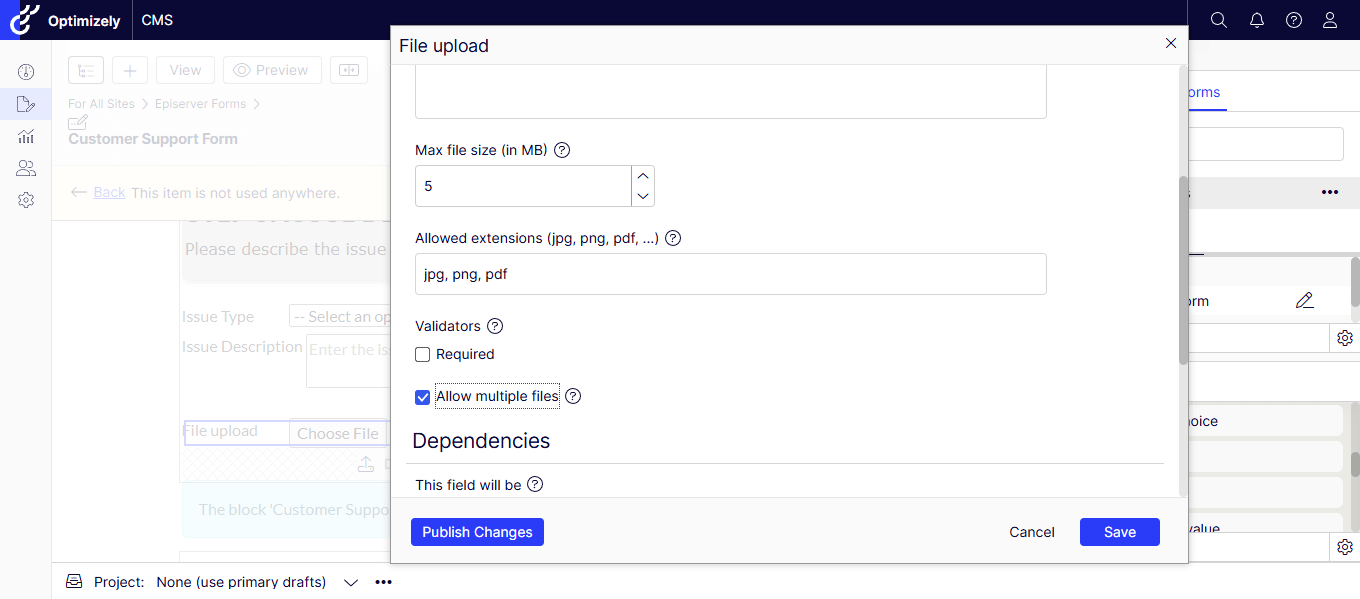
- File Upload – Set the Max Limit and Allowed extensions separated by a comma.
- The Step 3 part is completed and ready to be placed in a landing page.
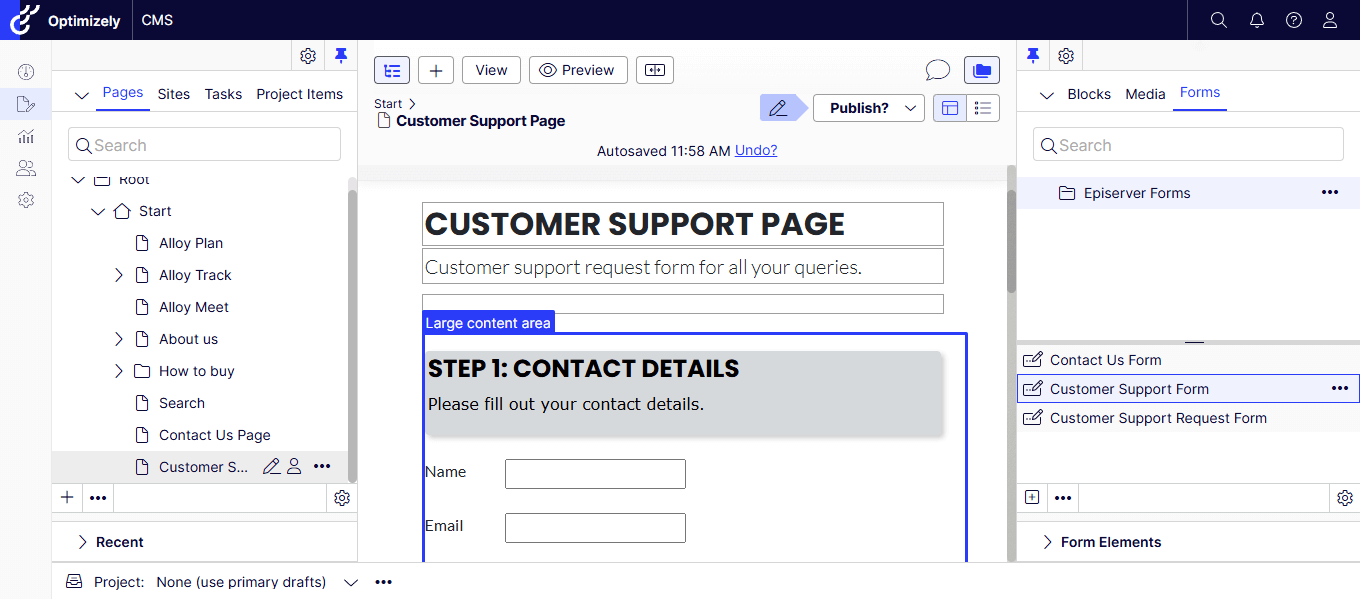
Form in Landing Page:
- Create a new Standard Page – Customer Support Page.
- Drag and drop the newly created Form into the Content Area.
- Publish the changes.
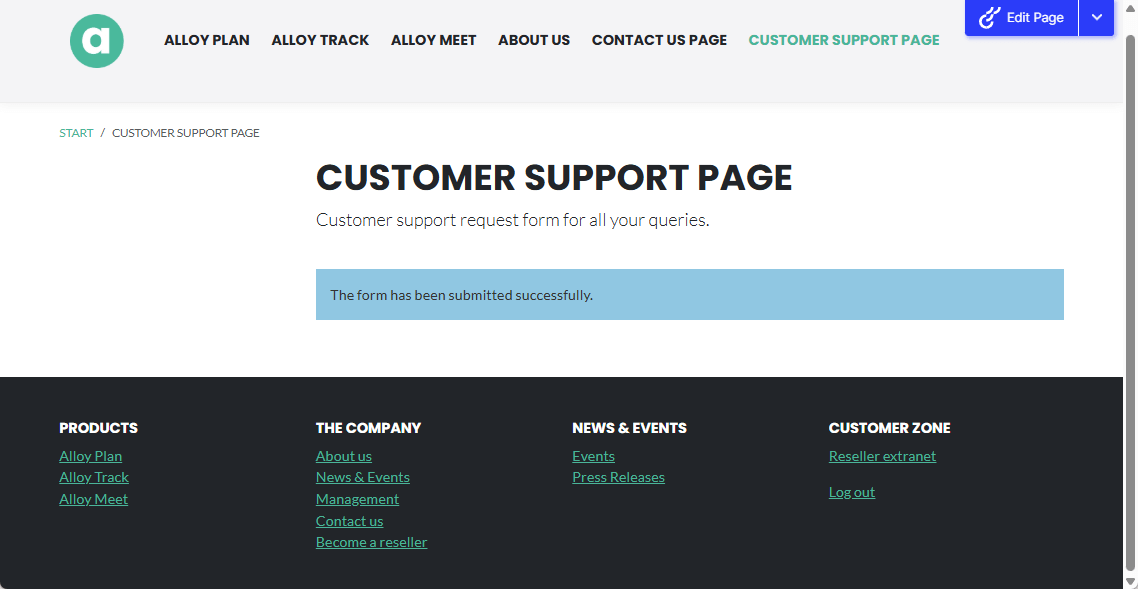
Testing the Form:
- The new landing page shows in the menu – let’s check it out.
- The File Upload – multiple file selection worked great!
- Let’s submit the form – you could redirect to a specific page if needed.
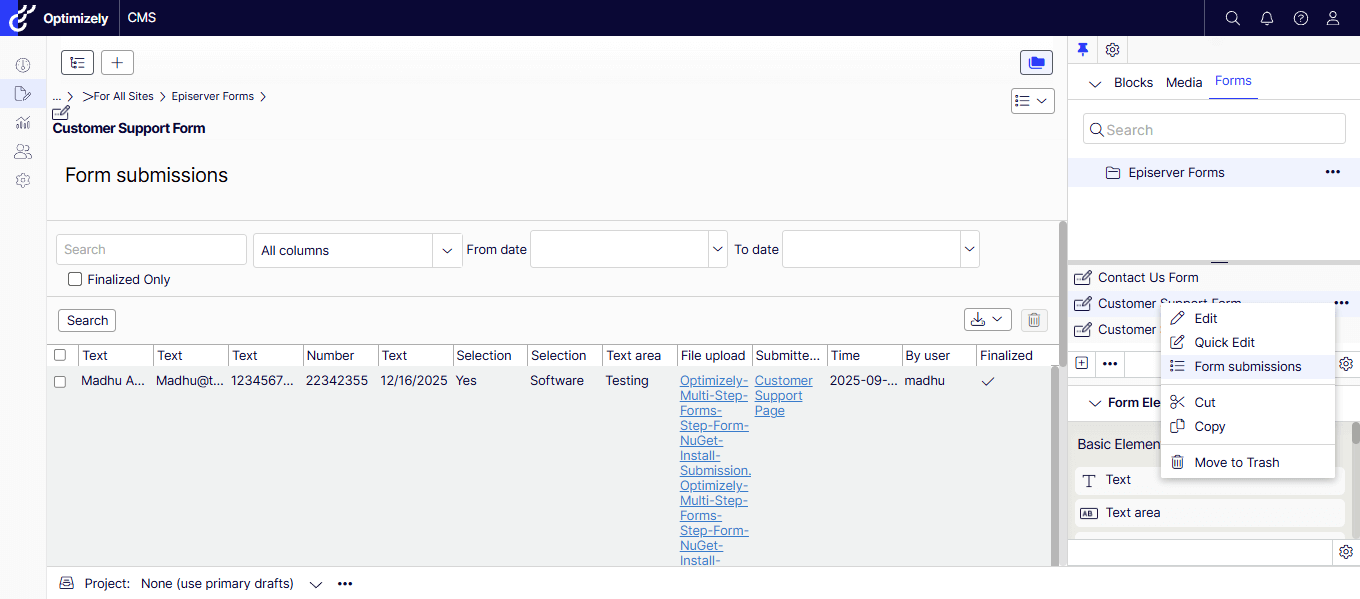
Form Submissions:
- The submitted records are easy to check by pressing the Form Submissions.
- The records can be exported in any of the following formats.
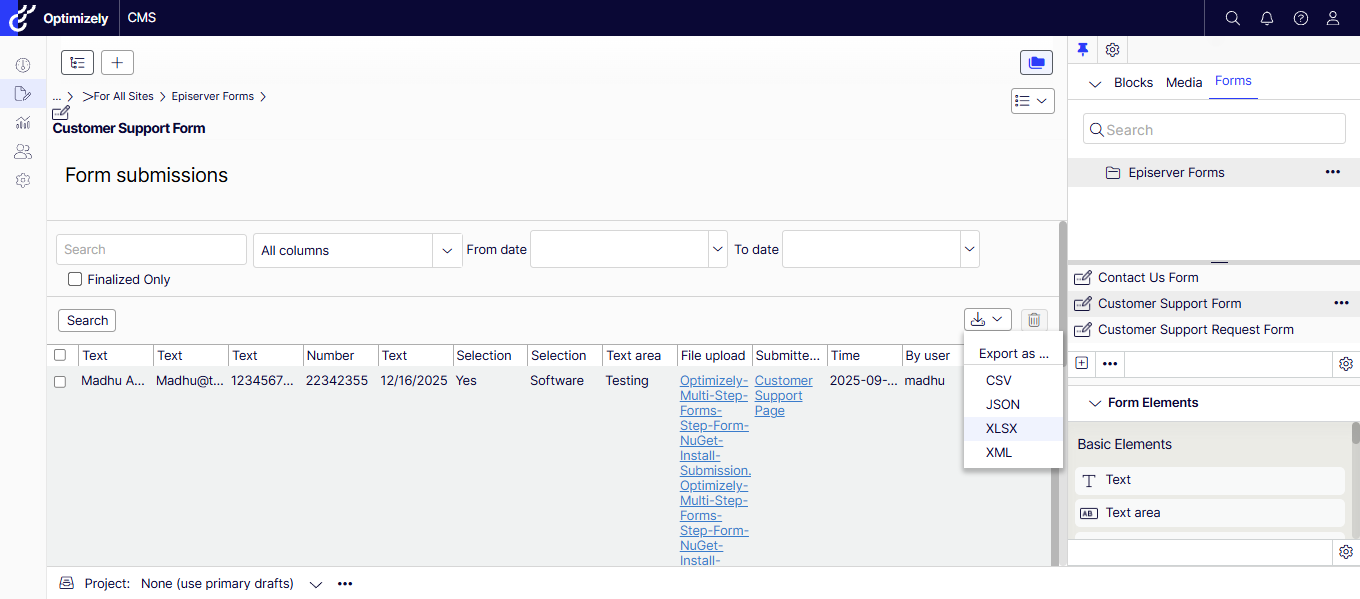
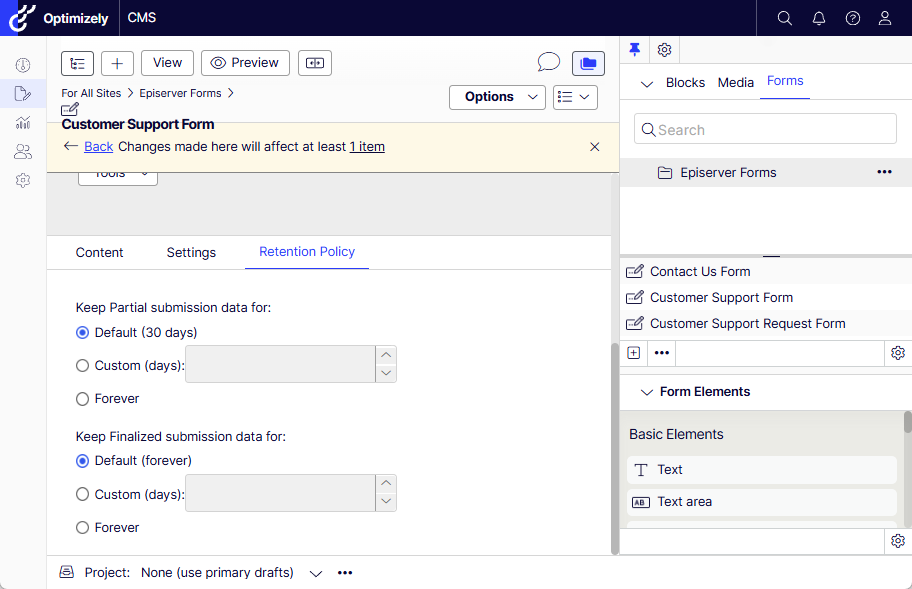
- The records are stored forever by default – feel free to change the retention policy as needed for partial and full submissions.
If you prefer watching a video, my quick recording –
Hope this helps.
Happy Optimizing!


